BRAKE SYSTEM (OTHER) BRAKE BOOSTER(for LHD) REMOVAL
CAUTION / NOTICE / HINT
- NOTICE:
-
Make sure to release vacuum from the brake booster assembly before removing the brake master cylinder sub-assembly from the brake booster assembly.
PROCEDURE

 1. PRECAUTION
- NOTICE:
-
After turning the ignition switch off, waiting time may be required before disconnecting the cable from the negative (-) battery terminal. Therefore, make sure to read the disconnecting the cable from the negative (-) battery terminal notices before proceeding with work.
-
Click hereGeneral>INTRODUCTION>REPAIR INSTRUCTION>PRECAUTION
2.REMOVE BRAKE MASTER CYLINDER SUB-ASSEMBLY WITH WAY
3.REMOVE WINDSHIELD WIPER MOTOR AND LINK ASSEMBLY
55701J
4.REMOVE OUTER COWL TOP PANEL SUB-ASSEMBLY
47220D
5.REMOVE BRAKE MASTER CYLINDER RESERVOIR ASSEMBLY
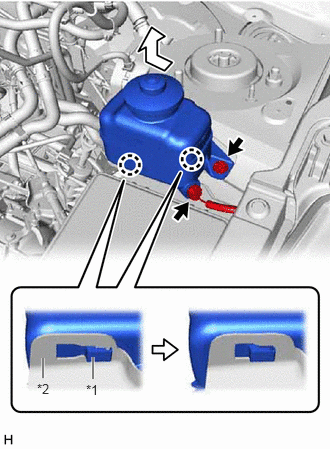
| *1 | Brake Master Cylinder Reservoir Assembly |
| *2 | Reservoir Bracket |
Disconnect the reservoir level switch connector and remove the bolt from the brake master cylinder reservoir assembly.
Move the brake master cylinder reservoir assembly as shown in the illustration to disengage the 2 claws, and remove it.
47233
6.REMOVE RESERVOIR BRACKET
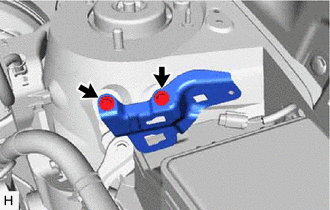
Remove the 2 bolts and reservoir bracket.
89661
7.REMOVE ECM
for 1AR-FE: Click hereEngine / Hybrid System>1AR-FE ENGINE CONTROL>ECM>REMOVAL
for 2GR-FKS: Click hereEngine / Hybrid System>2GR-FKS (ENGINE CONTROL)>ECM>REMOVAL
44773F
8.DISCONNECT UNION TO CHECK VALVE HOSE (for 2GR-FKS)
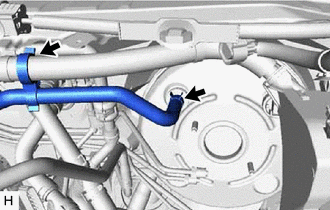
Slide the clip and disconnect the union to check valve hose from the brake booster assembly.
Separate the union to check valve hose from the engine room main wire.
82121
9.SEPARATE ENGINE WIRE (for 1AR-FE)
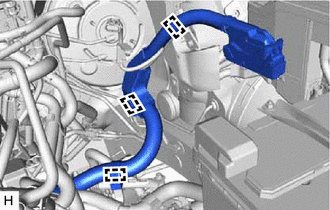
Disengage the 3 clamps to separate the engine wire.
82121
10.SEPARATE ENGINE WIRE (for 2GR-FKS)
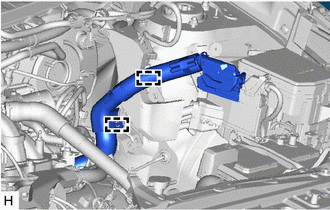
Disengage the 2 clamps to separate the engine wire.
82111
11.SEPARATE ENGINE ROOM MAIN WIRE
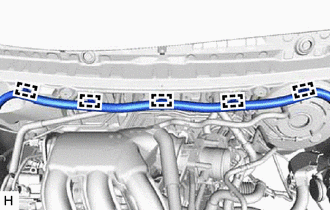
Disengage the 5 clamps to separate the engine room main wire.
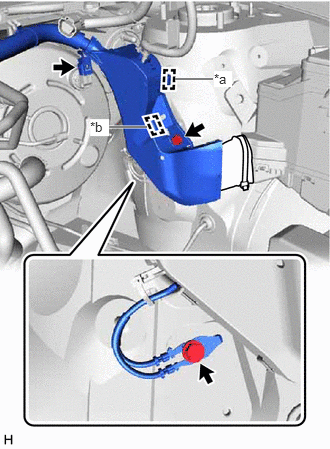
| *a | Clamp |
| *b | Pin |
for 2GR-FKS:
Disconnect the connector from the vacuum warning switch assembly.
Remove the 2 bolts.
Disengage the clamp and pin to separate the wire harness protector.
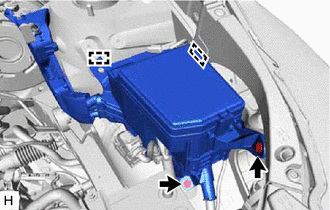
Remove the 2 bolts.
Disengage the 2 pins to separate the engine room relay block assembly.
23820
12.DISCONNECT FUEL VAPOR FEED HOSE ASSEMBLY
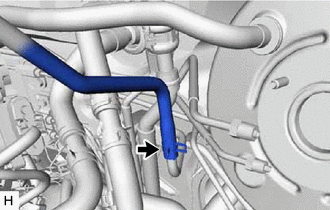
Slide the clip and disconnect the fuel vapor feed hose assembly.
44777
13.DISCONNECT NO. 1 VACUUM HOSE CONNECTOR (for 1AR-FE)
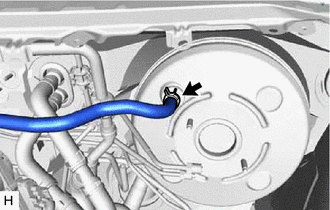
Slide the clip and disconnect the union to check valve hose from the brake booster assembly.
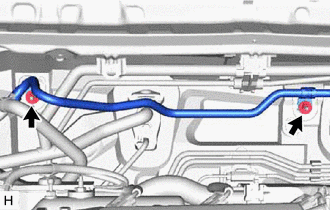
Remove the 2 nuts and separate the No. 1 vacuum hose connector.
88704
14.SEPARATE SUCTION HOSE SUB-ASSEMBLY
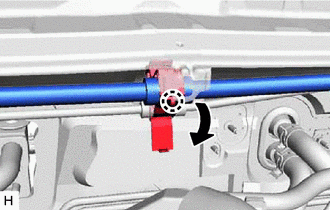
Disengage the claw to release the piping clamp.
Separate the suction hose sub-assembly from the piping clamp.
- NOTICE:
- ·
Do not deform the refrigerant lines.
·Do not damage the clamp.
15.SEPARATE AIR CONDITIONER TUBE AND ACCESSORY ASSEMBLY
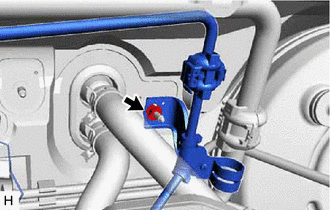
Remove the nut and separate the air conditioner tube and accessory assembly.
- NOTICE:
- ·
Do not deform the refrigerant lines.
·Do not damage the clamp.
16.SEPARATE BRAKE LINE
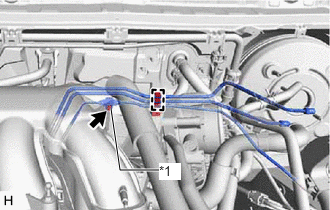
| *1 | Front No. 1 Brake Tube Way |
Remove the bolt and separate the front No. 1 brake tube way.
Disengage the brake tube clamp to separate the 3 brake lines.
- NOTICE:
- ·
Do not kink or damage the brake lines.
·Do not damage the clamp.
47101A
17.REMOVE BRAKE PEDAL RETURN SPRING
18.LOOSEN LOCK NUT
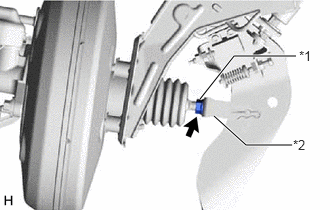
| *1 | Lock Nut |
| *2 | Brake Master Cylinder Push Rod Clevis |
Loosen the lock nut of the brake master cylinder push rod clevis.
47264A
19.REMOVE PUSH ROD PIN
44610
20.REMOVE BRAKE BOOSTER ASSEMBLY
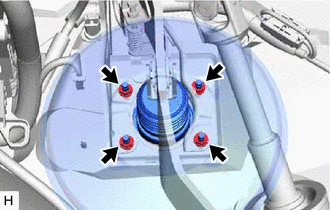
Remove the 4 nuts and push the brake booster assembly toward the engine compartment.
- NOTICE:
-
Do not apply excessive force to the brake lines or refrigerant lines.
Remove the brake master cylinder push rod clevis and lock nut from the brake booster assembly.
Remove the brake booster assembly from the vehicle body.
- NOTICE:
-
Do not apply excessive force to the brake lines or refrigerant lines.
44785
21.REMOVE BRAKE BOOSTER GASKET