UA80F AUTOMATIC TRANSMISSION / TRANSAXLE DIFFERENTIAL OIL SEAL(for LH Side) REPLACEMENT
PROCEDURE

 51441
1.REMOVE NO. 1 ENGINE UNDER COVER
53737B
2.REMOVE FRONT FENDER APRON SEAL LH
3.DRAIN AUTOMATIC TRANSAXLE FLUID
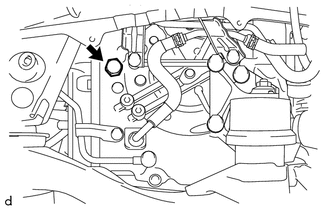
Remove the refill plug and gasket from the automatic transaxle case sub-assembly.
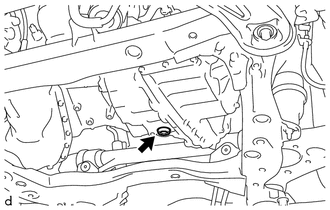
Using a 10 mm hexagon socket wrench, remove the overflow plug and gasket from the transaxle housing.
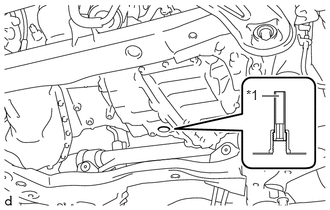
| *1 | No. 1 Transmission Oil Filler Tube |
Using a 6 mm hexagon socket wrench, remove the No. 1 transmission oil filler tube from the transaxle housing and drain the automatic transaxle fluid.
Using a 6 mm hexagon socket wrench, install the No. 1 transmission oil filler tube to the transaxle housing.
- Torque:
- 1.7 N*m (17 kgf*cm, 15 in.*lbf)
Using a 10 mm hexagon socket wrench, temporarily install the gasket and overflow plug to the transaxle housing.
- HINT:
-
Reuse the old gasket as the overflow plug will be removed again to adjust the automatic transaxle fluid level.
Temporarily install the gasket and refill plug to avoid automatic transaxle fluid spillage.
- HINT:
-
Reuse the old gasket as the refill plug will be removed again to adjust the automatic transaxle fluid level.
4.REMOVE FRONT DRIVE SHAFT ASSEMBLY LH
43420H
5.REMOVE FRONT DRIVE SHAFT OIL SEAL LH
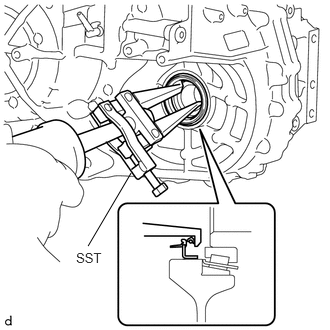
Using SST, remove the front drive shaft oil seal LH from the automatic transaxle case sub-assembly.
- SST
- 09308-00010
- NOTICE:
-
Be careful not to damage the automatic transaxle case sub-assembly.
43420H
6.INSTALL FRONT DRIVE SHAFT OIL SEAL LH
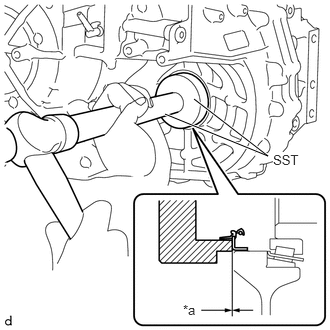
| *a | Depth |
Using SST and a hammer, install a new front drive shaft oil seal LH to the automatic transaxle case sub-assembly.
- SST
- 09316-10010
09950-70010 (09951-07100)
- Standard Depth:
-0.5 to 0.5 mm (-0.0197 to 0.0197 in.)
- NOTICE:
- ·
Make sure that the front drive shaft oil seal LH is installed in the correct direction.
·Do not damage the lip of the front drive shaft oil seal LH.
7.INSTALL FRONT DRIVE SHAFT ASSEMBLY LH
8.ADJUST AUTOMATIC TRANSAXLE FLUID
9.INSPECT FOR FLUID LEAK
53737B
10.INSTALL FRONT FENDER APRON SEAL LH
51441
11.INSTALL NO. 1 ENGINE UNDER COVER