AXLE AND DIFFERENTIAL DIFFERENTIAL MOUNT CUSHION REMOVAL
CAUTION / NOTICE / HINT
The necessary procedures (adjustment, calibration, initialization, or registration) that must be performed after parts are removed and installed, or replaced during rear No. 1 differential mount cushion removal/installation are shown below.
| Replaced Part or Performed Procedure | Necessary Procedure | Effect/Inoperative Function when Necessary Procedure not Performed | Link |
|---|---|---|---|
| Rear wheel alignment adjustment | 1.
Perform "Reset Memory". 2.
Perform "Calibration". |
·
VSC is disabled or malfunctions ·
DTCs are output ·
Slip indicator light illuminates ·
ABS warning light illuminates |
( ) |
| Suspension, tires, etc.
(The vehicle height changes because of suspension or tire replacement) |
·
Measurement of ultrasonic sensor detection angle ·
Ultrasonic sensor detection angle registration |
Parking Support Brake System | ()
|
| Rear television camera assembly optical axis (Back camera position setting) | Parking Assist Monitor System | ()
|
|
·
Parking assist ECU initialization ·
Adjust steering angle |
Panoramic View Monitor System | ()
|
|
| Gas leaks from exhaust system | Perform Inspection After Repair | ·
Poor idle, etc. ·
Engine start function, etc. |
()
|
for Dynamic Torque Control AWD System:
Rear differential carrier assembly |
·
ECU data initialization ·
Disconnect system function check |
Dynamic Torque Control AWD System | ()
|
for Dynamic Torque Vectoring AWD system:
Torque vectoring differential carrier assembly |
Dynamic Torque Vectoring AWD System | ()
|
- CAUTION:
-
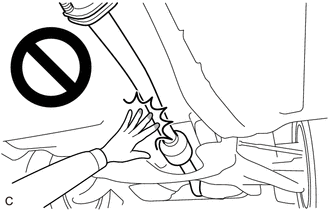
-
To prevent burns, do not touch the engine, exhaust pipe or other high temperature components while the engine is hot.
PROCEDURE

 1.REMOVE SPARE TIRE
2.REMOVE REAR DIFFERENTIAL CARRIER ASSEMBLY (for Dynamic Torque Control AWD)
3.REMOVE TORQUE VECTORING DIFFERENTIAL CARRIER ASSEMBLY (for Dynamic Torque Vectoring AWD)
41651
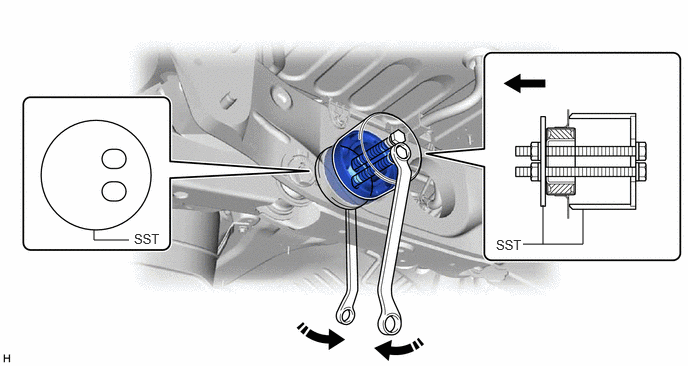
4.REMOVE REAR NO. 1 DIFFERENTIAL MOUNT CUSHION
Using SST, remove the rear No. 1 differential mount cushion.
- SST
- 09570-48010

|
Front of the Vehicle | - | - |
- NOTICE:
- ·
Before using SST, apply grease to the SST bolts.
·Be sure to use the correct combination of SST.
·Be sure to use the correct direction of SST.
·Make sure that SST contacts the entire circumference of the rear No. 1 differential mount cushion.
·Do not tilt the bolts of SST.
·Tighten the 2 bolts of SST so that they enter the 2 holes of the rear No. 1 differential mount cushion by an equal amount.