AUDIO / VIDEO RADIO ANTENNA CORD REMOVAL
CAUTION / NOTICE / HINT
The necessary procedures (adjustment, calibration, initialization or registration) that must be performed after parts are removed and installed, or replaced during antenna cord sub-assembly removal/installation are shown below.
| Replaced Part or Performed Procedure | Necessary Procedure | Effect/Inoperative Function when Necessary Procedure not Performed | Link |
|---|---|---|---|
|
*1: Learning can also be performed using the GTS. Click here( |
|||
| Disconnect cable from negative auxiliary battery terminal | Perform steering sensor zero point calibration | Lane Control System | ( ) |
| Parking Support Brake System*1 | |||
| Pre-collision System | |||
| Memorize steering angle neutral point | Parking Assist Monitor System | ()
|
|
| Panoramic View Monitor System | ()
|
||
| Initialize back door lock | Power Door Lock Control System | ()
|
|
| Reset back door close position | Power Back Door System | ()
|
|
- CAUTION:
-
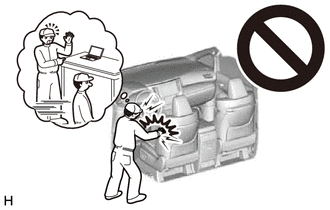
-
Be sure to read Precaution thoroughly before servicing.
-
Click hereVehicle Interior>SUPPLEMENTAL RESTRAINT SYSTEMS>AIRBAG SYSTEM>PRECAUTION
- NOTICE:
-
After the ignition switch is turned off, the radio and display receiver assembly or the radio receiver assembly records various types of memory and settings. As a result, after turning the ignition switch off, make sure to wait at least 120 seconds before disconnecting the cable from the negative (-) auxiliary battery terminal.
| Replaced Part or Performed Procedure | Necessary Procedure | Effect/Inoperative Function when Necessary Procedure not Performed | Link |
|---|---|---|---|
|
*1: Learning can also be performed using the GTS. Click here( |
|||
| Disconnect cable from negative auxiliary battery terminal | Idle the engine for approximately 5 to 60 minutes or drive the vehicle until stop and start control is permitted | Stop and Start System | ()
|
| Perform steering sensor zero point calibration | Lane Control System | ()
|
|
| Parking Support Brake System*1 | |||
| Pre-collision System | |||
| Memorize steering angle neutral point | Parking Assist Monitor System | ()
|
|
| Panoramic View Monitor System | ()
|
||
| Initialize back door lock | Power Door Lock Control System | ()
|
|
| Reset back door close position | Power Back Door System | ()
|
|
- CAUTION:
-
-
Be sure to read Precaution thoroughly before servicing.
-
Click hereVehicle Interior>SUPPLEMENTAL RESTRAINT SYSTEMS>AIRBAG SYSTEM>PRECAUTION
- NOTICE:
-
After the ignition switch is turned off, the radio and display receiver assembly or the radio receiver assembly records various types of memory and settings. As a result, after turning the ignition switch off, make sure to wait at least 120 seconds before disconnecting the cable from the negative (-) auxiliary battery terminal.
PROCEDURE

 1.REMOVE INSTRUMENT PANEL SAFETY PAD SUB-ASSEMBLY
55846A
2.REMOVE NO. 4 HEATER TO REGISTER DUCT (for LHD)
55843A
3.REMOVE NO. 1 HEATER TO REGISTER DUCT (for RHD)
- HINT:
-
Use the same procedure as for LHD.
-
Click hereVehicle Interior>INTERIOR PANELS / TRIM>INSTRUMENT PANEL SAFETY PAD>REASSEMBLY
86101J
4.REMOVE NO. 2 ANTENNA CORD SUB-ASSEMBLY (w/ Navigation Antenna)
for LHD Antenna Cord Sub-assembly without Branch Line:
Disconnect the connector and disengage the 2 claws.
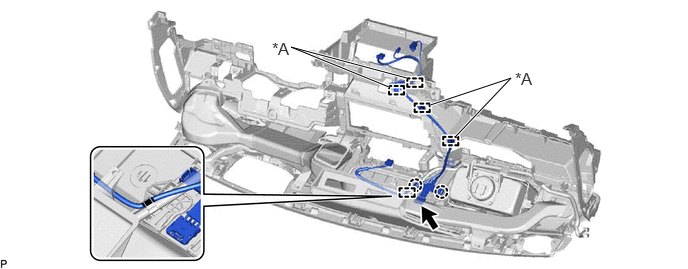
| *A | w/ Navigation ECU | - | - |
Disengage each clamp and remove the No. 2 antenna cord sub-assembly.
for RHD Antenna Cord Sub-assembly without Branch Line:
Disconnect the connector and disengage the 2 claws.
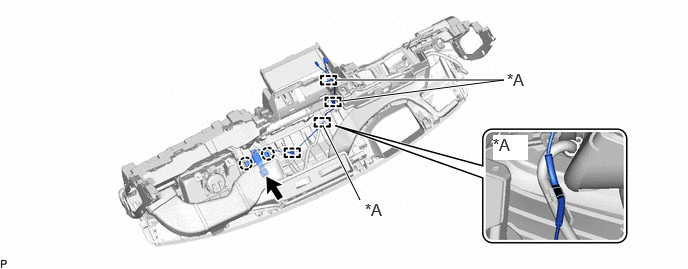
| *A | w/ Navigation ECU | - | - |
Disengage each clamp and remove the No. 2 antenna cord sub-assembly.
for LHD Antenna Cord Sub-assembly with Branch Line:
Disconnect the connector and disengage the 2 claws.
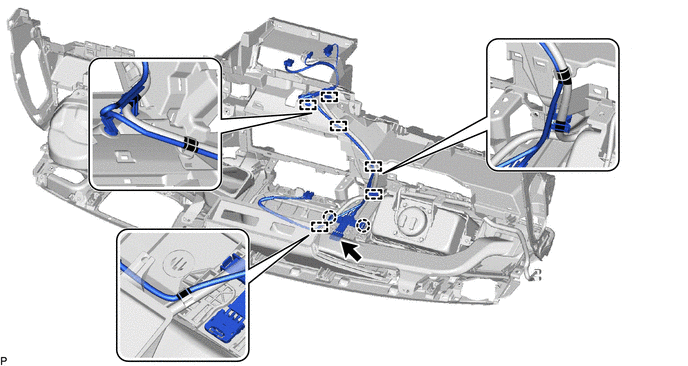
Disengage each clamp and remove the No. 2 antenna cord sub-assembly.
for RHD Antenna Cord Sub-assembly with Branch Line:
Disconnect the connector and disengage the 2 claws.
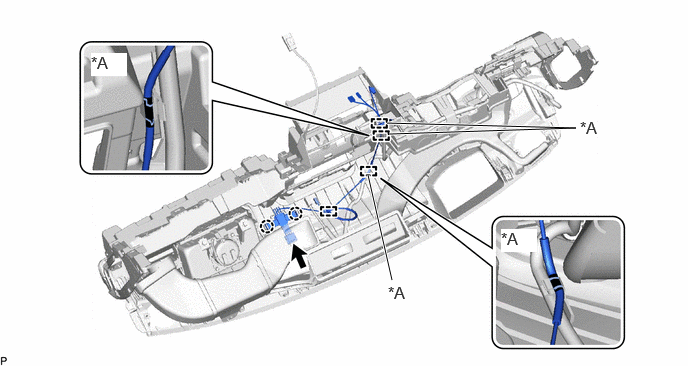
| *A | w/ Navigation ECU or Telematics transceiver | - | - |
Disengage each clamp and remove the No. 2 antenna cord sub-assembly.
86101
5.REMOVE ANTENNA CORD SUB-ASSEMBLY
w/ Antenna Divider Center Side:
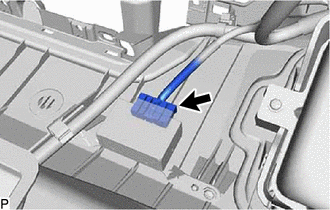
Disconnect the connector.
w/ Antenna Divider RH Side:
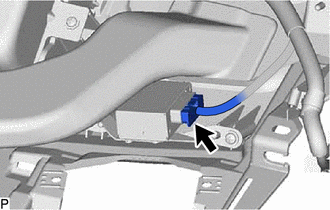
Disconnect the connector.
for LHD:
Disengage each clamp and remove the antenna cord sub-assembly.
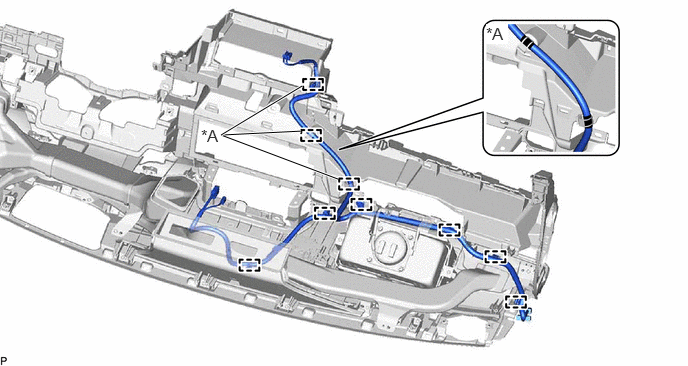
| *A | for Antenna Cord Sub-assembly with Branch Line | - | - |
for RHD:
Disengage each clamp and remove the antenna cord sub-assembly.
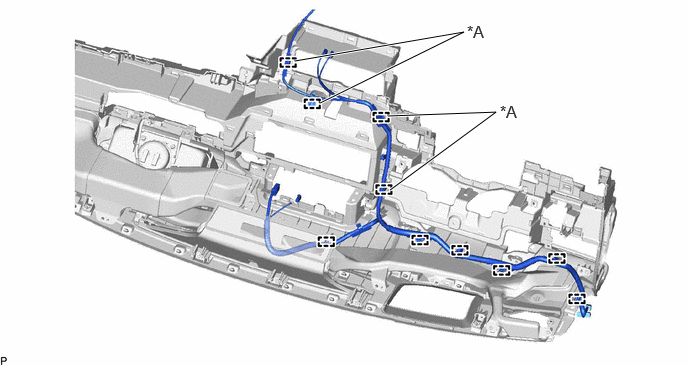
| *A | for Antenna Cord Sub-assembly with Branch Line | - | - |
6.REMOVE ROOF HEADLINING ASSEMBLY
86101D
7.REMOVE NO. 3 ANTENNA CORD SUB-ASSEMBLY (for Normal Roof)
Remove the adhesive tape from the roof headlining assembly.
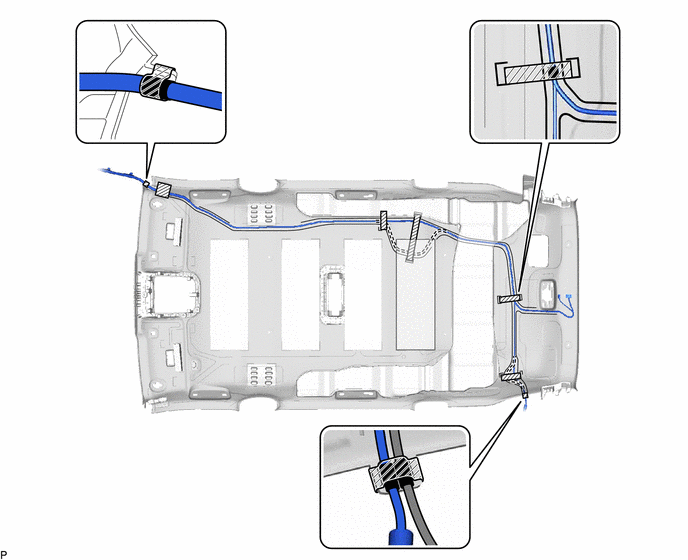

|
Adhesive Tape | - | - |
Remove the No. 3 antenna cord sub-assembly from the roof headlining assembly.
86101D
8.REMOVE NO. 3 ANTENNA CORD SUB-ASSEMBLY (for Moon Roof)
Remove the adhesive tape from the roof headlining assembly.
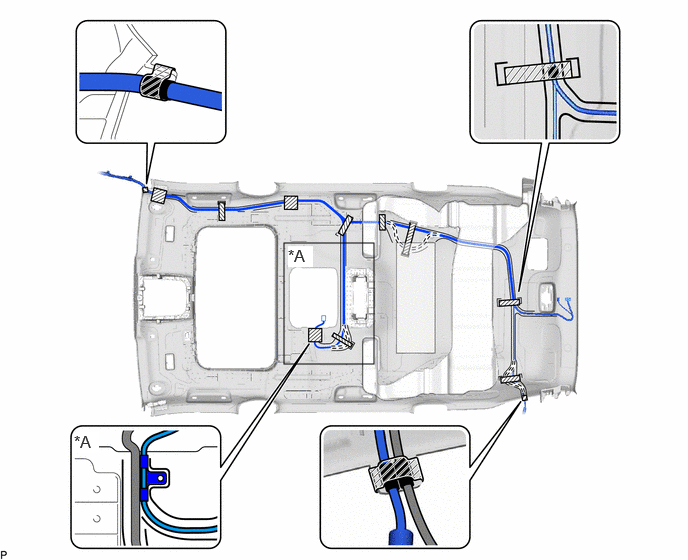
| *A | w/ Rear Seat Entertainment System | - | - |
|
|
Adhesive Tape | - | - |
Remove the No. 3 antenna cord sub-assembly from the roof headlining assembly.
86101D
9.REMOVE NO. 3 ANTENNA CORD SUB-ASSEMBLY (for Panoramic Moon Roof)
Remove the adhesive tape from the roof headlining assembly.
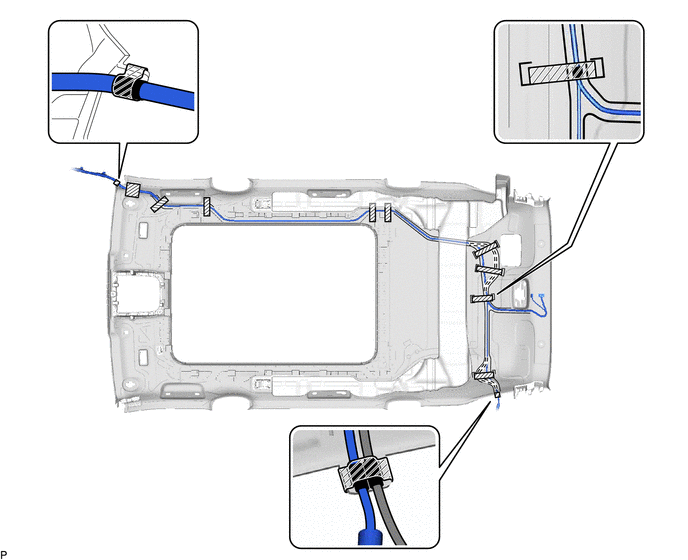
|
|
Adhesive Tape | - | - |
Remove the No. 3 antenna cord sub-assembly from the roof headlining assembly.
86101Q
10.REMOVE NO. 4 ANTENNA CORD SUB-ASSEMBLY
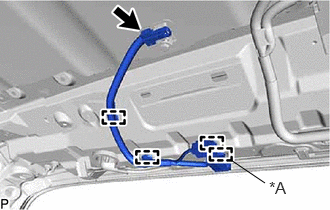
| *A | w/ Manual (SOS) Switch |
Disconnect the connector.
Disengage each clamp and remove the No. 4 antenna cord sub-assembly.