STOP AND START ENGINE STOP AND START ECU REMOVAL
CAUTION / NOTICE / HINT
The necessary procedures (adjustment, calibration, initialization or registration) that must be performed after parts are removed and installed, or replaced during engine stop and start ECU removal/installation are shown below.
| Replaced Part or Performed Procedure | Necessary Procedure | Effect/Inoperative Function when Necessary Procedure not Performed | Link |
|---|---|---|---|
|
*1: Learning can also be performed using the GTS. Click here( |
|||
| Battery terminal is disconnected/reconnected | Idle the engine for approximately 5 to 60 minutes or drive the vehicle until stop and start control is permitted | Stop and Start System | ( ) |
| Perform steering sensor zero point calibration | Lane Control System | ()
|
|
| Parking Support Brake System*1 | |||
| Pre-collision System | |||
| Memorize steering angle neutral point | Parking Assist Monitor System | ()
|
|
| Panoramic View Monitor System | ()
|
||
| Initialize back door lock | Power Door Lock Control System | ()
|
|
| Reset back door close position | Power Back Door System | ()
|
|
| Replacement of Engine stop and start ECU | ·
Upload the number of starter operations ·
Perform external backup boost converter (eco run vehicle converter assembly) existence learning ·
Reset air conditioning information ·
Learning air conditioning information ·
Clear the zero point calibration data ·
Perform zero point calibration of the deceleration sensor |
Stop and Start System | ()
|
- NOTICE:
-
After the ignition switch is turned off, the radio and display receiver assembly or the radio receiver assembly records various types of memory and settings. As a result, after turning the ignition switch off, make sure to wait at least 120 seconds before disconnecting the cable from the negative (-) auxiliary battery terminal.
PROCEDURE

 1. READ NUMBER OF STARTER OPERATIONS
2.DISCONNECT CABLE FROM NEGATIVE BATTERY TERMINAL
55607
3.REMOVE NO. 2 INSTRUMENT PANEL UNDER COVER SUB-ASSEMBLY
- HINT:
-
Use the same procedure for the RHD and LHD.
-
Click hereVehicle Interior>INTERIOR PANELS / TRIM>INSTRUMENT PANEL SAFETY PAD>REMOVAL
55303B
4.REMOVE LOWER INSTRUMENT PANEL SUB-ASSEMBLY
- HINT:
-
Use the same procedure for the RHD and LHD.
-
Click hereVehicle Interior>INTERIOR PANELS / TRIM>INSTRUMENT PANEL SAFETY PAD>REMOVAL
89261A
5.REMOVE ENGINE STOP AND START ECU
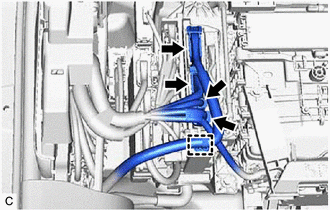
Disconnect each connector.
Disengage the clamp.
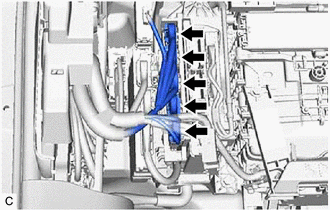
Disconnect each connector.
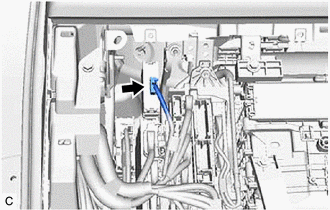
Disconnect the engine stop and start solenoid filter connector.
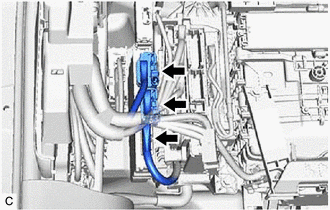
Disconnect the 3 engine stop and start ECU connectors.
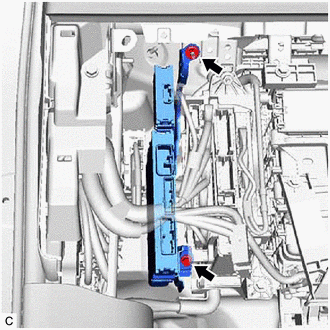
Remove the bolt, nut and engine stop and start ECU.
8926A
6.REMOVE ENGINE STOP AND START SOLENOID FILTER