BRAKE SYSTEM (OTHER) VACUUM PUMP REMOVAL
CAUTION / NOTICE / HINT
The necessary procedures (adjustment, calibration, initialization or registration) that must be performed after parts are removed and installed, or replaced during vacuum pump assembly removal/installation are shown below.
| Replaced Part or Performed Procedure | Necessary Procedure | Effect/Inoperative Function when Necessary Procedure not Performed | Link |
|---|---|---|---|
|
*: Learning can also be performed using the GTS. Click here( |
|||
| Battery terminal is disconnected/reconnected | Idle the engine for approximately 5 to 60 minutes or drive the vehicle until stop and start control is permitted | Stop and Start System | ( ) |
| Perform steering sensor zero point calibration | Lane Control System | ()
|
|
| Parking Support Brake System* | |||
| Pre-collision System | |||
| Memorize steering angle neutral point | Parking Assist Monitor System | ()
|
|
| Panoramic View Monitor System | ()
|
||
| Initialize back door lock | Power Door Lock Control System | ()
|
|
| Reset back door close position | Power Back Door System | ()
|
|
- NOTICE:
-
After the ignition switch is turned off, the radio and display receiver assembly or the radio receiver assembly records various types of memory and settings. As a result, after turning the ignition switch off, make sure to wait at least 120 seconds before disconnecting the cable from the negative (-) auxiliary battery terminal.
PROCEDURE

 1.REMOVE BATTERY
2.REMOVE AIR CLEANER ASSEMBLY WITH AIR CLEANER HOSE
74404B
3.REMOVE BATTERY CLAMP SUB-ASSEMBLY
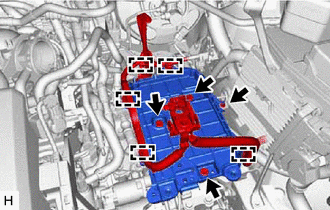
Disengage the 5 clamps from the battery clamp sub-assembly.
Remove the 3 bolts, nut and battery clamp sub-assembly.
22030
4.REMOVE THROTTLE BODY WITH MOTOR ASSEMBLY
17126
5.REMOVE NO. 2 SURGE TANK STAY
87245B
6.SEPARATE INLET HEATER WATER HOSE B
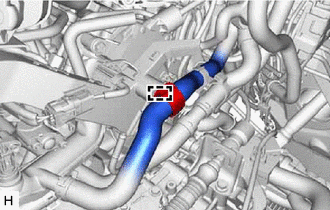
Disengage the clamp to separate the inlet heater water hose B.
17308B
7.SEPARATE VACUUM HOSE SUB-ASSEMBLY
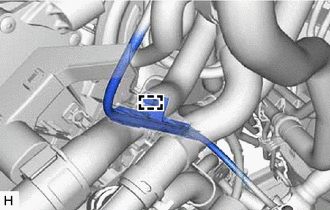
Disengage the clamp to separate the vacuum hose sub-assembly.
35104V
8.SEPARATE BREATHER PLUG HOSE
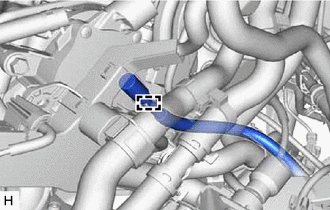
Disengage the clamp to separate the bleeder plug hose.
82121
9.SEPARATE ENGINE WIRE
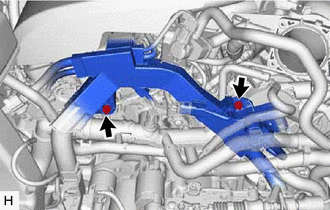
Remove the 2 bolts and separate the engine wire.
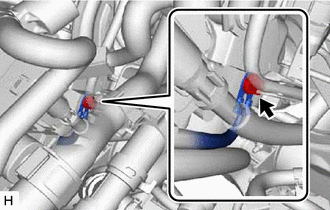
Remove the bolt and separate the earth wire.
17361M
10.DISCONNECT AIR TUBE
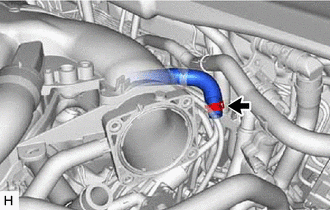
Slide the clip and disconnect the air tube from the vacuum pump assembly.
29300
11.REMOVE VACUUM PUMP ASSEMBLY
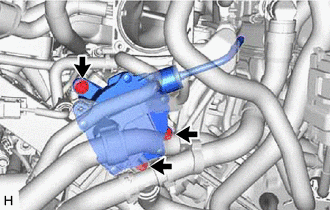
Remove the 3 bolts and vacuum pump assembly from the engine assembly.
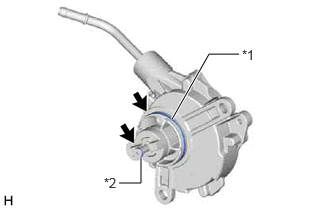
| *1 | No. 2 O-ring |
| *2 | No. 3 O-ring |
Remove the No. 2 O-ring and No. 3 O-ring from the vacuum pump assembly.