MANUAL TRANSMISSION ASSEMBLY > INSTALLATION |
| 1. INSTALL TRANSFER ASSEMBLY |
Install the transfer (Click here).
| 2. INSTALL MANUAL TRANSMISSION UNIT ASSEMBLY |
|
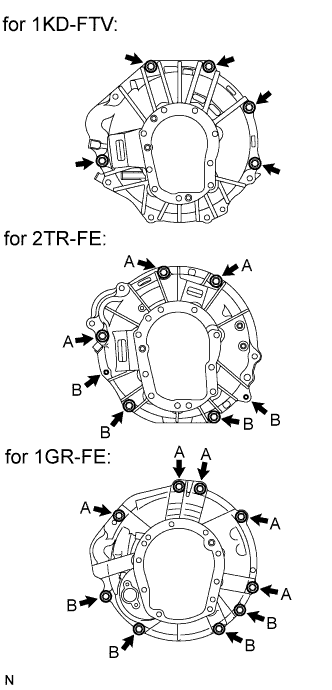
Align the input shaft with the clutch disc and install the transmission to the engine.
1KD-FTV:
Install the 5 bolts.
2TR-FE:
Install the 7 bolts.
1GR-FE:
Install the 9 bolts.
| 3. INSTALL STIFFENER PLATE (for 1KD-FTV) |
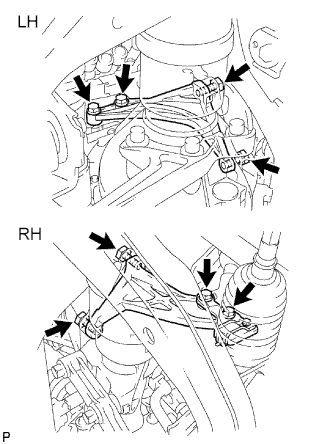 |
Install the stiffener plate RH with the 4 bolts.
Install the stiffener plate LH with the 4 bolts.
| 4. INSTALL EXHAUST MANIFOLD STAY (for 2TR-FE) |
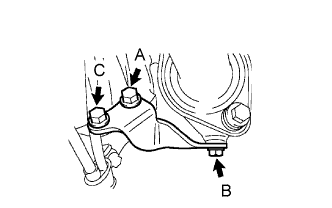 |
Install the exhaust manifold stay with the 3 bolts.
| 5. INSTALL REAR NO. 1 ENGINE MOUNTING INSULATOR |
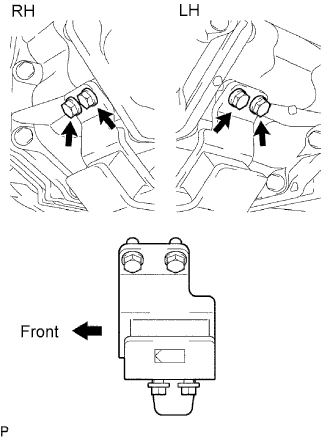 |
Install the mounting insulator with the 4 bolts.
| 6. INSTALL NO. 3 FRAME CROSSMEMBER SUB-ASSEMBLY |
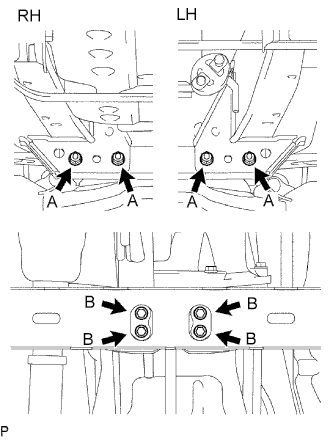 |
Install the frame crossmember with the 4 bolts and 4 nuts.
Install the 4 set bolts to the No. 1 engine mounting insulator rear.
| 7. INSTALL STARTER ASSEMBLY |
Install the starter.
for 2TR-FE; (Click here)
for 1GR-FE 1.6 kW Type: (Click here)
for 1GR-FE 1.4 kW Type: (Click here)
for 1KD-FTV BOSCH made: (Click here)
for 1KD-FTV DENSO made: (Click here)
| 8. CONNECT CLUTCH RELEASE CYLINDER ASSEMBLY (except 1GR-FE) |
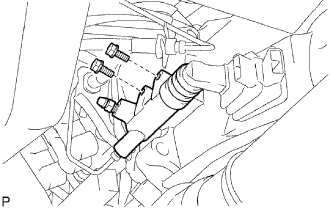 |
Install the release cylinder with the 2 bolts.
| 9. INSTALL CLUTCH RELEASE CYLINDER ASSEMBLY (for 1GR-FE) |
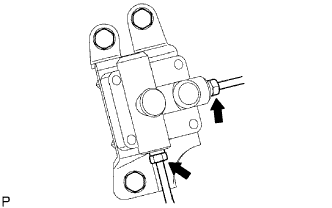 |
Install the accumulator with the 3 bolts.
Using a union nut wrench, connect the 2 flexible hose tubes.
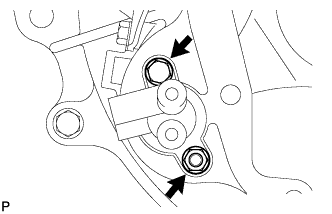 |
Install the clutch release cylinder with the 2 bolts.
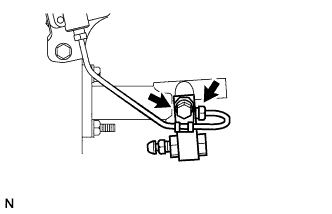 |
Using a union nut wrench, connect the flexible tube.
Install the 2 way with the bolt.
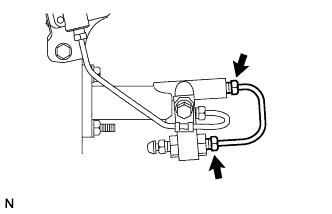 |
Using a union nut wrench, install the flexible tube.
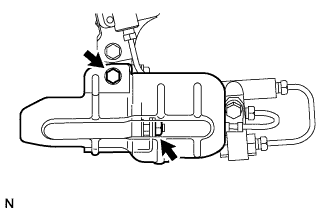 |
Install the release cylinder heat insulator with the bolt and the nut.
| 10. CONNECT WIRE HARNESS |
Transmission side:
Connect the back-up light switch connector.
Transfer side:
Connect the No. 1, No. 2 and No. 3 transfer indicator switch connectors, and vehicle speed sensor connector.
| 11. INSTALL FRONT EXHAUST PIPE ASSEMBLY |
Install the front exhaust pipe.
for 1KD-FTV: (Click here).
for 2TR-FE: (Click here).
for 1GR-FE: (Click here).
| 12. INSTALL REAR PROPELLER SHAFT ASSEMBLY |
Install the rear propeller shaft.
for DANA made: (Click here)
except DANA made: (Click here)
| 13. INSTALL FRONT PROPELLER SHAFT ASSEMBLY |
| 14. ADD MANUAL TRANSMISSION OIL |
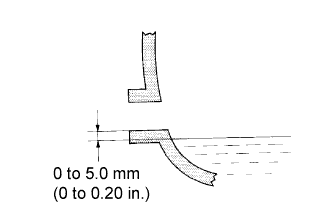 |
| 15. INSTALL NO. 2 ENGINE UNDER COVER |
| 16. INSTALL NO. 1 ENGINE UNDER COVER |
| 17. INSTALL TRANSFER CASE LOWER PROTECTOR |
Install the transfer case lower protector with the 4 bolts.
| 18. INSTALL TRANSFER HIGH AND LOW SHIFT LEVER ASSEMBLY |
Install the transfer shift lever.
Using pliers, install the snap ring.
| 19. INSTALL FLOOR SHIFT SHIFT LEVER ASSEMBLY |
Cover the shift lever cap with a cloth.
Press down on the shift lever cap and rotate it clockwise to install it.
| 20. INSTALL SHIFT LEVER BOOT ASSEMBLY |
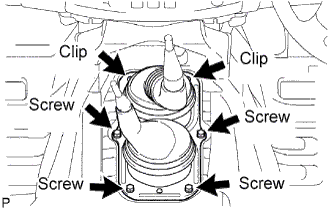 |
Install the shift lever boot with the 4 screws and 2 clips.
| 21. INSTALL CONSOLE BOX ASSEMBLY |
| 22. CONNECT CABLE TO NEGATIVE BATTERY TERMINAL |
| 23. BLEED AIR FROM CLUTCH PIPE LINE (for 1GR-FE) |
| 24. INSPECT AND ADJUST CLUTCH PEDAL ASSEMBLY (for 1GR-FE) |
Inspect and adjust the clutch pedal .
| 25. CHECK FLUID LEVEL IN RESERVOIR (for 1GR-FE) |
Check the fluid level in the reservoir (Click here).
| 26. CHECK FOR CLUTCH FLUID LEAKAGE (for 1GR-FE) |