AUDIO / VIDEO STEREO COMPONENT AMPLIFIER REMOVAL
PROCEDURE

 1. PRECAUTION
- NOTICE:
-
After turning the ignition switch off, waiting time may be required before disconnecting the cable from the negative (-) battery terminal.
-
Click hereGeneral>INTRODUCTION>REPAIR INSTRUCTION>PRECAUTION
2.DISCONNECT CABLE FROM NEGATIVE BATTERY TERMINAL
3.REMOVE FRONT SEAT ASSEMBLY RH
for Manual Seat Type:
Click hereVehicle Interior>SEAT>FRONT SEAT ASSEMBLY (for Manual Seat)>REMOVAL
for Power Seat Type:
Click hereVehicle Interior>SEAT>FRONT SEAT ASSEMBLY (for Power Seat)>REMOVAL
for Walk in Seat Type:
Click hereVehicle Interior>SEAT>FRONT SEAT ASSEMBLY (for Walk in Seat Type)>REMOVAL
for Bench Seat Type:
Click hereVehicle Interior>SEAT>FRONT SEAT ASSEMBLY(for Bench Seat Type)>REMOVAL
86287B
4.REMOVE AMPLIFIER COVER
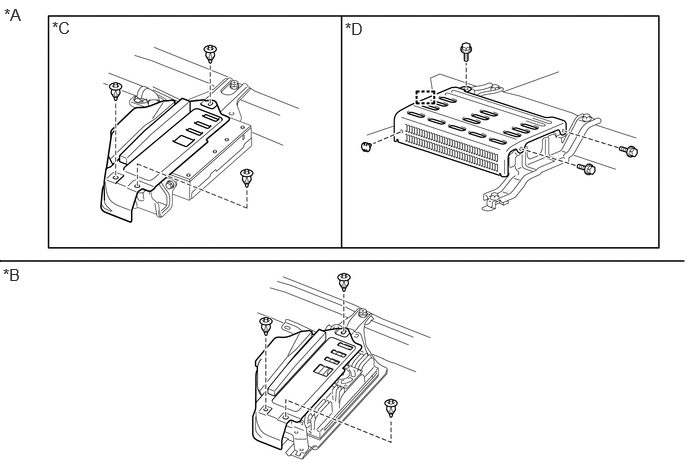
| *A | for Pioneer Made | *B | for JBL Made |
| *C | for Type A | *D | for Type B |
Fold back the floor carpet.
for Pioneer Made, Type A:
Remove the 3 clips and amplifier cover.
for Pioneer Made, Type B:
Remove the 3 screws and clip.
Detach the clamp and remove amplifier cover.
for JBL Made:
Remove the 3 clips and amplifier cover.
86280
5.REMOVE STEREO COMPONENT AMPLIFIER ASSEMBLY
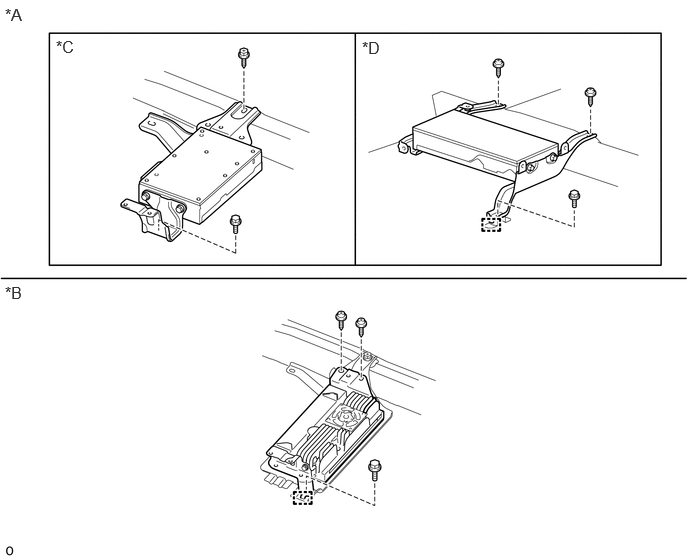
| *A | for Pioneer Made | *B | for JBL Made |
| *C | for Type A | *D | for Type B |
Disconnect each connector.
Remove the bolt and 2 screws.
Detach the guide and remove the stereo component amplifier assembly.
86287C
6.REMOVE NO. 2 AMPLIFIER COVER (for JBL Made)
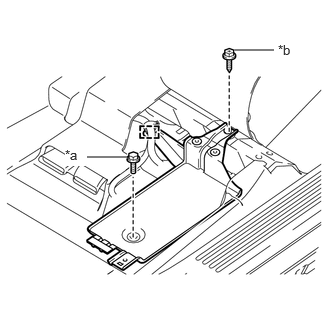
| *a | Bolt |
| *b | Screw |
Detach the clamp.
Remove the screw, bolt and No. 2 amplifier cover.
86285
7.REMOVE NO. 1 AMPLIFIER BRACKET
Remove the 2 screws and No. 1 amplifier bracket.
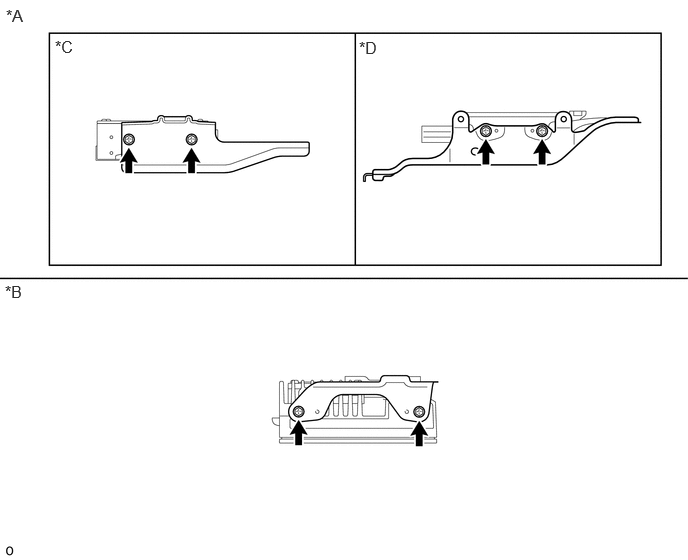
| *A | for Pioneer Made | *B | for JBL Made |
| *C | for Type A | *D | for Type B |
86286
8.REMOVE NO. 2 AMPLIFIER BRACKET
Remove the 2 screws and No. 2 amplifier bracket.
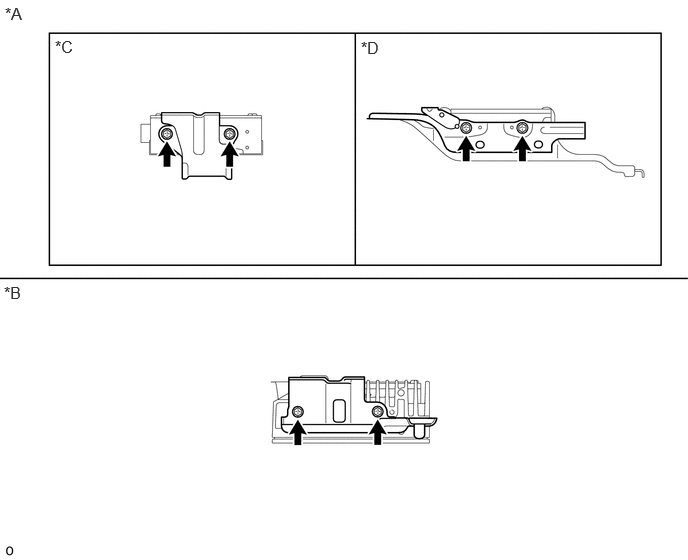
| *A | for Pioneer Made | *B | for JBL Made |
| *C | for Type A | *D | for Type B |