HEATING / AIR CONDITIONING COMPRESSOR(for 1GD-FTV) REMOVAL
PROCEDURE

 53292A
1.REMOVE UPPER RADIATOR SUPPORT SEAL
2.RECOVER REFRIGERANT FROM REFRIGERATION SYSTEM
for HFC-134a (R134a):
Click hereVehicle Interior>HEATING / AIR CONDITIONING>REFRIGERANT (for HFC-134a(R134a))>REPLACEMENT
for HFO-1234yf (R1234yf):
Click hereVehicle Interior>HEATING / AIR CONDITIONING>REFRIGERANT(for HFO-1234yf(R1234yf))>REPLACEMENT
27020
3.REMOVE GENERATOR ASSEMBLY
for 130 A Type:
(See page Power Source / Network>1GD-FTV (BATTERY / CHARGING)>GENERATOR (for 130 A Type)>REMOVAL)
for 100 A Type:
(See page Power Source / Network>1GD-FTV (BATTERY / CHARGING)>GENERATOR (for 100 A Type)>REMOVAL)
82122
4.DISCONNECT NO. 2 ENGINE WIRE
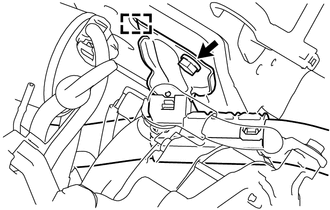
Remove the bolt.
Detach the guide and disconnect the No. 2 engine wire.
88711
5.DISCONNECT NO. 1 COOLER REFRIGERANT DISCHARGE HOSE
Type A:
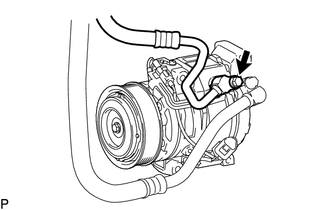
Remove the bolt and disconnect the No. 1 cooler refrigerant discharge hose from the cooler compressor assembly.
Remove the O-ring from the No. 1 cooler refrigerant discharge hose.
- NOTICE:
-
Seal the openings of the disconnected parts using vinyl tape to prevent moisture and foreign matter from entering them.
Type B:
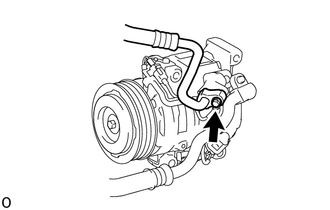
Remove the bolt and disconnect the No. 1 cooler refrigerant discharge hose from the cooler compressor assembly.
Remove the O-ring from the No. 1 cooler refrigerant discharge hose.
- NOTICE:
-
Seal the openings of the disconnected parts using vinyl tape to prevent moisture and foreign matter from entering them.
88712
6.DISCONNECT NO. 1 COOLER REFRIGERANT SUCTION HOSE
Type A:
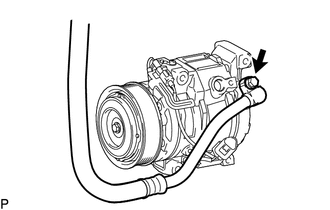
Remove the bolt and disconnect the No. 1 cooler refrigerant suction hose from the cooler compressor assembly.
Remove the O-ring from the No. 1 cooler refrigerant suction hose.
- NOTICE:
-
Seal the openings of the disconnected parts using vinyl tape to prevent moisture and foreign matter from entering them.
Type B:
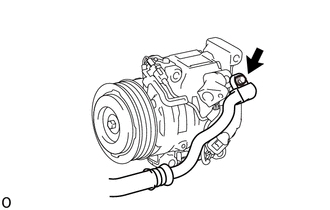
Remove the bolt and disconnect the No. 1 cooler refrigerant suction hose from the cooler compressor assembly.
Remove the O-ring from the No. 1 cooler refrigerant suction hose.
- NOTICE:
-
Seal the openings of the disconnected parts using vinyl tape to prevent moisture and foreign matter from entering them.
88320
7.REMOVE COOLER COMPRESSOR ASSEMBLY
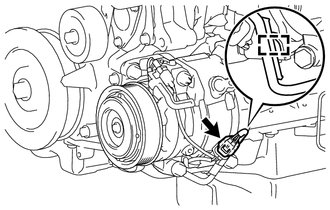
Detach the clamp and disconnect the connector.
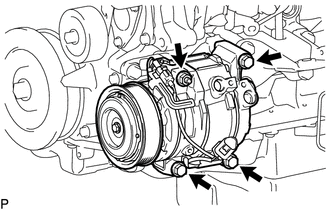
Remove the 3 bolts and nut.
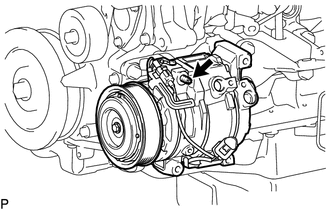
Using an E8 "TORX" socket wrench, remove the stud bolt and cooler compressor assembly.