AUDIO / VIDEO RADIO RECEIVER(w/o Stereo Component Amplifier) INSTALLATION
PROCEDURE

 84330
1.INSTALL HAZARD WARNING SIGNAL SWITCH ASSEMBLY
83910
2.INSTALL CLOCK ASSEMBLY
86211
3.INSTALL NO. 1 RADIO BRACKET
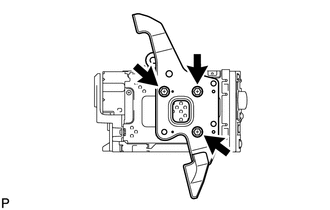
Install the bracket with the 3 bolts.
- Torque:
- 3.0 N*m (30 kgf*cm, 26 in.*lbf)
86212
4.INSTALL NO. 2 RADIO BRACKET
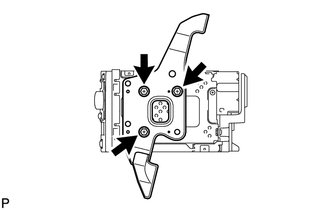
Install the bracket with the 3 bolts.
- Torque:
- 3.0 N*m (30 kgf*cm, 26 in.*lbf)
86120
5.INSTALL RADIO RECEIVER ASSEMBLY WITH BRACKET
Connect the connectors.
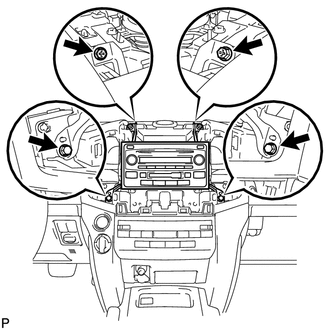
Install the radio receiver with the 2 screws and 2 bolts.
- Torque:
- Bolt : 12 N*m (122 kgf*cm, 9 ft.*lbf)
55412C
6.INSTALL NO. 1 INSTRUMENT CLUSTER FINISH PANEL CENTER
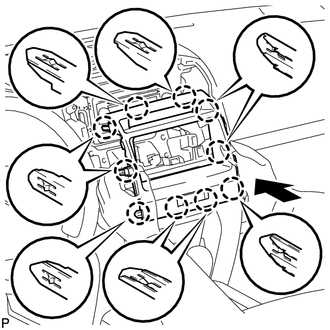
Insert the cluster finish panel and attach the 10 claws on its backside to install it.
55680A
7.INSTALL NO. 4 INSTRUMENT PANEL REGISTER ASSEMBLY
55670
8.INSTALL NO. 3 INSTRUMENT PANEL REGISTER ASSEMBLY
55510F
9.INSTALL NO. 1 SPEAKER OPENING COVER ASSEMBLY
10.CONNECT CABLE TO NEGATIVE BATTERY TERMINAL
- NOTICE:
-
When disconnecting the cable, some systems need to be initialized after the cable is reconnected (See page General>INTRODUCTION>REPAIR INSTRUCTION>INITIALIZATION).