PARK ASSIST / MONITORING FRONT AND SIDE MONITOR MAIN SWITCH INSTALLATION
CAUTION / NOTICE / HINT
- HINT:
- ·
Use the same procedure for RHD and LHD vehicles.
·The procedure listed below is for LHD vehicles.
PROCEDURE

 84480F
1.INSTALL MAIN SWITCH ASSEMBLY
Attach the 2 claws to install the main switch assembly.
55404C
2.INSTALL INSTRUMENT CLUSTER FINISH PANEL SUB-ASSEMBLY
w/o Multi-information Display:
Connect the connector.
w/ Multi-information Display:
Connect the 2 connectors.
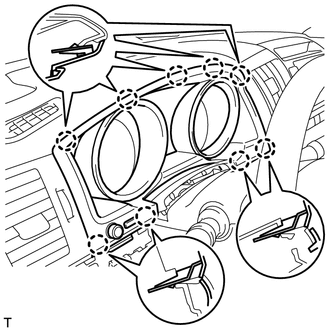
Attach the 9 claws to install the finish panel.
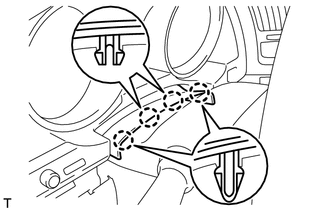
Attach the 4 claws.
55475A
3.INSTALL NO. 2 INSTRUMENT CLUSTER FINISH PANEL GARNISH
55403C
4.INSTALL LOWER INSTRUMENT PANEL PAD SUB-ASSEMBLY LH
55449C
5.INSTALL NO. 2 INSTRUMENT PANEL FINISH PANEL CUSHION
55474C
6.INSTALL NO. 1 INSTRUMENT CLUSTER FINISH PANEL GARNISH
55318C
7.INSTALL INSTRUMENT SIDE PANEL LH
8.CONNECT CABLE TO NEGATIVE BATTERY TERMINAL
- NOTICE:
- ·
Reset the Autoaway/Return function setting to the previous condition by changing the customize parameter (See page General>INTRODUCTION>REPAIR INSTRUCTION>CUSTOMIZE PARAMETERS).
·When disconnecting the cable, some systems need to be initialized after the cable is reconnected (See page General>INTRODUCTION>REPAIR INSTRUCTION>INITIALIZATION).