AC60F AUTOMATIC TRANSMISSION / TRANSAXLE AUTOMATIC TRANSMISSION ASSEMBLY REMOVAL
PROCEDURE

 1. PRECAUTION
- NOTICE:
-
After turning the engine switch off, waiting time may be required before disconnecting the cable from the battery terminal. Therefore, make sure to read the disconnecting the cable from the battery terminal notice before proceeding with work.
-
Click hereGeneral>INTRODUCTION>REPAIR INSTRUCTION>PRECAUTION
2.DISCONNECT CABLE FROM NEGATIVE BATTERY TERMINAL
- NOTICE:
-
When disconnecting the cable, some systems need to be initialized after the cable is reconnected.
-
Click hereGeneral>INTRODUCTION>REPAIR INSTRUCTION>INITIALIZATION
53806
3.REMOVE FRONT FENDER SPLASH SHIELD SUB-ASSEMBLY LH
53805
4.REMOVE FRONT FENDER SPLASH SHIELD SUB-ASSEMBLY RH
51405A
5.REMOVE NO. 1 ENGINE UNDER COVER SUB-ASSEMBLY
51442
6.REMOVE NO. 2 ENGINE UNDER COVER
7.DRAIN AUTOMATIC TRANSMISSION FLUID
53782
8.REMOVE FRONT FENDER APRON TRIM PACKING A
53784
9.REMOVE FRONT FENDER APRON TRIM PACKING C
37140
10.REMOVE FRONT PROPELLER SHAFT ASSEMBLY
37110
11.REMOVE PROPELLER SHAFT ASSEMBLY
17105
12.REMOVE EXHAUST MANIFOLD SUB-ASSEMBLY LH
17104
13.REMOVE EXHAUST MANIFOLD SUB-ASSEMBLY RH
33702B
14.DISCONNECT FLOOR SHIFT GEAR SHIFTING ROD SUB-ASSEMBLY
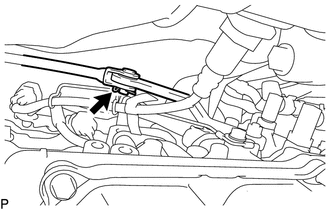
Remove the clip and pin and disconnect the floor shift gear shifting rod sub-assembly from the transmission control shaft lever RH.
28100
15.REMOVE STARTER ASSEMBLY
11363A
16.REMOVE FLYWHEEL HOUSING SIDE COVER
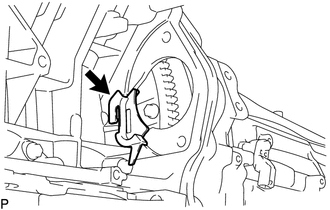
Remove the flywheel housing side cover from the engine assembly.
32101A
17.REMOVE DRIVE PLATE AND TORQUE CONVERTER SETTING BOLT
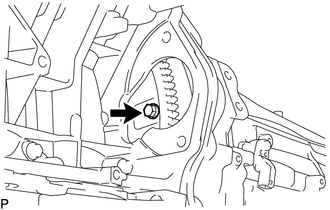
Turn the crankshaft to gain access to the 6 bolts and remove the bolts while holding the crankshaft pulley setting bolt with a wrench.
- HINT:
-
There will be one black colored bolt.
18.DISCONNECT OIL COOLER TUBE SUB-ASSEMBLY
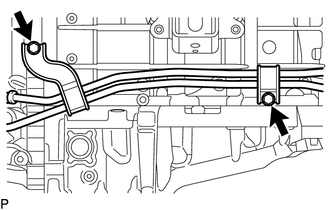
Remove the 2 bolts and disconnect the oil cooler tube sub-assembly from the automatic transmission assembly and engine assembly.
32943B
19.DISCONNECT TRANSMISSION OIL COOLER HOSE
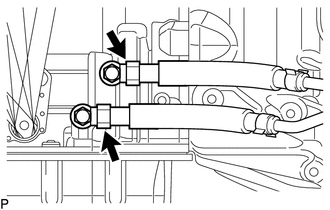
Slide the 2 hose clips and disconnect the 2 transmission oil cooler hoses from the 2 oil cooler tube unions.
35000
20.SUPPORT AUTOMATIC TRANSMISSION ASSEMBLY
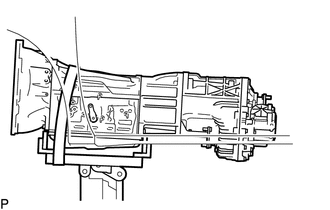
Support the automatic transmission assembly with a transmission jack. Lift the automatic transmission assembly slightly from the crossmember.
- NOTICE:
- ·
In order to protect the automatic transmission oil pan sub-assembly, place attachments on the transmission jack.
·Make sure that the attachments and the automatic transmission oil pan sub-assembly are centered on the transmission jack.
·To prevent the automatic transmission oil pan sub-assembly from deforming, do not place any attachments under the automatic transmission oil pan sub-assembly of the automatic transmission assembly.
·Secure the automatic transmission assembly to the transmission jack using a belt, etc. to prevent it from falling.
51203
21.REMOVE NO. 3 FRAME CROSSMEMBER SUB-ASSEMBLY
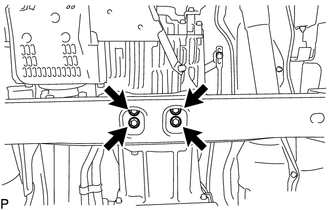
Remove the 4 bolts of the rear No. 1 engine mounting insulator.
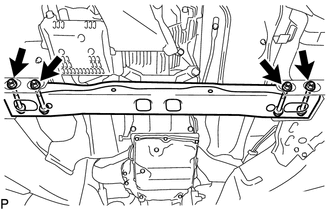
Remove the 4 nuts, 4 bolts and No. 3 frame crossmember sub-assembly.
12371
22.REMOVE REAR NO. 1 ENGINE MOUNTING INSULATOR
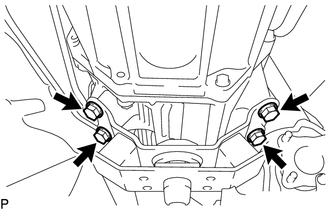
Remove the 4 bolts and rear No. 1 engine mounting insulator from the automatic transmission assembly.
23.DISCONNECT WIRE HARNESS AND CONNECTOR
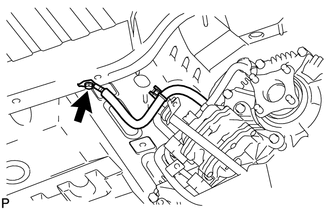
Remove the bolt and disconnect the ground cable.
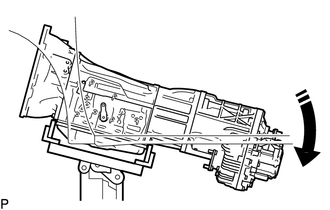

|
Downward |
Tilt the automatic transmission assembly downward.
- NOTICE:
- ·
Support the oil pan bolts to prevent damage to the oil pan gasket.
- ·
Make sure the cooling fan does not contact the fan shroud.
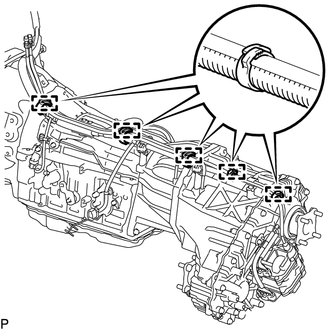
Remove the 5 wire harness clamps.
Disconnect the park/neutral position switch assembly connector, transmission wire connector, 2 transmission revolution sensor connectors and 2 transfer control connectors.
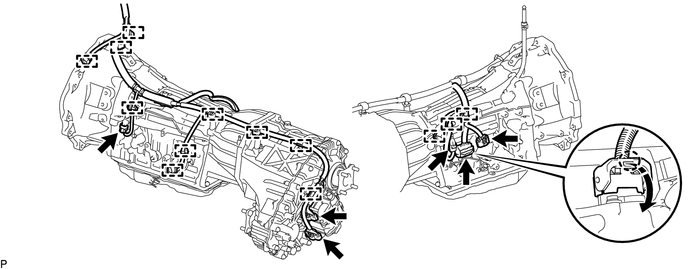
- HINT:
-
Detach the claw, press down the lever, and then disconnect the transmission wire connector.
Disconnect the 13 harness clamps and wire harness.
35000
24.REMOVE AUTOMATIC TRANSMISSION ASSEMBLY
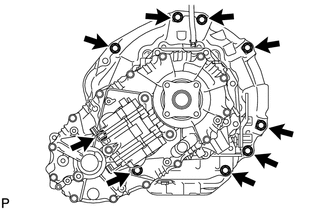
Remove the 9 bolts and automatic transmission assembly.
- NOTICE:
-
Do not use excess force to pry off the automatic transmission assembly.
36407
25.DISCONNECT TRANSFER BREATHER HOSE SUB-ASSEMBLY
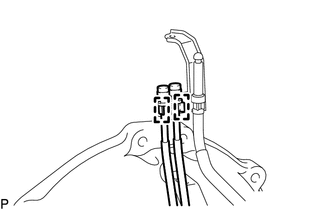
Disconnect the 2 breather plug hoses from the harness clamp bracket.
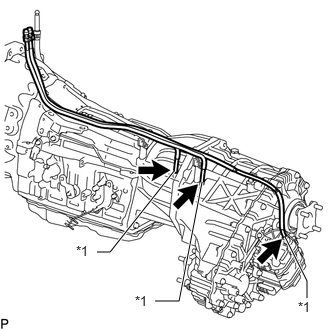
| *1 | Breather Hose |
Disconnect the 3 breather hoses and remove the transfer breather hose sub-assembly from the automatic transmission assembly.
36179
26.REMOVE LOWER TRANSFER CASE PROTECTOR
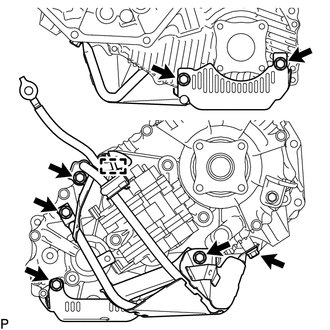
Detach the clamp of the ground cable from the lower transfer case protector.
Remove the 7 bolts and lower transfer case protector.
36100
27.REMOVE TRANSFER ASSEMBLY
28.REMOVE HARNESS CLAMP BRACKET
Remove the 6 bolts and 6 harness clamp brackets.
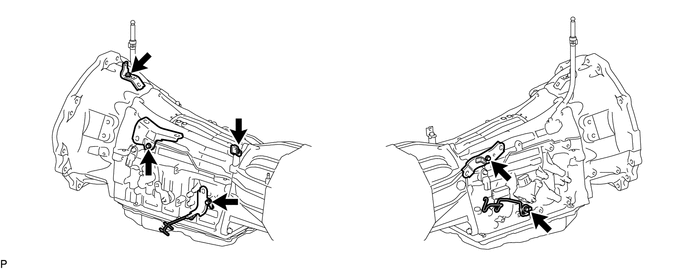
32000
29.REMOVE TORQUE CONVERTER ASSEMBLY
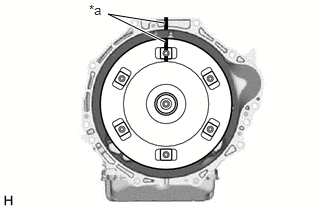
Put matchmarks on the automatic transmission assembly and the torque converter assembly.
| *a | Matchmark |
Remove the torque converter assembly from the automatic transmission assembly.
- NOTICE:
-
Remove the torque converter assembly from the input shaft horizontally.