HEATING / AIR CONDITIONING CONDENSER REMOVAL
CAUTION / NOTICE / HINT
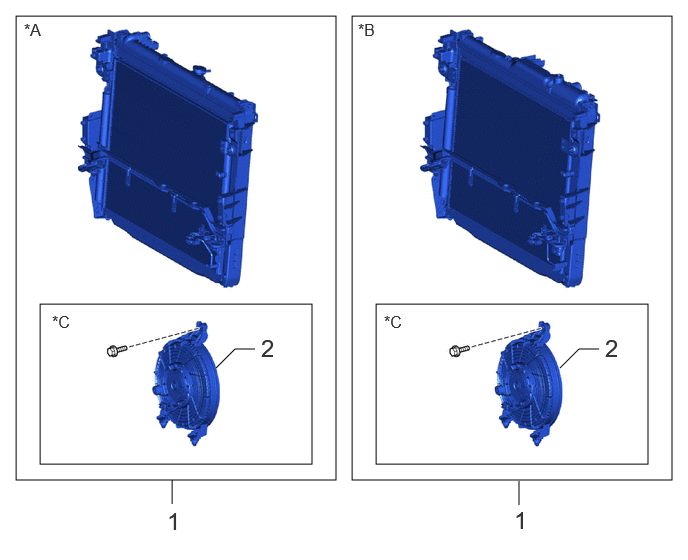
| Procedure | Part Name Code |

|

|

|
|
|---|---|---|---|---|---|
| 1 | RADIATOR WITH COOLER CONDENSER ASSEMBLY | - | - | - | - |
| 2 | BLOWER ASSEMBLY WITH SHROUD | 88590 | - | - | - |
| *A | for 1GR-FE | *B | for V35A-FTS |
| *C | w/ Condenser Fan | - | - |
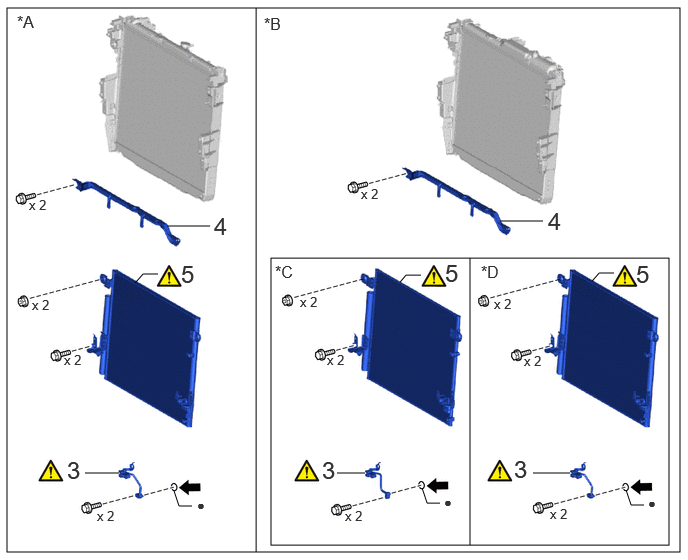
| Procedure | Part Name Code |
|
|
|
|
|---|---|---|---|---|---|
| 3 | NO. 2 AIR CONDITIONING TUBE AND ACCESSORY ASSEMBLY | 88710G | ( ) |
- | - |
| 4 | COOLER BRACKET | - | - | - | - |
| 5 | COOLER CONDENSER ASSEMBLY | 884A0 | () |
- | - |
| *A | for 1GR-FE | *B | for V35A-FTS |
| *C | for Type A | *D | for Type B |
| ● | Non-reusable part | - | - |
CAUTION / NOTICE / HINT
The necessary procedures (adjustment, calibration, initialization, or registration) that must be performed after parts are removed, installed, or replaced during the cooler condenser assembly removal/installation are shown below.
| Replaced Part or Performed Procedures | Necessary procedures | Effect/Inoperative Function when Necessary Procedures are not Performed | Link |
|---|---|---|---|
| Front bumper assembly (Including removal and installation) | Front television camera view adjustment | Panoramic view monitor system | () |
- HINT:
-
·
Use the same procedure for RHD and LHD vehicles.
·The procedure listed below is for LHD vehicles.
PROCEDURE

 1.REMOVE RADIATOR WITH COOLER CONDENSER ASSEMBLY
for 1GR-FE:
Click hereEngine / Hybrid System>1GR-FE (COOLING)>RADIATOR>REMOVAL
for V35A-FTS:
Click hereEngine / Hybrid System>V35A-FTS (COOLING)>RADIATOR>REMOVAL
88590 2.REMOVE BLOWER ASSEMBLY WITH SHROUD (w/ Condenser Fan)
for 1GR-FE:
Click hereEngine / Hybrid System>1GR-FE (COOLING)>RADIATOR>REMOVAL
for V35A-FTS:
Click hereEngine / Hybrid System>V35A-FTS (COOLING)>RADIATOR>REMOVAL
88710G 3.REMOVE NO. 2 AIR CONDITIONING TUBE AND ACCESSORY ASSEMBLY
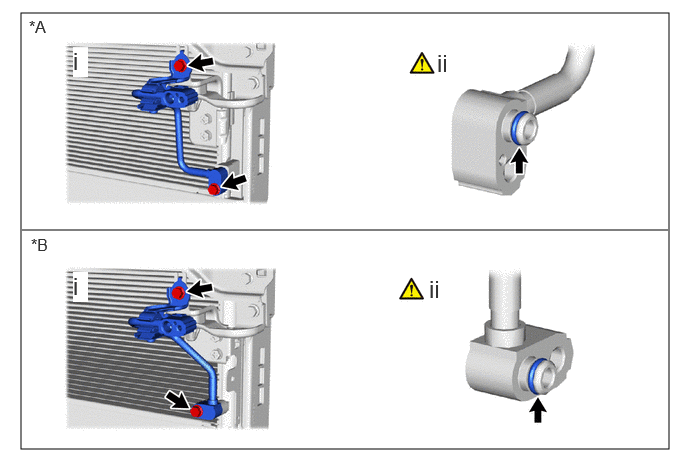
| *A | for Type A | *B | for Type B |
Remove the 2 bolts and No. 2 air conditioning tube and accessory assembly.
Remove the O-ring from the No. 2 air conditioning tube and accessory assembly.
- NOTICE:
-
Seal the openings of the disconnected parts using vinyl tape to prevent moisture and foreign matter from entering them.
4.REMOVE COOLER BRACKET
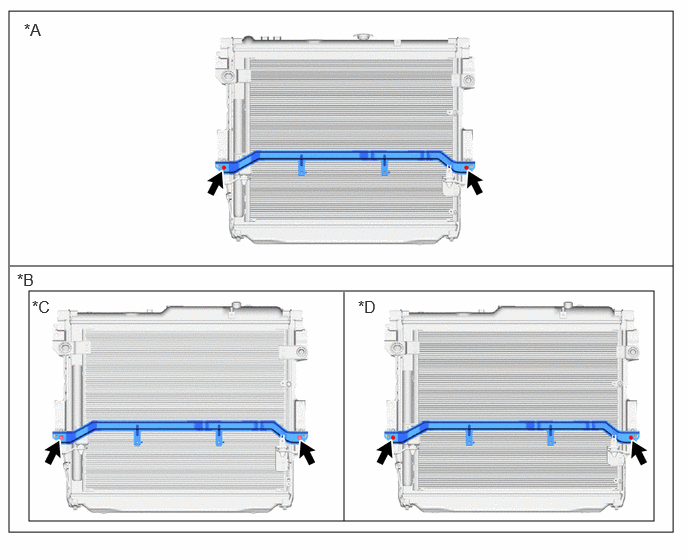
| *A | for 1GR-FE | *B | for V35A-FTS |
| *C | for Type A | *D | for Type B |
884A0 5.REMOVE COOLER CONDENSER ASSEMBLY
|
|
|
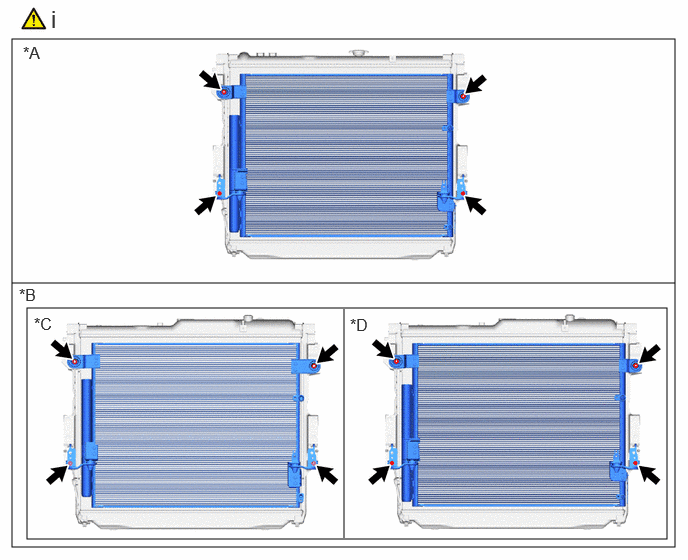
| *A | for 1GR-FE | *B | for V35A-FTS |
| *C | for Type A | *D | for Type B |
Remove the 2 nuts and 2 bolts and cooler condenser assembly.