1GR-FE COOLING RADIATOR REMOVAL
CAUTION / NOTICE / HINT
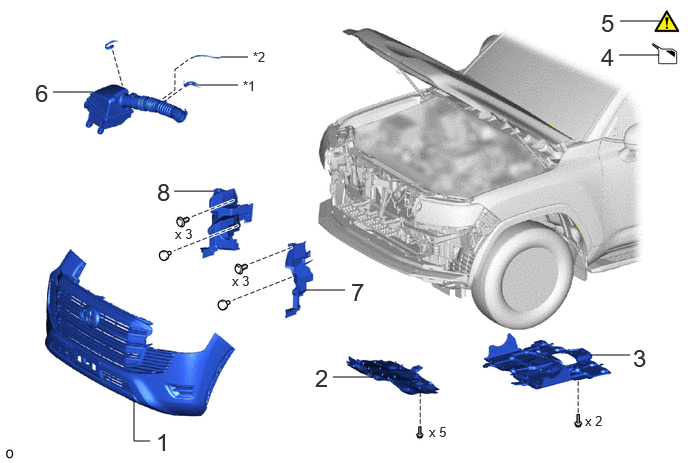
| Procedure | Part Name Code |

|

|

|
|
|---|---|---|---|---|---|
| 1 | FRONT BUMPER ASSEMBLY | - | - | - | - |
| 2 | NO. 1 ENGINE UNDER COVER ASSEMBLY | 51410 | - | - | - |
| 3 | NO. 2 ENGINE UNDER COVER ASSEMBLY | 51420 | - | - | - |
| 4 | DRAIN ENGINE COOLANT | - | - | ( ) |
- |
| 5 | REFRIGERANT FROM REFRIGERATION SYSTEM | - | () |
- | - |
| 6 | AIR CLEANER ASSEMBLY WITH AIR CLEANER HOSE | 17700 | - | - | - |
| 7 | NO. 1 RADIATOR AIR GUIDE LH | 16595B | - | - | - |
| 8 | NO. 1 RADIATOR AIR GUIDE RH | 16593B | - | - | - |
| *1 | VENTILATION HOSE | *2 | VACUUM HOSE |
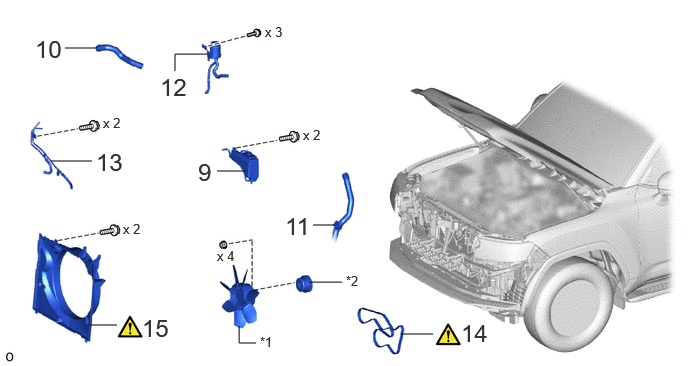
| Procedure | Part Name Code |
|
|
|
|
|---|---|---|---|---|---|
| 9 | RADIATOR RESERVE TANK ASSEMBLY | 16470 | - | - | - |
| 10 | NO. 1 RADIATOR HOSE | 16571C | - | - | - |
| 11 | NO. 2 RADIATOR HOSE | 16572D | - | - | - |
| 12 | NO. 1 OIL RESERVOIR BRACKET | 44369A | - | - | - |
| 13 | OIL COOLER TUBE SUB-ASSEMBLY | - | - | - | - |
| 14 | FAN AND GENERATOR V BELT | 16361A | () |
- | - |
| 15 | FAN SHROUD | 16711 | () |
- | - |
| *1 | FLUID COUPLING ASSEMBLY WITH FAN | *2 | FAN PULLEY |
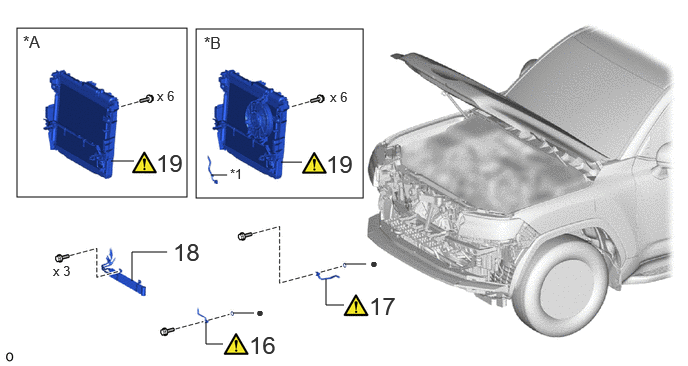
| Procedure | Part Name Code |
|
|
|
|
|---|---|---|---|---|---|
| 16 | AIR CONDITIONING TUBE AND ACCESSORY ASSEMBLY | 88710E | () |
- | - |
| 17 | NO. 1 COOLER REFRIGERANT DISCHARGE HOSE | 88711 | () |
- | - |
| 18 | NO. 1 POWER STEERING OIL COOLER SUB-ASSEMBLY | 44402 | - | - | - |
| 19 | RADIATOR WITH COOLER CONDENSER ASSEMBLY | - | () |
- | - |
| *A | w/o Condenser Fan | *B | w/ Condenser Fan |
| *1 | ENGINE ROOM MAIN WIRE | - | - |
| ● | Non-reusable part | - | - |
| Procedure | Part Name Code |
|
|
|
|
|---|---|---|---|---|---|
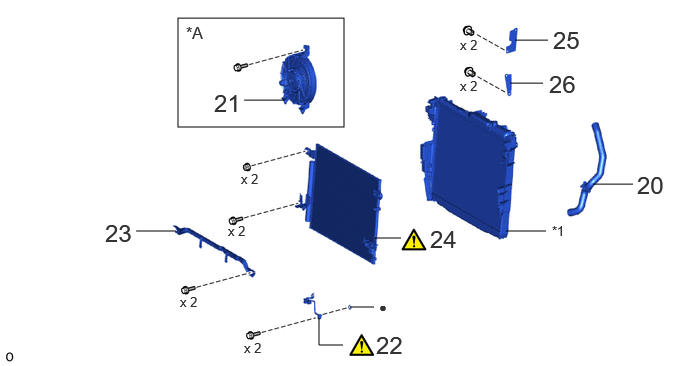
| 20 | NO. 2 RADIATOR HOSE | 16572D | - | - | - |
| 21 | BLOWER ASSEMBLY WITH SHROUD | 88590 | - | - | - |
| 22 | NO. 2 AIR CONDITIONING TUBE AND ACCESSORY ASSEMBLY | 88710G | () |
- | - |
| 23 | COOLER BRACKET | - | - | - | - |
| 24 | COOLER CONDENSER ASSEMBLY | 884A0 | - | - | - |
| 25 | UPPER RADIATOR AIR GUIDE PLATE | 16681 | - | - | - |
| 26 | NO. 1 RADIATOR TO SUPPORT SEAL | 16561 | - | - | - |
| *A | w/ Condenser Fan | - | - |
| *1 | RADIATOR ASSEMBLY | - | - |
| ● | Non-reusable part | - | - |
CAUTION / NOTICE / HINT
The necessary procedures (adjustment, calibration, initialization or registration) that must be performed after parts are removed, installed or replaced during the radiator assembly removal/installation are shown below.
| Replaced Part or Performed Procedures | Necessary Procedures | Effect/Inoperative Function when Necessary Procedures are not Performed | Link |
|---|---|---|---|
| Front bumper assembly (Including removal and installation) | Front television camera view adjustment | Panoramic view monitor system | () |
PROCEDURE

 1.REMOVE FRONT BUMPER ASSEMBLY
for Standard
Click hereVehicle Exterior>EXTERIOR PANELS / TRIM>FRONT BUMPER (for Standard)>REMOVAL
for Aero Type
Click hereVehicle Exterior>EXTERIOR PANELS / TRIM>FRONT BUMPER (for Aero Type)>REMOVAL
51410 2.REMOVE NO. 1 ENGINE UNDER COVER ASSEMBLY
51420 3.REMOVE NO. 2 ENGINE UNDER COVER ASSEMBLY
4.DRAIN ENGINE COOLANT
5. REFRIGERANT FROM REFRIGERATION SYSTEM
17700 6.REMOVE AIR CLEANER ASSEMBLY WITH AIR CLEANER HOSE
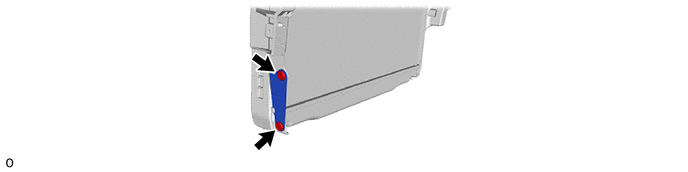
16595B 7.REMOVE NO. 1 RADIATOR AIR GUIDE LH
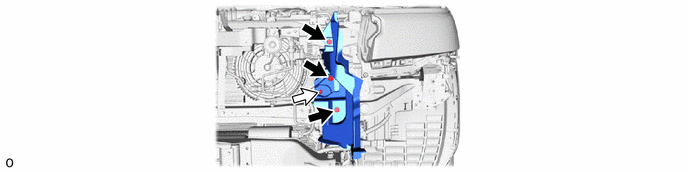

|
Clip A |

|
Clip B |
16593B 8.REMOVE NO. 1 RADIATOR AIR GUIDE RH
Use the same procedure described for the LH side.
16470 9.REMOVE RADIATOR RESERVE TANK ASSEMBLY
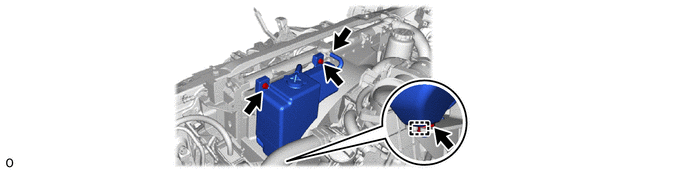
16571C 10.REMOVE NO. 1 RADIATOR HOSE
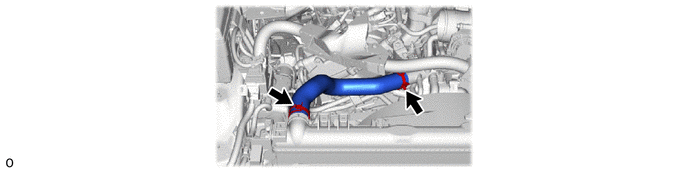
16572D 11.DISCONNECT NO. 2 RADIATOR HOSE
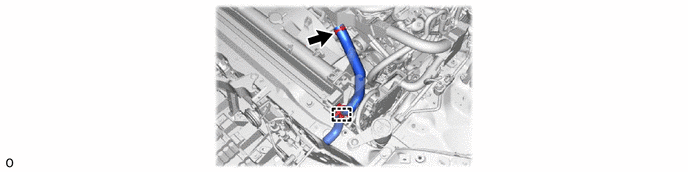
44369A 12.REMOVE NO. 1 OIL RESERVOIR BRACKET
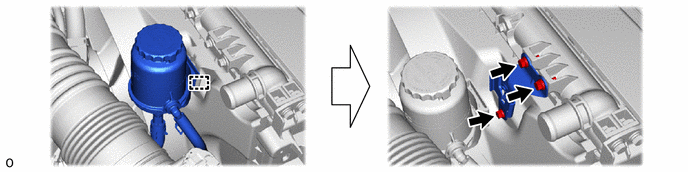
13.DISCONNECT OIL COOLER TUBE SUB-ASSEMBLY
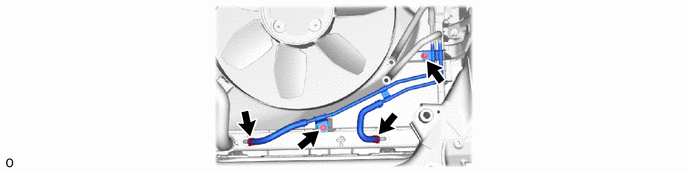
16361A 14.REMOVE FAN AND GENERATOR V BELT
|
|
Click here() |
16711 15.REMOVE FAN SHROUD
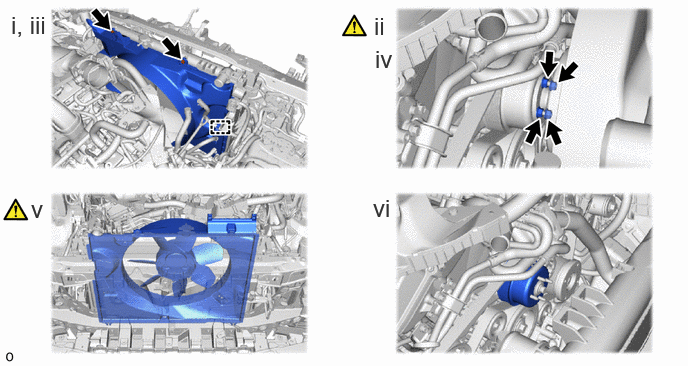
Detach the clamp.
Loosen the 4 nuts holding the fluid coupling assembly with fan.
Remove the 2 bolts holding the fan shroud.
Remove the 4 nuts.
Remove the fan shroud together with the fluid coupling assembly with fan.
- NOTICE:
-
Be careful not to damage the radiator core.
Remove the fan pulley from the engine water pump assembly.
88710E 16.DISCONNECT AIR CONDITIONING TUBE AND ACCESSORY ASSEMBLY
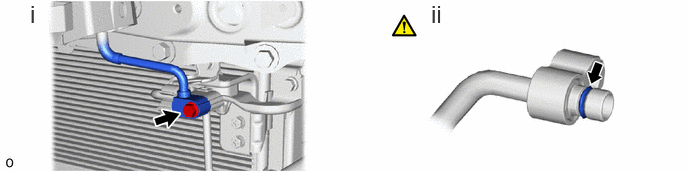
Remove the bolt and disconnect the air conditioning tube and accessory assembly.
Remove the O-ring from the air conditioning tube and accessory assembly.
- NOTICE:
-
Seal the openings of the disconnected parts using vinyl tape to prevent moisture and foreign matter from entering them.
88711 17.DISCONNECT NO. 1 COOLER REFRIGERANT DISCHARGE HOSE
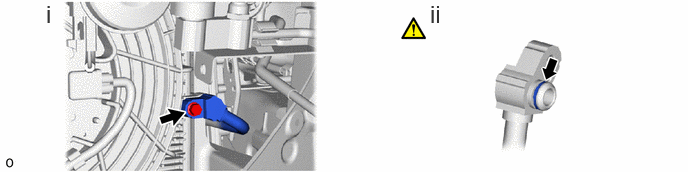
Remove the bolt and disconnect the No. 1 cooler refrigerant discharge hose.
Remove the O-ring from the No. 1 cooler refrigerant discharge hose.
- NOTICE:
-
Seal the openings of the disconnected parts using vinyl tape to prevent moisture and foreign matter from entering them.
44402 18.DISCONNECT NO. 1 POWER STEERING OIL COOLER SUB-ASSEMBLY
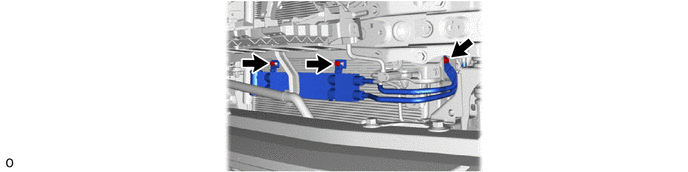
19.REMOVE RADIATOR WITH COOLER CONDENSER ASSEMBLY
w/ Condenser Fan:
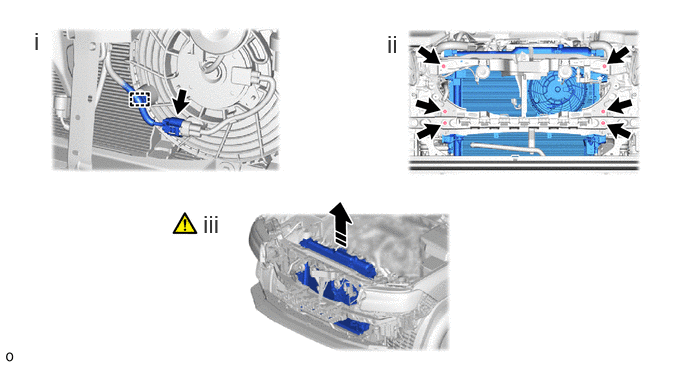

|
Remove in this Direction | - | - |
Detach the clamp and disconnect the connector.
Remove the 6 bolts.
Remove the radiator from the vehicle with cooler condenser assembly as shown in the illustration.
- NOTICE:
-
·
Perform the following procedure with 2 or more people to prevent damage to the radiator with cooler condenser assembly.
·When removing the radiator with cooler condenser assembly from the vehicle, do not apply excessive force to the cooler pipe or cooling hoses.
w/o Condenser Fan:
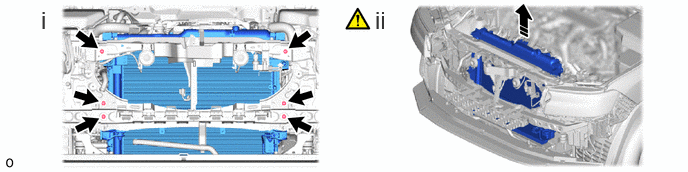
Remove the 6 bolts.
Remove the radiator from the vehicle with cooler condenser assembly as shown in the illustration.
- NOTICE:
-
·
Perform the following procedure with 2 or more people to prevent damage to the radiator with cooler condenser assembly.
·When removing the radiator with cooler condenser assembly from the vehicle, do not apply excessive force to the cooler pipe or cooling hoses.
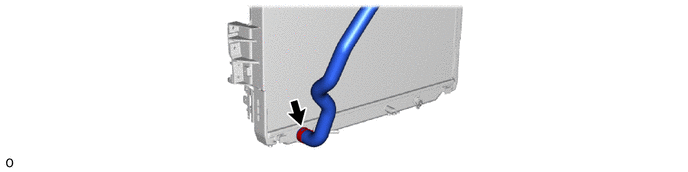
16572D 20.REMOVE NO. 2 RADIATOR HOSE
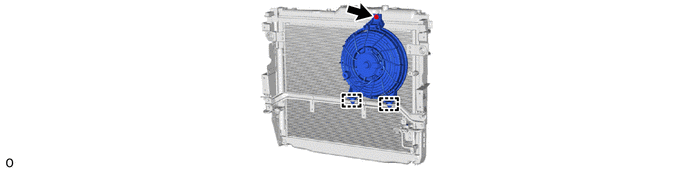
88590 21.REMOVE BLOWER ASSEMBLY WITH SHROUD (w/ Condenser Fan)
88710G 22.REMOVE NO. 2 AIR CONDITIONING TUBE AND ACCESSORY ASSEMBLY
|
|
Click here() |
23.REMOVE COOLER BRACKET
884A0 24.REMOVE COOLER CONDENSER ASSEMBLY
|
|
Click here() |
16681 25.REMOVE UPPER RADIATOR AIR GUIDE PLATE
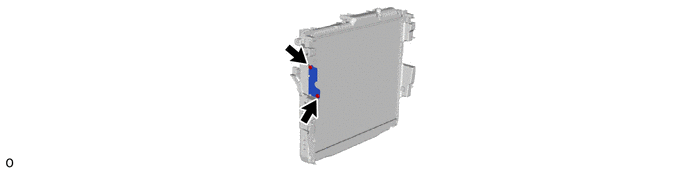
16561 26.REMOVE NO. 1 RADIATOR TO SUPPORT SEAL