WINDOW / GLASS BACK DOOR GLASS REMOVAL
CAUTION / NOTICE / HINT
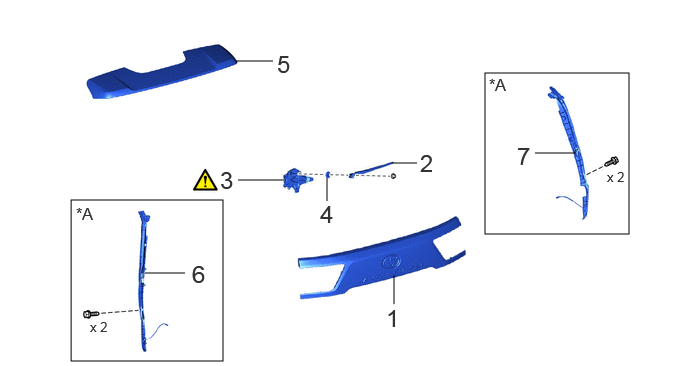
| Procedure | Part Name Code |

|

|

|
|
|---|---|---|---|---|---|
| 1 | BACK DOOR OUTSIDE GARNISH SUB-ASSEMBLY | 76801 | - | - | - |
| 2 | REAR WIPER ARM AND BLADE ASSEMBLY | - | - | - | - |
| 3 | REAR WIPER MOTOR ASSEMBLY | 85110R | ( ) |
- | - |
| 4 | REAR WIPER MOTOR GROMMET | 85143R | - | - | - |
| 5 | REAR SPOILER SUB-ASSEMBLY | 76085 | - | - | - |
| 6 | POWER BACK DOOR SENSOR ASSEMBLY LH | 84280D | - | - | - |
| 7 | POWER BACK DOOR SENSOR ASSEMBLY RH | 84270G | - | - | - |
| *A | w/ Power Back Door | - | - |
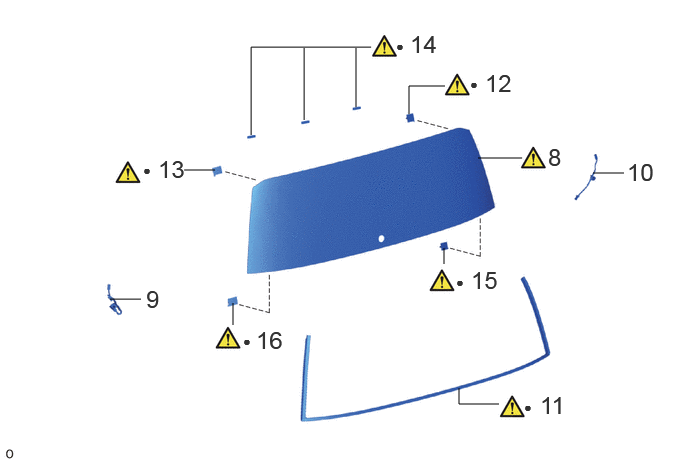
| Procedure | Part Name Code |
|
|
|
|
|---|---|---|---|---|---|
| 8 | BACK DOOR GLASS | 68131 | () |
- | - |
| 9 | REAR NO. 2 WINDOW WIRE | 82187 | - | - | - |
| 10 | REAR NO. 1 WINDOW WIRE | 82186 | - | - | - |
| 11 | BACK WINDOW OUTSIDE MOULDING | 75573C | () |
- | - |
| 12 | BACK WINDOW GLASS CLIP RH | 64827A | () |
- | - |
| 13 | BACK WINDOW GLASS CLIP LH | 64828 | () |
- | - |
| 14 | BACK DOOR GLASS ADHESIVE DAM | 68294B | () |
- | - |
| 15 | NO. 1 BACK DOOR GLASS SPACER | 64818B | () |
- | - |
| 16 | NO. 2 BACK DOOR GLASS SPACER | 64819C | () |
- | - |
| ● | Non-reusable part | - | - |
PROCEDURE

 76801 1.REMOVE BACK DOOR OUTSIDE GARNISH SUB-ASSEMBLY
2.REMOVE REAR WIPER ARM AND BLADE ASSEMBLY
85110R 3.REMOVE REAR WIPER MOTOR ASSEMBLY
|
|
Click here() |
85143R 4.REMOVE REAR WIPER MOTOR GROMMET
76085 5.REMOVE REAR SPOILER SUB-ASSEMBLY
84280D 6.REMOVE POWER BACK DOOR SENSOR ASSEMBLY LH (w/ Power Back Door)
84270G 7.REMOVE POWER BACK DOOR SENSOR ASSEMBLY RH (w/ Power Back Door)
Use the same procedure for the RH and LH sides.
68131 8.REMOVE BACK DOOR GLASS
|
|
|
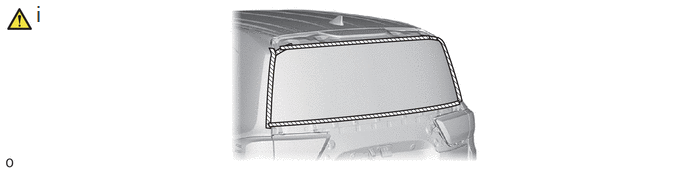

|
Protective Tape | - | - |
Apply protective tape to the outer surface of the vehicle body to prevent scratches.
- HINT:
-
When separating the back door glass from the vehicle, be careful not to damage the vehicle paint or interior/exterior ornaments.
When reusing the back door glass:
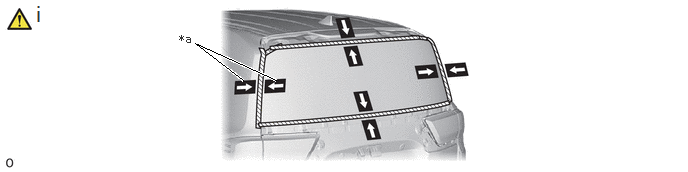
| *a | Matchmarks | - | - |
Place matchmarks over the glass and vehicle body at the locations indicated in theillustration.
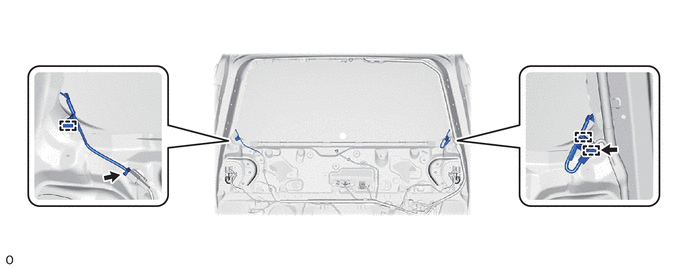
Disconnect 2 connectors and detach the clamp.
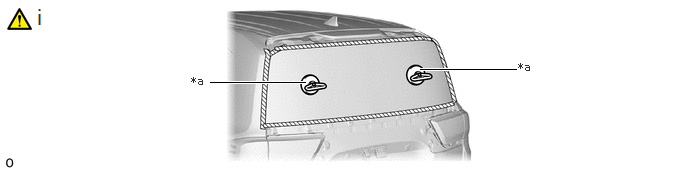
| *a | Suction Cups | - | - |
Install the suction cups to the back door glass.
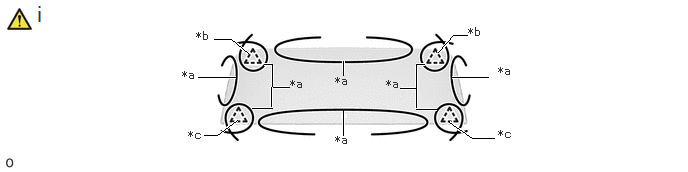
| *a | Piano Wire | *b | Clip |
| *c | Spacer | - | - |
When using a piano wire, perform the following procedure.
1. Pass the piano wire (0.6 mm is appropriate) and install both ends on the mighty puller as shown in the illustration.
2. Tie objects that can serve as handles (for example, wooden blocks) to both wire ends.
3. Pull the piano wire back and forth and cut through the adhesive of the back door glass leaving the back window glass clip and back door glass spacer.
- NOTICE:
-
·
When working near the connector, be careful not to damage it with the piano wire.
·Do not forcefully allow the piano wire to come to contact with the edges of the back door glass.
·Be careful as the piano wire will break if it crosses itself.
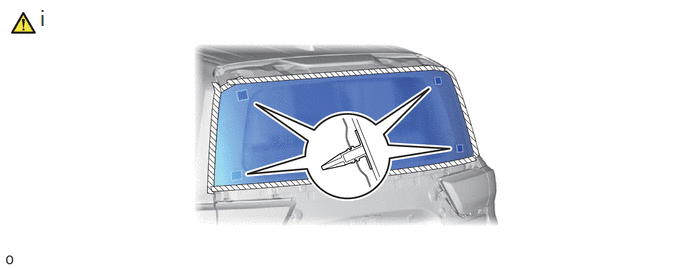
Holding the suction cups, detach the 2 clips and 2 spacers and remove the back door glass.
- NOTICE:
-
Be careful not to drop the back door glass.
82187 9.REMOVE REAR NO. 2 WINDOW WIRE

| *a | for Glass Breakage Sensor | - | - |
82186 10.REMOVE REAR NO. 1 WINDOW WIRE
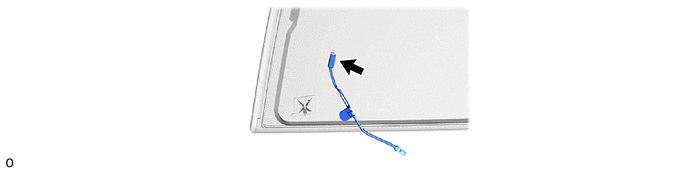
75573C 11.REMOVE BACK WINDOW OUTSIDE MOULDING
When reusing the back door glass:
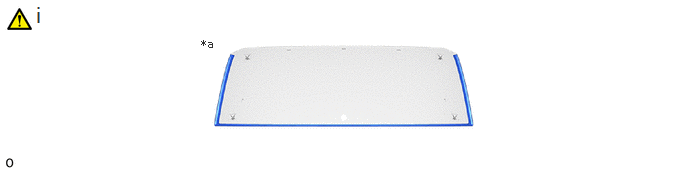
| *a | Backside | - | - |
Using a scraper, remove the back window outside moulding.
- NOTICE:
-
·
Do not damage the back door glass.
·Always replace the installed back window outside moulding with a new back window outside moulding.
64827A 12.REMOVE BACK WINDOW GLASS CLIP RH
When reusing the back door glass:
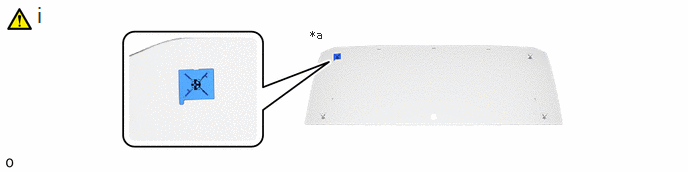
| *a | Backside | - | - |
Using a scraper, remove the back window glass clip RH.
- NOTICE:
-
·
Do not damage the back door glass.
·Always replace the installed back window glass clip RH with a new back window glass clip RH.
64828 13.REMOVE BACK WINDOW GLASS CLIP LH
Use the same procedure as for the back window glass clip RH.
68294B 14.REMOVE BACK DOOR GLASS ADHESIVE DAM
When reusing the back door glass:
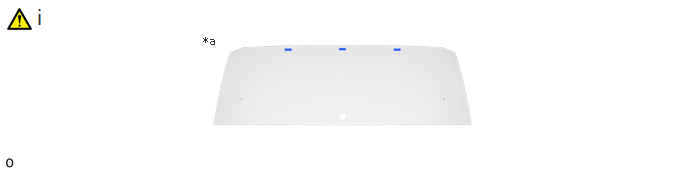
| *a | Backside | - | - |
Using a scraper, remove the back door glass adhesive dam.
- NOTICE:
-
·
Do not damage the back door glass.
·Always replace the installed back door glass adhesive dam with a new back door glass adhesive dam.
64818B 15.REMOVE NO. 1 BACK DOOR GLASS SPACER
When reusing the back door glass:
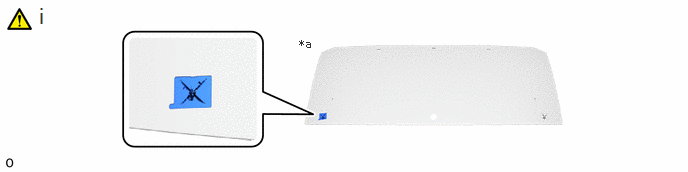
| *a | Backside | - | - |
Using a scraper, remove the No. 1 back door glass spacer.
- NOTICE:
-
·
Do not damage the back door glass.
·Always replace the installed No. 1 back door glass spacer with a new No. 1 back door glass spacer.
64819C 16.REMOVE NO. 2 BACK DOOR GLASS SPACER
Use the same procedure as for the No. 1 back door glass spacer.