AUDIO / VIDEO RADIO ANTENNA CORD(for Roof) INSTALLATION
CAUTION / NOTICE / HINT
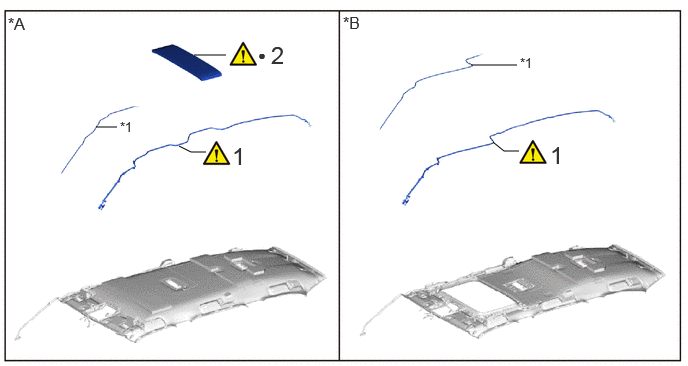
| Procedure | Part Name Code |

|

|

|
|
|---|---|---|---|---|---|
| 1 | NO. 2 ANTENNA CORD SUB-ASSEMBLY | 86101J | ( ) |
- | - |
| 2 | NO. 2 ROOF SILENCER PAD | 63342 | () |
- | - |
| *A | for Normal Roof | *B | for Moon Roof |
| *1 | WASHER HOSE ASSEMBLY | - | - |
| ● | Non-reusable part | - | - |
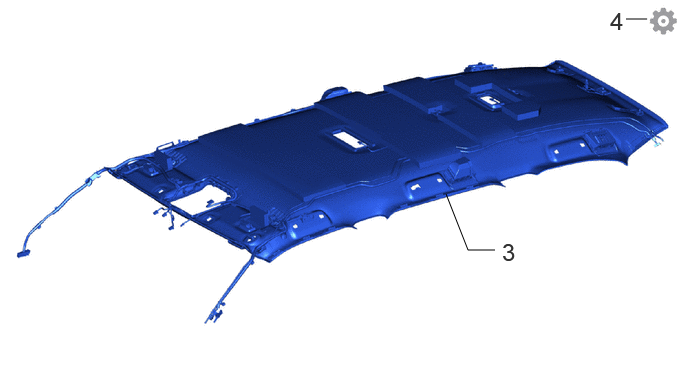
| Procedure | Part Name Code |
|
|
|
|
|---|---|---|---|---|---|
| 3 | ROOF HEADLINING ASSEMBLY | - | - | - | - |
| 4 | INITIALIZATION AFTER RECONNECTING BATTERY TERMINAL | - | - | - | () |
PROCEDURE

 86101J 1.INSTALL NO. 2 ANTENNA CORD SUB-ASSEMBLY
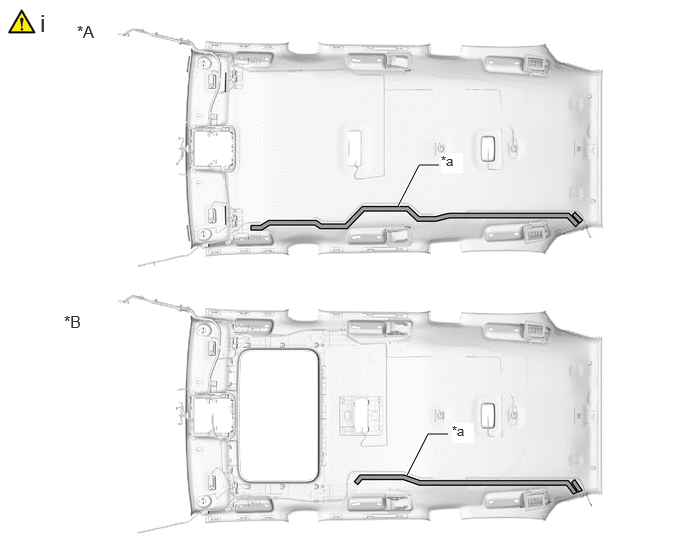
| *A | for Normal Roof | *B | for Moon Roof |
| *a | Marking | - | - |

|
Double-sided Butyl Tape | - | - |
Apply the double-sided butyl tape to the roof headlining assembly while aligning the tape with the markings on the roof headlining assembly.
for Normal Roof:
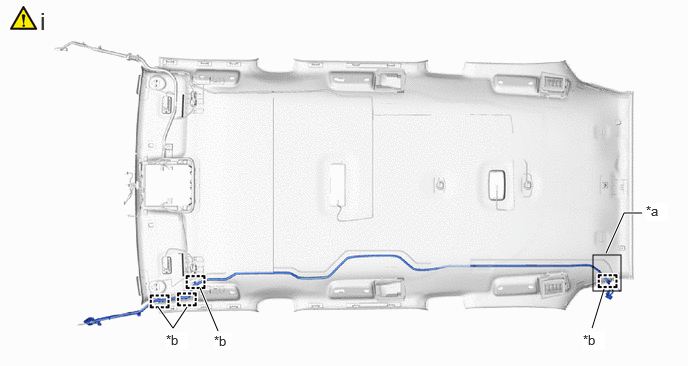
| *a | Adjustment Area | *b | Clamp |
Attach the clamp to install the No. 2 antenna cord sub-assembly to the roof headlining assembly as shown in the illustration.
- NOTICE:
-
·
Make sure that there are no gaps between the roof headlining assembly and No. 2 antenna cord sub-assembly, and that the No. 2 antenna cord sub-assembly is not twisted.
·Make sure the No. 2 antenna cord assembly is securely installed. If any part of the No. 2 antenna cord sub-assembly is loose, it will cause an abnormal noise.
·Use the adjustment area to accommodate any excess length of the No. 2 antenna cord sub-assembly.
for Moon Roof:
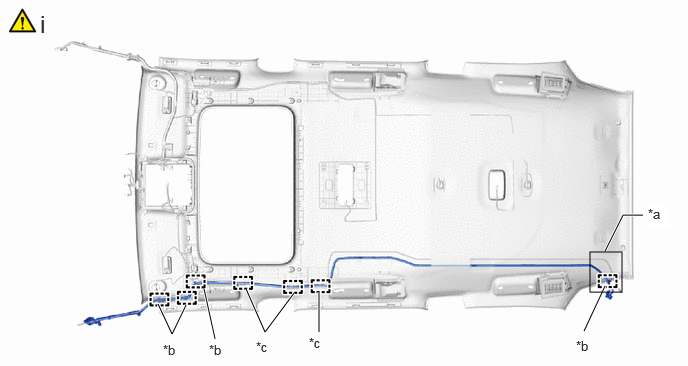
| *a | Adjustment Area | *b | Clamp |
| *c | Guide | - | - |
Attach the clamp and guide to install the No. 2 antenna cord sub-assembly to the roof headlining assembly as shown in the illustration.
- NOTICE:
-
·
Make sure that there are no gaps between the roof headlining assembly and No. 2 antenna cord sub-assembly, and that the No. 2 antenna cord sub-assembly is not twisted.
·Make sure the No. 2 antenna cord assembly is securely installed. If any part of the No. 2 antenna cord sub-assembly is loose, it will cause an abnormal noise.
·Use the adjustment area to accommodate any excess length of the No. 2 antenna cord sub-assembly.
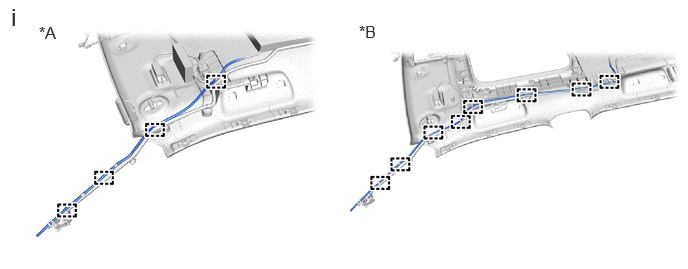
| *A | for Normal Roof | *B | for Moon Roof |
Attach the guide to install the washer hose assembly.
63342 2.INSTALL NO. 2 ROOF SILENCER PAD (for Normal Roof)
|
|
Click here() |
3.INSTALL ROOF HEADLINING ASSEMBLY
4. INITIALIZATION AFTER RECONNECTING BATTERY TERMINAL
Click hereGeneral>SETUP>WHEN DISCONNECTING OR RECONNECTING BATTERY TERMINAL>WORK PROCEDURE
- HINT:
-
When disconnecting and reconnecting the battery, there is an automatic learning function that completes learning when the respective system is used.
-
Click hereGeneral>SETUP>WHEN DISCONNECTING OR RECONNECTING BATTERY TERMINAL>AUTOMATIC LEARNING CHART