REAR SUSPENSION TOE CONTROL LINK REMOVAL
CAUTION / NOTICE / HINT
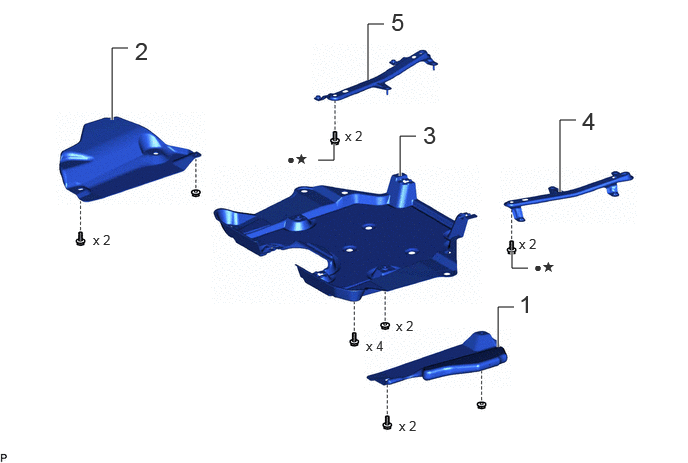
| Procedure | Part Name Code | 
|

|

|
|
|---|---|---|---|---|---|
| 1 | NO. 2 DIFFERENTIAL SUPPORT PROTECTOR | 52384C | - | - | - |
| 2 | NO. 1 DIFFERENTIAL SUPPORT PROTECTOR | 52383E | - | - | - |
| 3 | REAR SUSPENSION BRACE COVER | 53661B | - | - | - |
| 4 | REAR SUSPENSION MEMBER BRACE LH | 52296 | - | - | - |
| 5 | REAR SUSPENSION MEMBER BRACE RH | 52295 | - | - | - |
| ● | Non-reusable part | ★ | Precoated part |
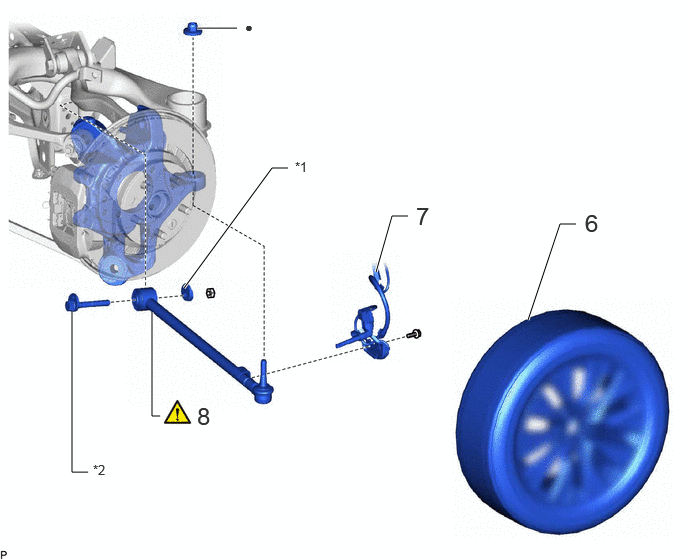
| Procedure | Part Name Code |
|
|
|
|
|---|---|---|---|---|---|
| 6 | REAR WHEEL | - | - | - | - |
| 7 | REAR SKID CONTROL SENSOR WIRE LH | 89516P | - | - | - |
| 8 | TOE CONTROL LINK SUB-ASSEMBLY LH | 48706B | ( ) |
- | - |
| *1 | REAR NO. 2 SUSPENSION TOE ADJUST PLATE | *2 | REAR SUSPENSION TOE ADJUST CAM SUB-ASSEMBLY |
| ● | Non-reusable part | - | - |
CAUTION / NOTICE / HINT
The necessary procedures (adjustment, calibration, initialization, or registration) that must be performed after parts are removed, installed, or replaced during the toe control link removal/installation are shown below.
- Necessary Procedure After Parts Removed/Installed/Replaced:
Replacement Part or Procedure Necessary Procedures Effects/Inoperative when not Performed Link Suspension, tires, etc.* ·Measurement of ultrasonic sensor detection angle
·Ultrasonic sensor detection angle registration
·Parking support brake system
·Advanced park
w/ Advanced Park:
()
w/o Advanced Park:
()
Rear television camera assembly optical axis (Back camera position setting) Parking assist monitor system ( )
·Parking assist ECU initialization
·Adjust steering angle
·Rear television camera view adjustment (for Rear camera detection system)
Panoramic view monitor system ( )
Perform headlight ECU sub-assembly LH initialization Automatic headlight beam level control system ( )
Wheel alignment adjustment Parking brake bedding Electric parking brake system ( )
- HINT:
- ·
Use the same procedure for the RH and LH side.
·The following procedure is for the LH side.
PROCEDURE

 52384C
1.REMOVE NO. 2 DIFFERENTIAL SUPPORT PROTECTOR
52383E
2.REMOVE NO. 1 DIFFERENTIAL SUPPORT PROTECTOR
53661B
3.REMOVE REAR SUSPENSION BRACE COVER
52296
4.REMOVE REAR SUSPENSION MEMBER BRACE LH
52295
5.REMOVE REAR SUSPENSION MEMBER BRACE RH
Use the same procedure as for the LH side.
6.REMOVE REAR WHEEL
89516P
7.DISCONNECT REAR SKID CONTROL SENSOR WIRE LH
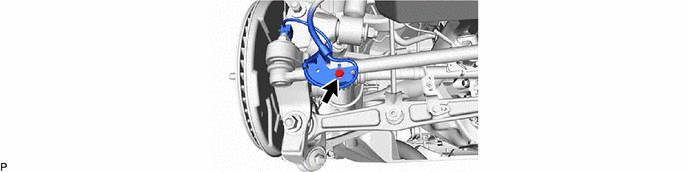
48706B
8.REMOVE TOE CONTROL LINK SUB-ASSEMBLY LH
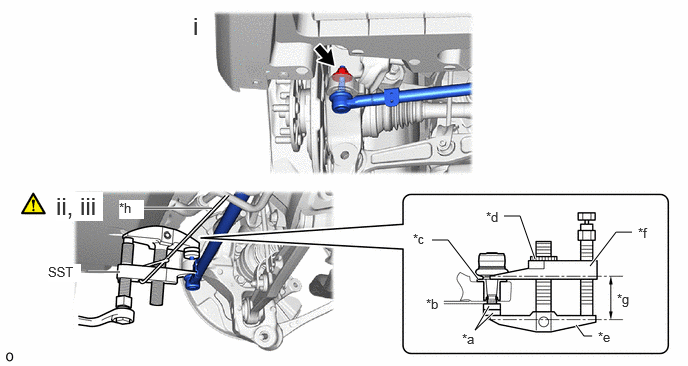
| *a | SST (Spacer B) | *b | 1 mm (0.0394 in.) |
| *c | Spacer | *d | Center Nut |
| *e | Body | *f | Claw |
| *g | Parallel | *h | String |
Remove the nut.
Install 2 SST (spacer B) onto the toe control link sub-assembly LH so that there is a space of approximately 1 mm (0.0394 in.) between the arm and spacers.
- SST
- 09960-20010 (09961-02060)
- NOTICE:
- ·
Make sure to install the spacers (SST spacer B) as the rear axle carrier sub-assembly LH spacer may shift.
·As SST may become damaged, make sure the space between the arm and spacers is not 1 mm (0.0394 in.) or less.
Using SST, disconnect the toe control link sub-assembly LH from the rear axle carrier sub-assembly LH.
- SST
- 09960-20010 (09961-02010)
- NOTICE:
- ·
Apply molybdenum grease to the bolt threads and end of the SST bolt.
·Do not damage the dust cover.
·As the dust cover may be damaged, adjust SST with the center nut so that the body and claw are parallel.
·Make sure to tie the string of SST to the vehicle to prevent SST from dropping.
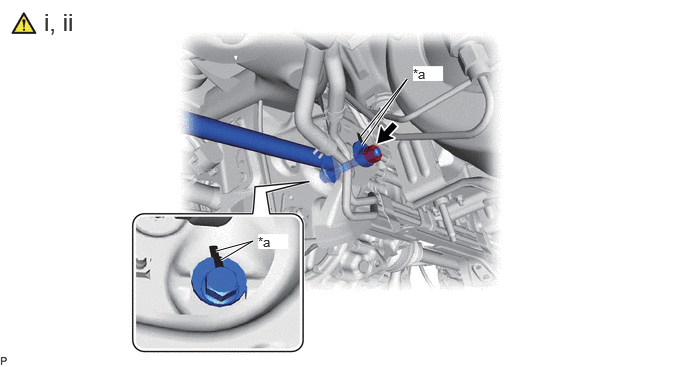
| *a | Matchmark | - | - |
Place matchmarks on the rear suspension toe adjust cam sub-assembly, rear No. 2 suspension toe adjust plate and rear suspension member sub-assembly.
Remove the nut, rear suspension toe adjust cam sub-assembly, rear No. 2 suspension toe adjust plate and toe control link sub-assembly LH.