FC CONTROL FC CONTROL SYSTEM P1E9011 FC Positive Contactor Control Circuit Short to Ground P1E9015 FC Positive Contactor Control Circuit Short to Battery or Open
DESCRIPTION
Refer to high voltage system diagram for the System Description.
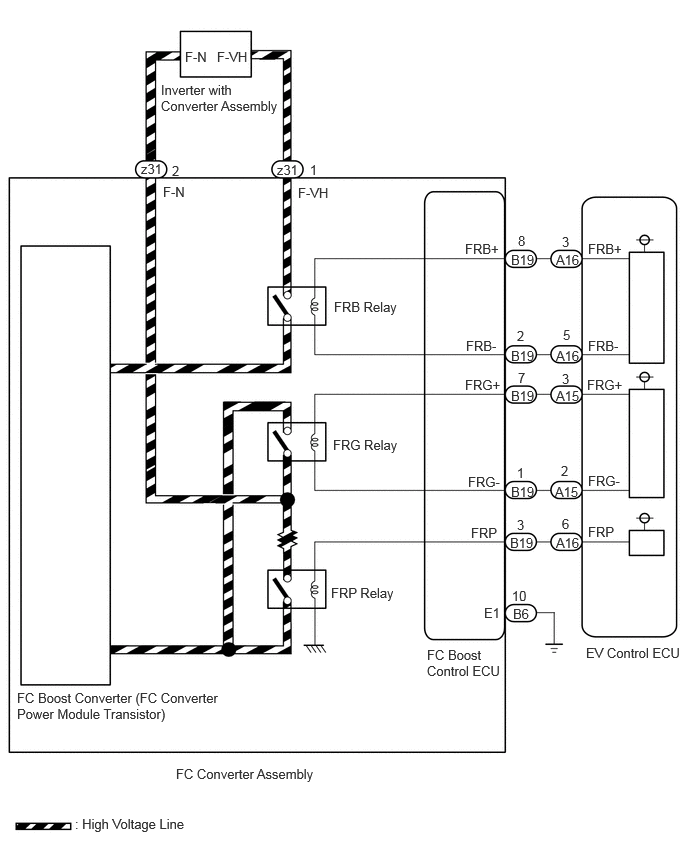
The FC Stack Main Relays are the relays that connect or disconnect the high voltage power system in accordance with commands from the EV control ECU.
The FCR system is composed of 2 FC stack main relays and 1 FC precharge junction assembly (relay and regulating resistor). The FC stack main relay and FC precharge junction assembly are located in the FC converter assembly.
To connect to the high voltage power system, the vehicle will first turn on FRP and FRB to charge the vehicle through the system main resistor. Then, FRP will be turned off after FRG is turned on. To shut off the high voltage power system, FRB and FRG are turned off.
| DTC No. | Detection Item | DTC Detection Condition | Trouble Area | Warning Indicate | DTC Output from | Priority |
|---|---|---|---|---|---|---|
| P1E9011 | FC Positive Contactor Control Circuit Short to Ground | The drive monitor voltage is less than 0.1 V during FC stack main relay positive side (FRB) relay ON control.
Primary circuit of FRB is malfunctioning. (1 trip detection logic) |
·
Wire harness or connector ·
FC boost control ECU ·
FC stack main relay (FRB) ·
No. 1 FC converter wire ·
No. 2 FC converter wire ·
EV control ECU |
Master Warning: Comes on | EV | A |
| P1E9015 | FC Positive Contactor Control Circuit Short to Battery or Open | The drive monitor voltage continues to be more than 2.9 V during FC stack main relay positive side (FRB) relay ON control.
Primary circuit of FRB is malfunctioning. (1 trip detection logic) |
·
Wire harness or connector ·
FC boost control ECU ·
FC stack main relay (FRB) ·
No. 1 FC converter wire ·
No. 2 FC converter wire ·
EV control ECU |
Master Warning: Comes on | EV | A |
| DTC No. | Data List |
|---|---|
| P1E9011 | ·
VL-Voltage before Boosting ·
FCDC Output Voltage ·
FC Precharge Relay Status ·
FC Positive Relay Drive Status ·
FC Negative Relay Drive Status ·
FC Precharge Relay Drive Request ·
FC Negative Relay Drive Request ·
FC Positive Relay Drive Request ·
FC Converter Shutdown Request ·
Motor Inverter Shutdown Status ·
FC Air Compressor Gate Shutdown Request |
| P1E9015 |
WIRING DIAGRAM
CAUTION / NOTICE / HINT
- CAUTION:
- ·
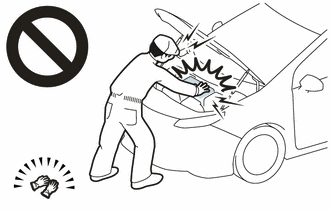
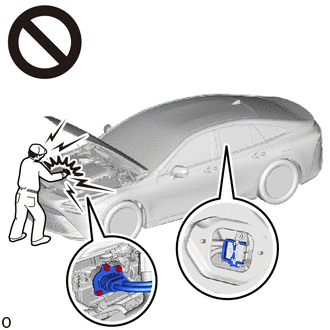
Before the following operations are conducted, take precautions to prevent electric shock by turning the ignition switch off, wearing insulated gloves, and removing the EV supply battery assembly service plug grip and FC converter power outlet cable (inverter with converter assembly) on FC converter side.
Make sure to remove the EV supply battery assembly service plug grip first.
-Inspecting the high-voltage system
-Disconnecting the low voltage connector of the inverter with converter assembly
-Disconnecting the low voltage connector of the EV supply battery assembly
-Disconnecting the low voltage connector of the FC converter assembly
·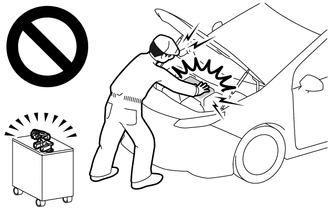
After removing the service plug grip from the EV supply battery assembly, put it in your pocket to prevent other technicians from accidentally reconnecting it while you are working on the high-voltage system. After removing the FC converter power outlet cable (inverter with converter assembly) on FC converter side and use the "HIGH-VOLTAGE, DO NOT TOUCH" sign to notify other technicians that you are working on the high-voltage system.
·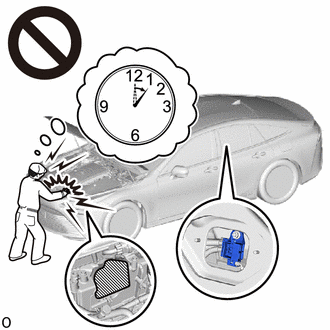
After removal of the EV supply battery assembly service plug grip and FC converter power outlet cable (inverter with converter assembly) on FC converter side, wait for at least 10 minutes before touching the high-voltage connectors and terminals. After waiting for 10 minutes, check the voltage at the terminals in the inspection point in the inverter with converter assembly. The voltage should be 0 V before beginning work.
- HINT:
-
At least 10 minutes are necessary to discharge the high-voltage capacitors inside the inverter with converter assembly and FC stack assembly.
·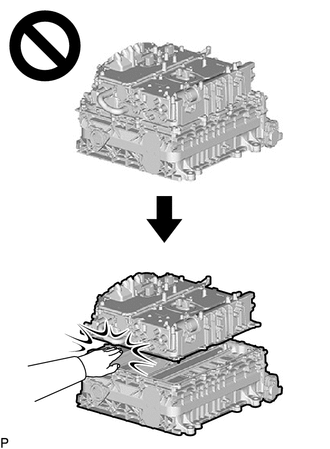
Since high voltage accumulates within the FC stack assembly with FC converter, never perform the work of separating the FC stack assembly with FC converter into the FC converter assembly and FC stack assembly without first performing electrical charge discharge (forced electrical charge discharge or electrical charge self-discharge), because doing so is dangerous.
Click hereEngine / Hybrid System>FC CONTROL>FC STACK>REMOVAL
·Removing and installing the FC stack assembly without first discharging the electrical charge may result in an electric shock due to the high voltage circuit.
- NOTICE:
- ·
This vehicle performs FC system shutdown process after turning the ignition switch off from ON (READY). Therefore, after the ignition switch is turned off from ON (READY), do not perform any work on the electrical system for at least 10 minutes including removing connectors or disconnecting the negative (-) auxiliary battery terminal.
·When the EV control ECU determines that the temperature of FC system components is below 0°C (32°F) when the vehicle is parked with the ignition switch off, it operates the FC air compressor, hydrogen pump and FC cooling water pump for a maximum of 180 seconds to drain the FC stack assembly. When performing inspection or repairs with the ignition switch off (not ON or ON (READY)), disconnect the cable from the negative (-) auxiliary battery terminal before performing work. (If the auxiliary battery voltage is needed to conduct inspection, perform the inspection in an environment with an ambient temperature of 10°C (50°F) or higher.)
- HINT:
- ·
If DTC P1E9011 or P1E9015 is output, the ignition switch cannot be turned to ON (READY).
·After the repair, clear the DTCs, perform the following procedure and check that the same DTC (including pending DTC) is not output.
(a)Turn the ignition switch off and wait for 10 minutes or more.
(b)Turn the ignition switch to ON (READY) and wait for 30 seconds or more.
(c)Turn the ignition switch off and wait for 10 minutes or more.
PROCEDURE
OK
NG
Click hereEngine / Hybrid System>FC CONTROL>FC CONTROL SYSTEM>P1D0619
- Result:
Result Proceed to OK A NG (The connector is not connected securely) B NG (The terminals are not making secure contact or are deformed, or water or foreign matter exists in the connector) C
A
B
C
Pre-procedure1
Disconnect the EV control ECU connector.
Procedure1
Measure the resistance according to the value(s) in the table below.
- Standard Resistance:
Tester Connection Condition Specified Condition Click Location & Routing(A16)Location & Routingewd_type=routing;type=c;code=A16
Click Connector(A16)Instrument Panel>Front Compartment Main Wire>EV Control ECUewd_type=component;type=c;code=A16;pinno=3,5
A16-3 (FRB+) - A16-5 (FRB-) Ignition switch off 11.07 to 13.53 Ω
- Result:
Proceed to OK NG
Post-procedure1
Reconnect the EV control ECU connector.
OK
NG
- CAUTION:
-
Be sure to wear insulated gloves.
Pre-procedure1
Check that the service plug grip is not installed to EV supply battery assembly and the FC converter power outlet cable (inverter with converter assembly) is not connected to the FC converter assembly.
- NOTICE:
-
After removing the EV supply battery assembly service plug grip and FC converter power outlet cable (inverter with converter assembly) on FC converter side, do not turn the ignition switch to ON (READY), unless instructed by the repair manual because this may cause a malfunction.
Remove the electric heater sub-assembly.
Disconnect the FC converter assembly connector.
Disconnect the EV control ECU connector.
Procedure1
Measure the resistance according to the value(s) in the table below.
- Standard Resistance:
Tester Connection Condition Specified Condition Click Location & Routing(A16,B19)Location & Routingewd_type=routing;type=c,c;code=A16,B19
Click Connector(A16)Instrument Panel>Front Compartment Main Wire>EV Control ECUewd_type=component;type=c;code=A16;pinno=3,5
Click Connector(B19)Engine Compartment>No. 2 Stack Wire>FC Converter Assemblyewd_type=component;type=c;code=B19;pinno=8,2
A16-3 (FRB+) - B19-8 (FRB+) Ignition switch off Below 1 Ω A16-5 (FRB-) - B19-2 (FRB-) Ignition switch off Below 1 Ω A16-3 (FRB+) or B19-8 (FRB+) - Body ground and other terminals Ignition switch off 10 kΩ or higher A16-5 (FRB-) or B19-2 (FRB-) - Body ground and other terminals Ignition switch off 10 kΩ or higher
- Result:
Proceed to OK NG
Post-procedure1
Reconnect the EV control ECU connector.
Reconnect the FC converter assembly connector.
Install the electric heater sub-assembly.
OK
Replace the FC converter and FC stack assembly components listed below.
Click hereEngine / Hybrid System>FC CONTROL>CONVERTER ASSEMBLY>REMOVAL
FC boost control ECU
FC stack main relay (FRB)
No. 1 FC converter wire
No. 2 FC converter wire
- HINT:
- ·
Refer to the parts location for the FC converter and FC stack assembly components.
Click hereEngine / Hybrid System>FC CONTROL>FC CONTROL SYSTEM>PARTS LOCATION
·Refer to the system description for the parts location of the FC converter and FC stack assembly components.
Click hereEngine / Hybrid System>FC CONTROL>FC CONTROL SYSTEM>SYSTEM DESCRIPTION
NG