REASSEMBLY
Removal / installation · Vehicles built from Nov 2005
- HINT:
- A bolt without a torque specification is shown in the standard bolt chart (Click here).
| 1. INSTALL STOPPER |
| 2. INSTALL CUSHION |

Remove the 2 cushions.
| 3. INSTALL BACK DOOR SIDE FEMALE STOPPER |
Install the stopper with the 2 bolts.
| 4. INSTALL BACK DOOR CHECK ASSEMBLY |
Apply MP grease to the sliding areas of the door check.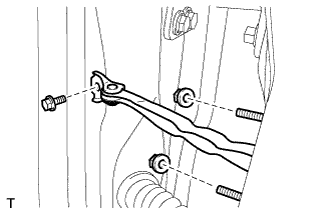

Install the door check to the door panel with the 2 nuts.
- Torque:
- 5.5 N*m{ 56 kgf*cm , 49 in.*lbf } for nut
Apply adhesive to the bolt.
- Adhesive:
- Toyota Genuine Adhesive 1324, Three Bond 1324 or equivalent
Install the door check to the body panel with the bolt.
- Torque:
- 30 N*m{ 306 kgf*cm , 22 ft.*lbf } for bolt
| 5. INSTALL BACK DOOR OUTSIDE HANDLE FRONT PAD |
Attach the 2 claws to install the pad.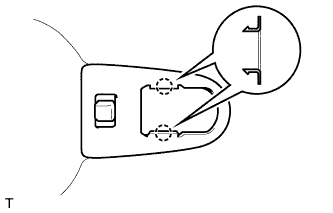
| 6. INSTALL BACK DOOR OUTSIDE HANDLE REAR PAD |
Attach the 2 claws to install the pad.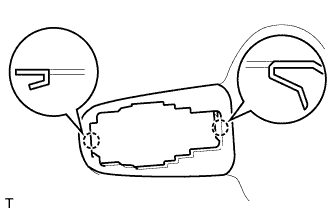
| 7. INSTALL BACK DOOR OUTSIDE HANDLE FRAME SUB-ASSEMBLY |
Install the front door lock open rod.
Attach the claw and clip to install the frame.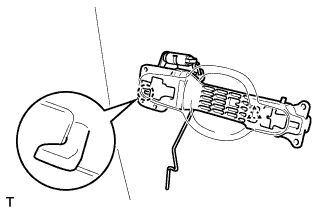
Using a T30 "torx" socket, install the screw.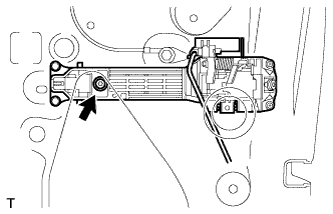
- Torque:
- 4.0 N*m{ 41 kgf*cm , 35 in.*lbf }
w/ Entry and Start System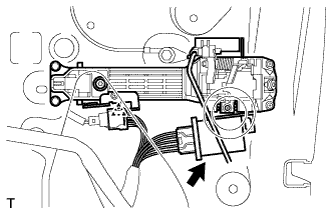
Connect the clamp and connector.
| 8. INSTALL BACK DOOR OUTSIDE HANDLE |
w/ Entry and Start System
Connect the connector.
Install the handle by pushing and sliding it in the direction indicated by the arrows in the illustration.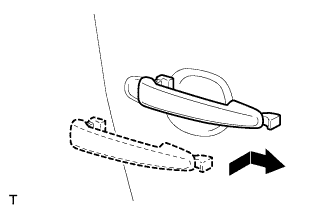
| 9. INSTALL BACK DOOR OUTSIDE HANDLE COVER |
Using a T30 "torx" socket, install the cover with the screw.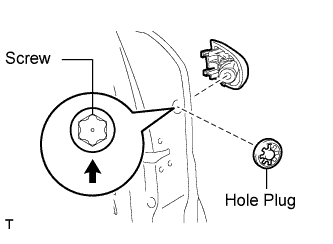
- Torque:
- 4.0 N*m{ 41 kgf*cm , 35 in.*lbf }
Install the hole plug.
| 10. INSTALL BACK DOOR LOCK ASSEMBLY |
Apply MP grease to the sliding and rotating areas of the back door lock.
Install a new door lock wire harness packing.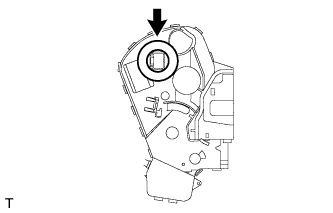
- NOTICE:
- When reinstalling the door lock, always use new packing.
- Do not allow grease or dirt to contaminate the gap between the door panel and packing.
- Old or damaged packing cannot effectively protect against water which can damage the door lock.
- When reinstalling the door lock, always use new packing.
Connect the control rod into the door lock, and then set it to the door panel.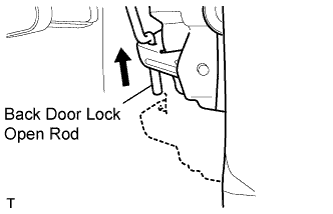
- NOTICE:
- Make sure that the rod is securely engaged with the lock.
Apply adhesive to the threads of the 3 screws.
- Adhesive:
- Toyota Genuine Adhesive 1324, Three Bond 1324 or equivalent
Using a T30 "torx" socket, install the door lock with the 3 screws.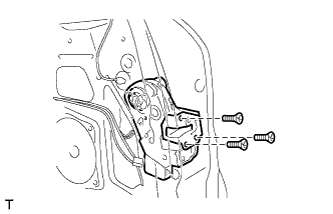
- Torque:
- 5.0 N*m{ 51 kgf*cm , 44 in.*lbf }
Connect the connector.
| 11. INSTALL BACK DOOR SERVICE HOLE COVER |
Apply butyl tape to the door panel, then install a new back door service hole cover as shown in the illustration.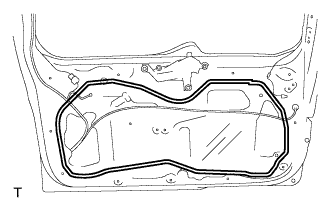
- HINT:
- When installing the service hole cover, pull out the links and connectors through the service hole cover.
- There should be no wrinkles or folds after attaching the service hole cover.
- After attaching the service hole cover, check the sealing quality.
- When installing the service hole cover, pull out the links and connectors through the service hole cover.
Connect each connector.
| 12. INSTALL REAR WIPER MOTOR ASSEMBLY |
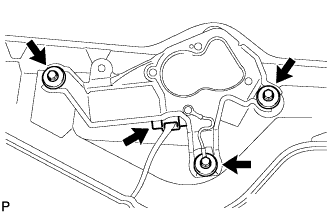 |
Install the wiper motor with the 3 bolts.
- Torque:
- 5.5 N*m{ 56 kgf*cm , 49 in.*lbf }
Connect the connector.
| 13. INSTALL UPPER BACK DOOR OUTSIDE GARNISH SUB-ASSEMBLY RH |
Attach the 6 clips to install the back door outside garnish.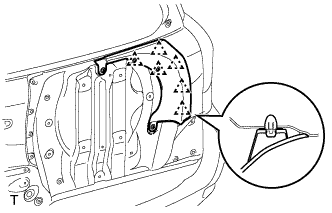
| 14. INSTALL LOWER BACK DOOR OUTSIDE GARNISH SUB-ASSEMBLY RH |
Install the back door outside garnish.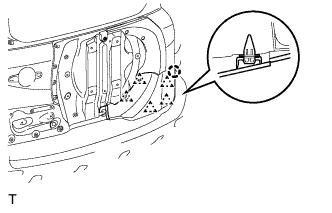
Attach the claw and the 5 clips.
| 15. INSTALL UPPER BACK DOOR OUTSIDE GARNISH SUB-ASSEMBLY LH |
Attach the 6 clips to install the back door outside garnish.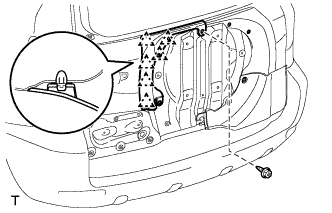
Install the screw.
| 16. INSTALL LOWER BACK DOOR OUTSIDE GARNISH SUB-ASSEMBLY LH |
Attach the 8 clips to install the back door outside garnish.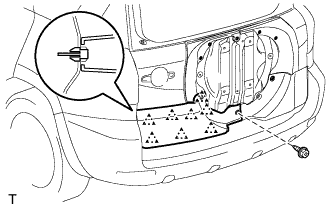
Install the screw.
| 17. INSTALL LOWER BACK DOOR OUTSIDE GARNISH SUB-ASSEMBLY LH (w/ License Plate Light) |
Remove the screw and 7 clips.
Remove the back door outside garnish and disconnect the connector.
for 1 piece type:
Remove the 1 piece type license plate light (Click here).
for 2 piece type:
Remove the 2 piece type license plate lights (Click here).
| 18. INSTALL LOWER BACK DOOR OUTSIDE GARNISH SUB-ASSEMBLY LH (w/ Rear Fog Light) |
Install the rear fog light (Click here).
Connect the connector.
Attach the 8 clips to install the back door outside garnish.
| 19. INSTALL BACK DOOR OUTSIDE GARNISH CLIP (w/o Tire Carrier) |
Install the 2 clips with 2 screws.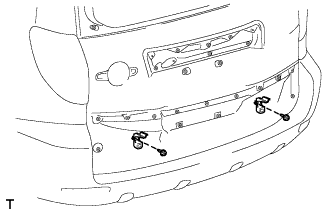
| 20. INSTALL LOWER BACK DOOR OUTSIDE GARNISH SUB-ASSEMBLY (w/o Tire Carrier) |
Attach the claw and the 15 clips.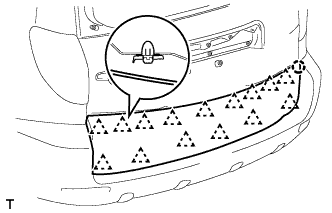
Install the back door outside garnish.
| 21. INSTALL TELEVISION CAMERA ASSEMBLY (w/ Parking Assist Monitor System) |
Install the television camera with the screw.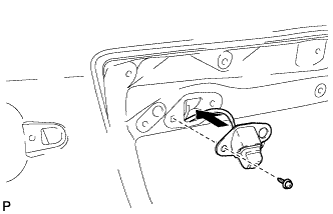
Attach the clamp and connect the television camera connector.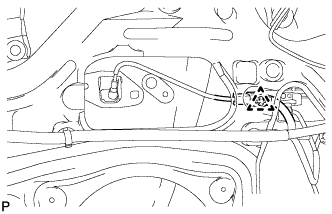
| 22. INSTALL BACK DOOR OUTSIDE GARNISH SUB-ASSEMBLY (w/o Tire Carrier) |
Install the 2 license plate lights (Click here).
Connect the connector.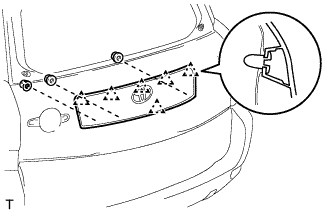
Attach the 6 clips and 3 nuts.
install the back door outside garnish.
| 23. INSTALL SPARE WHEEL CARRIER BRACKET SUB-ASSEMBLY (w/ Tire Carrier) |
w/o Breakaway Bolts:
Install the spare wheel carrier bracket.
Detach the 2 clips to install the carrier bracket.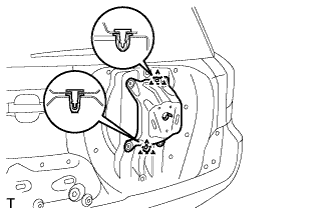
Install the 4 bolts.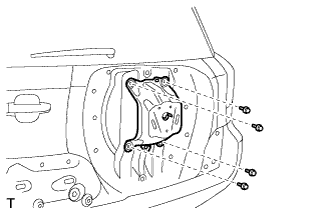
- Torque:
- 28 N*m{ 286 kgf*cm , 21 ft.*lbf }
w/ Breakaway Bolts:
Install the spare wheel carrier bracket.
Detach the 2 clips to install the carrier bracket.
Install the 2 bolts.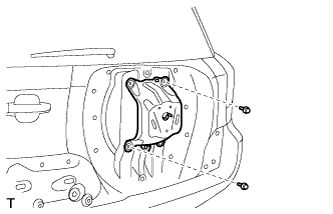
- Torque:
- 28 N*m{ 286 kgf*cm , 21 ft.*lbf }
Tighten the 2 new breakaway bolts until the bolt heads break off.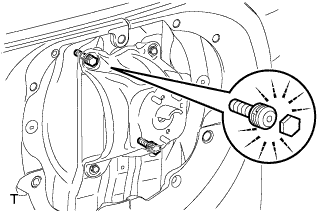
| 24. INSTALL CENTER STOP LIGHT ASSEMBLY |
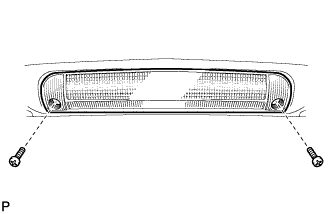 |
Install the center stop light with the 2 screws.
Connect the connector.
| 25. INSTALL REAR SPOILER |
Clean the vehicle body surface.
Using a heat light, heat the vehicle body surface.
If reusing the spoiler:
Clean the spoiler.Using a heat light, heat the spoiler.
Connect the center stop light connector.
Install the spoiler with 3 clips.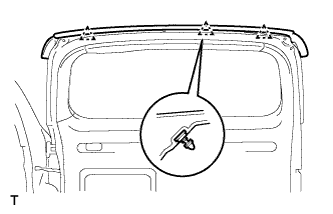
Install the 3 bolts.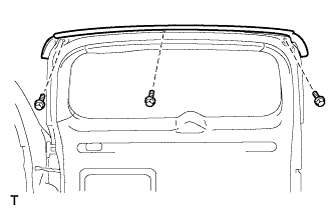
- Torque:
- 7.5 N*m{ 76 kgf*cm , 66 in.*lbf }
| 26. INSTALL REAR WIPER ARM AND BLADE ASSEMBLY |
Stop the wiper motor at the automatic stop position.
Clean the wiper arm serration with a round file or equivalent.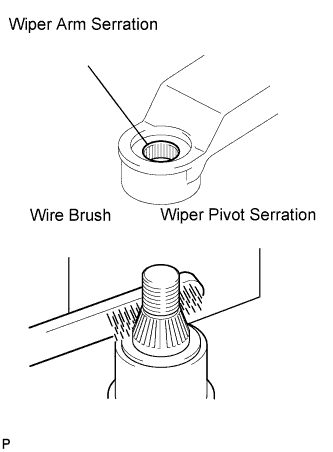
Clean the wiper pivot serration with a wire brush.
Install the arm and blade with the nut. Make sure that the arm and blade comes to the position shown in the illustration.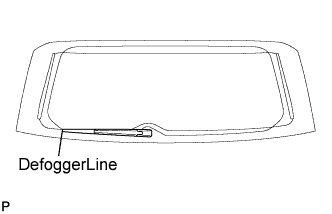
- Torque:
- 5.5 N*m{ 56 kgf*cm , 49 in.*lbf }
- HINT:
- Hold down the arm hinge by hand while tightening the nut.
- Install the arm and blade so that the rear wiper blade is aligned with the defogger line.
- Hold down the arm hinge by hand while tightening the nut.
Install the cap.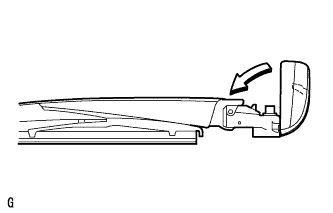
| 27. INSTALL BACK DOOR TRIM BOARD |
Install the back door trim pocket with the 5 screws.
Attach the 13 clips to install the trim board.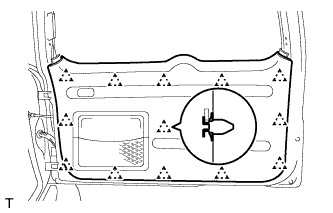
| 28. INSTALL BACK DOOR COURTESY LIGHT ASSEMBLY |
Install the bulb to the light.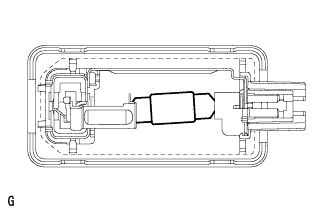
Attach the 4 claws to install the light shade.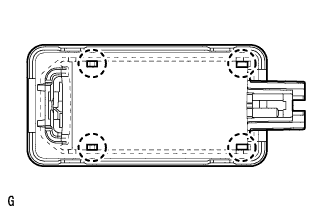
Install the light as shown in the illustration.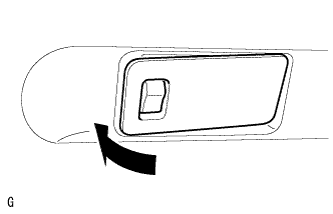
| 29. INSTALL BACK DOOR SIDE GARNISH LH |
Attach the 2 claws and 2 clips to install the garnish.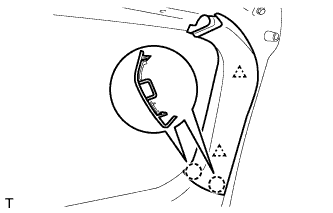
| 30. INSTALL BACK DOOR SIDE GARNISH RH |
- HINT:
- Use the same procedures described for the LH side.
| 31. INSTALL BACK DOOR CENTER GARNISH |
Attach the 4 claws and 4 clips to install the garnish.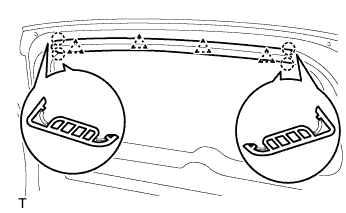
| 32. CONNECT CABLE TO NEGATIVE BATTERY TERMINAL |