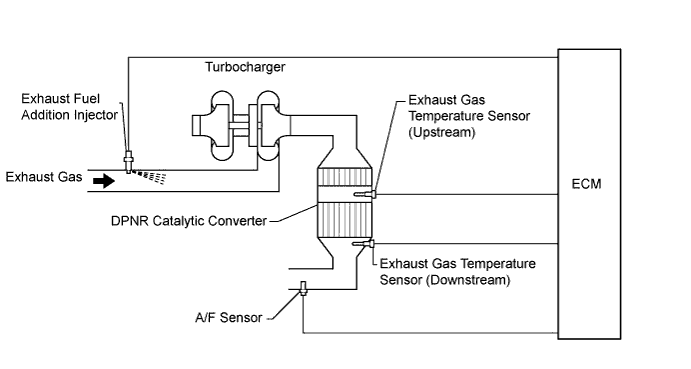
DTC P2047 Reductant Injector Circuit / Open (Bank 1 Unit 1) |
DTC P2048 Short to GND in Reductant Injector Circuit (Bank 1) |
DTC P2049 Short to B+ in Reductant Injector Circuit (Bank 1) |
| DTC Detection Drive Pattern | DTC Detection Condition | Trouble Area |
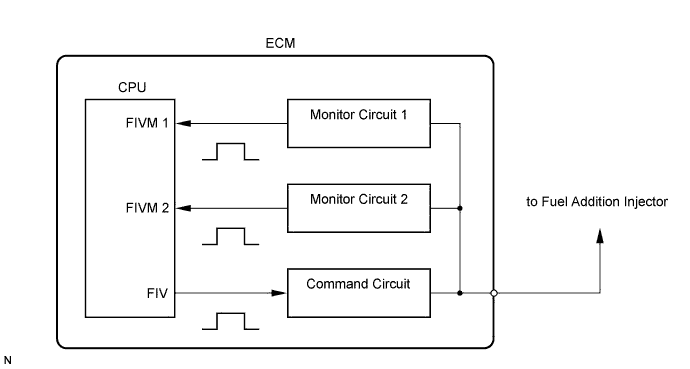
| Ignition switch ON for 3 seconds | With the exhaust fuel addition injector off, the FIVM1 output is high and the FIVM2 output is low for 3 seconds. (1 trip detection logic) |
|
| DTC Detection Drive Pattern | DTC Detection Condition | Trouble Area |
| Ignition switch ON for 1 second | With the exhaust fuel addition injector off, the FIVM1 output is high and the FIVM2 output is high for 0.16 seconds. (1 trip detection logic) |
|
| DTC Detection Drive Pattern | DTC Detection Condition | Trouble Area |
| Drive vehicle for 20 minutes (exhaust gas temperature is 250°C (482°F) or higher). | With the exhaust fuel addition injector on, the FIVM1 output is low and the FIVM2 output is low 7 or more times. (1 trip detection logic) |
|
| 1.INSPECT EXHAUST FUEL ADDITION INJECTOR (RESISTANCE) |
Inspect the exhaust fuel addition injector assembly (Click here).
|
| ||||
| OK | |
 |
| 2.CHECK TERMINAL VOLTAGE (POWER SOURCE) |
 |
Disconnect the exhaust fuel addition injector assembly connector.
Measure the voltage according to the value(s) in the table below.
| Tester Connection | Switch Condition | Specified Condition |
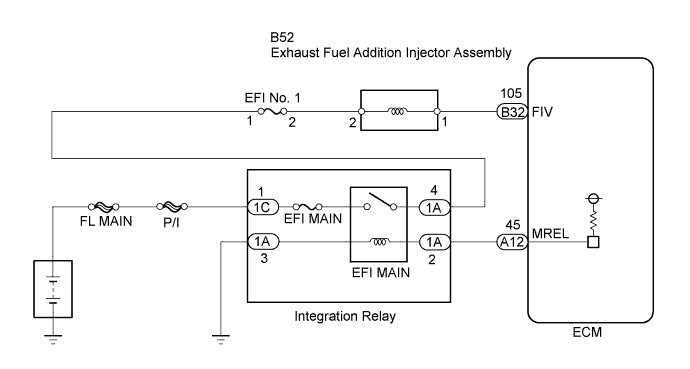
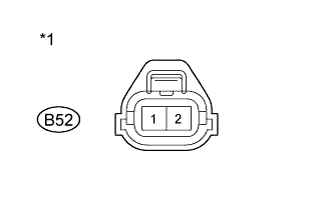
| B52-2 - Body ground | Ignition switch ON | 11 to 14 V |
| *1 | Front view of wire harness connector (to Exhaust Fuel Addition Injector Assembly) |
Reconnect the exhaust fuel addition injector assembly connector.
|
| ||||
| OK | |
|
| 3.CHECK HARNESS AND CONNECTOR (EXHAUST FUEL ADDITION INJECTOR - ECM) |
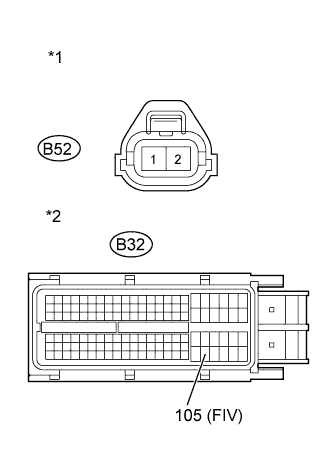 |
Disconnect the exhaust fuel addition injector assembly connector.
Disconnect the ECM connector.
Measure the resistance according to the value(s) in the table below.
| Tester Connection | Condition | Specified Condition |
| B52-1 - B32-105 (FIV) | Always | Below 1 Ω |
| Tester Connection | Condition | Specified Condition |
| B52-1 or B32-105 (FIV) - Body ground | Always | 10 kΩ or higher |
| *1 | Front view of wire harness connector (to Exhaust Fuel Addition Injector Assembly) |
| *2 | Front view of wire harness connector (to ECM) |
Reconnect the exhaust fuel addition injector assembly connector.
Reconnect the ECM connector.
|
| ||||
| OK | |
|
| 4.REPLACE ECM |
Replace the ECM (Click here).
|
| ||||
| 5.REPLACE EXHAUST FUEL ADDITION INJECTOR ASSEMBLY |
Replace the exhaust fuel addition injector (Click here).
|
| ||||
| 6.REPAIR OR REPLACE HARNESS OR CONNECTOR |
Repair or replace the harness or connector.
| NEXT | |
|
| 7.CONFIRM WHETHER MALFUNCTION HAS BEEN SUCCESSFULLY REPAIRED |
Connect the intelligent tester to the DLC3.
Clear the DTCs (Click here).
Drive the vehicle for 20 minutes.
Enter the following menus: Powertrain / Engine and ECT / DTC.
Confirm that the DTC is not output again.
| NEXT | ||
 | ||
| ||
