EB63 MANUAL TRANSMISSION / TRANSAXLE MANUAL TRANSAXLE ASSEMBLY REMOVAL
CAUTION / NOTICE / HINT
- NOTICE:
-
When the transaxle is removed, be sure to use a new clutch release with bearing cylinder and new installation bolts. Removal of the transaxle allows the compressed clutch release with bearing cylinder to return to its original position, and dust could damage the seal of the clutch release with bearing cylinder, possibly causing clutch fluid leaks.
PROCEDURE

 1.REMOVE ENGINE ASSEMBLY WITH TRANSAXLE
28100
2.REMOVE STARTER ASSEMBLY
3.REMOVE WIRE HARNESS CLAMP BRACKET
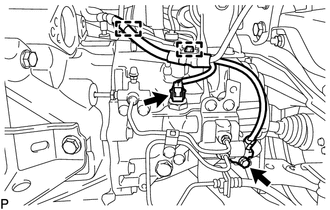
Remove the bolt and engine wire from manual transaxle assembly.
Disconnect the back-up light connector, 2 clamps and engine wire from the manual transaxle assembly.
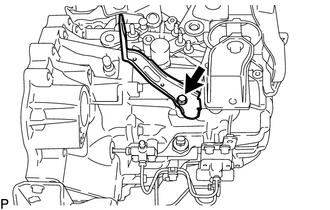
Remove the bolt and wire harness clamp bracket.
30300
4.REMOVE MANUAL TRANSAXLE ASSEMBLY
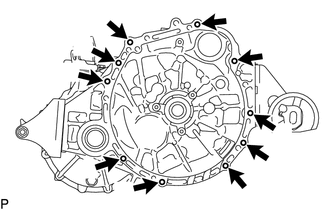
Remove the 10 bolts and manual transaxle assembly.
12311A
5.REMOVE FRONT ENGINE MOUNTING BRACKET
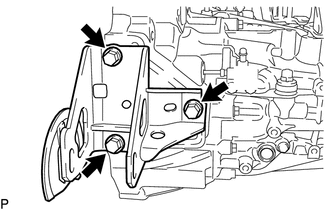
Remove the 3 bolts and front engine mounting bracket.
12325A
6.REMOVE ENGINE MOUNTING BRACKET LH
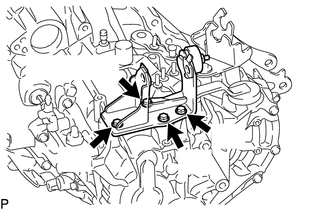
Remove the 4 bolts and engine mounting bracket LH.
12321A
7.REMOVE REAR ENGINE MOUNTING BRACKET
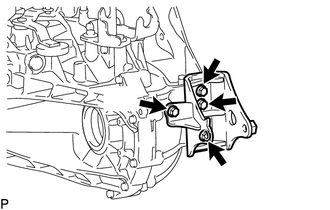
Remove the 4 bolts and rear engine mounting bracket.
31490
8.REMOVE CLUTCH ACCUMULATOR ASSEMBLY
31407B
9.REMOVE CLUTCH RELEASE BLEEDER SUB-ASSEMBLY
31400
10.REMOVE CLUTCH RELEASE WITH BEARING CYLINDER ASSEMBLY
33403K
11.REMOVE SPEEDOMETER DRIVEN HOLE COVER SUB-ASSEMBLY
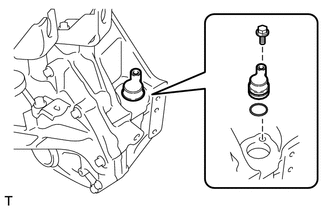
Remove the bolt and speedometer driven hole cover sub-assembly from the manual transmission case.
Remove the O-ring from the speedometer driven hole cover sub-assembly.