INTERIOR PANELS / TRIM FRONT CONSOLE BOX REMOVAL
CAUTION / NOTICE / HINT
- HINT:
- ·
Use the same procedure for RHD and LHD vehicles.
·The procedure listed below is for LHD vehicles.
PROCEDURE

 67913B
1.REMOVE FRONT DOOR SCUFF PLATE RH (for RHD)
- HINT:
-
Use the same procedure described for the LH side.
-
Click hereVehicle Interior>INTERIOR PANELS / TRIM>ROOF HEADLINING>REMOVAL
62111C
2.REMOVE COWL SIDE TRIM BOARD RH (for RHD)
- HINT:
-
Use the same procedure described for the LH side.
-
Click hereVehicle Interior>INTERIOR PANELS / TRIM>INSTRUMENT PANEL SAFETY PAD>REMOVAL
55606
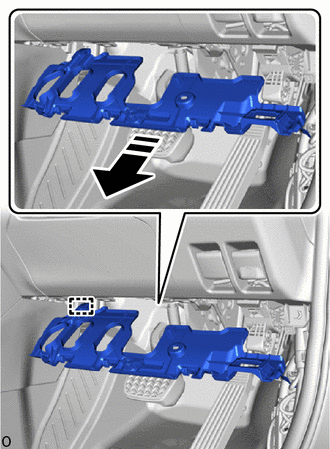
3.REMOVE NO. 1 INSTRUMENT PANEL UNDER COVER SUB-ASSEMBLY (for RHD)
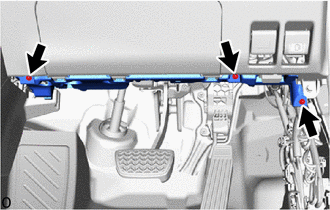
Remove the 3 screws.
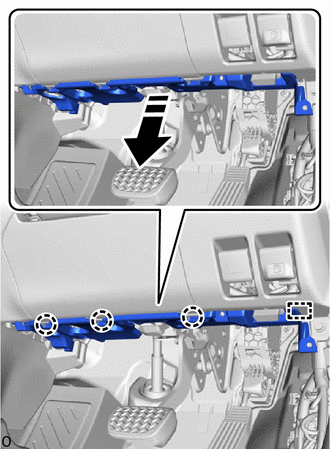

|
Remove in this Direction |
Detach the claw and guide and lower the No. 1 instrument panel under cover sub-assembly in the direction of the arrow shown in the illustration.
w/ Foot Light:
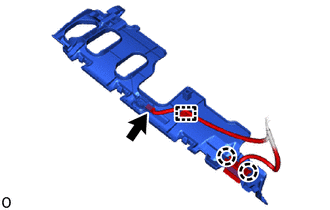
Disconnect the connector and detach the clamp.
Detach the claw and remove the DLC3.
w/o Foot Light:
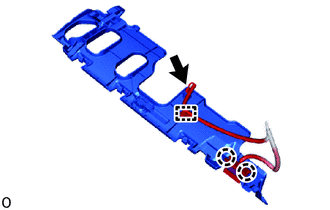
Detach the claw and remove the DLC3.
- HINT:
-
Even if there is no foot light, if there is a connector, disconnect the connector and detach the clamp.
|
|
Remove in this Direction |
Pull in the direction of the arrow shown in the illustration to detach the guide and remove the No. 1 instrument panel under cover sub-assembly.
33504F
4.REMOVE SHIFT LEVER KNOB SUB-ASSEMBLY (except Manual Transaxle)
for Automatic Transaxle:
for CVT:
K120: Click hereDrivetrain>K120 (MULTIDRIVE / CVT)>SHIFT LEVER KNOB>REMOVAL
K120F: Click hereDrivetrain>K120F (MULTIDRIVE / CVT)>SHIFT LEVER KNOB>REMOVAL
for HV Model:
33504F
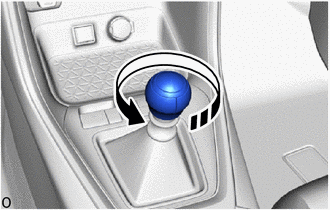
5.REMOVE SHIFT LEVER KNOB SUB-ASSEMBLY (for Manual Transaxle)
|
|
Remove in this Direction |
Twist the shift lever knob sub-assembly in the direction indicated by the arrow and remove it.
58804A
6.REMOVE UPPER CONSOLE PANEL SUB-ASSEMBLY
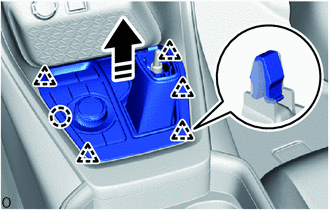
except Manual Transaxle:
|
|
Remove in this Direction |
Lift up in the direction indicated by the arrow shown in the illustration to detach the claw and clip and remove the upper console panel sub-assembly.
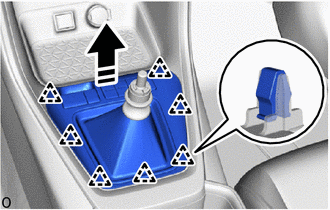
for Manual Transaxle:
|
|
Remove in this Direction |
Lift up in the direction indicated by the arrow shown in the illustration to detach the clip and remove the upper console panel sub-assembly.
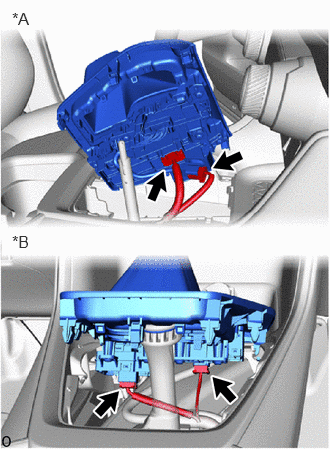
| *A | except Manual Transaxle |
| *B | for Manual Transaxle |
Disconnect the 2 connectors.
861C0
7.REMOVE MOBILE WIRELESS CHARGER CRADLE ASSEMBLY (w/ Wireless Charger)
58813
8.REMOVE UPPER CONSOLE BOX (w/o Wireless Charger)
Rotate in the direction indicated by the arrow (1) shown in the illustration to detach the clip.
Pull in the direction indicated by the arrow (2) shown in the illustration to detach the guide and remove the upper console box.
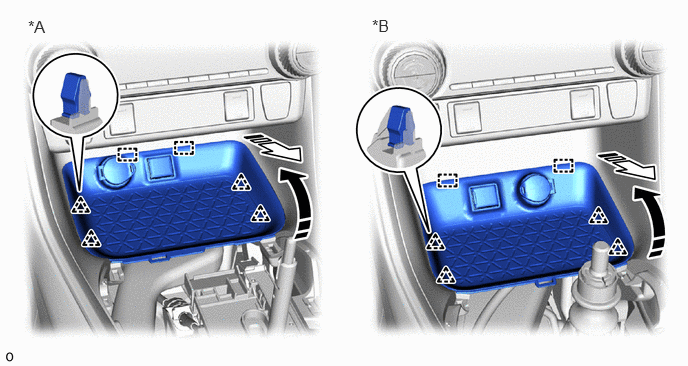
| *A | except Manual Transaxle | *B | for Manual Transaxle |
|
|
Remove in this Direction (1) | 
|
Remove in this Direction (2) |
w/ Radio Receiver:
Detach the clamp and disconnect the 2 connectors.
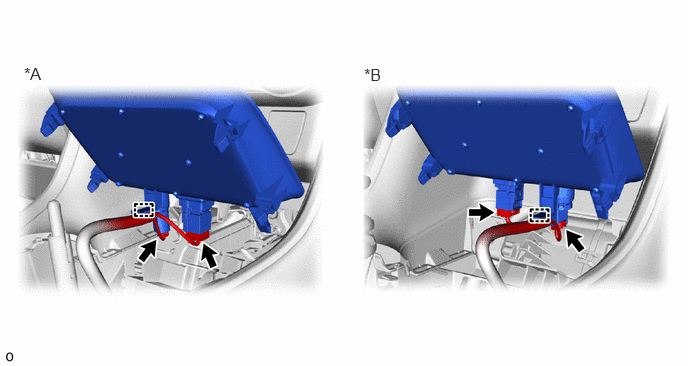
| *A | except Manual Transaxle | *B | for Manual Transaxle |
w/o Radio Receiver:
Detach the clamp and disconnect the connector.
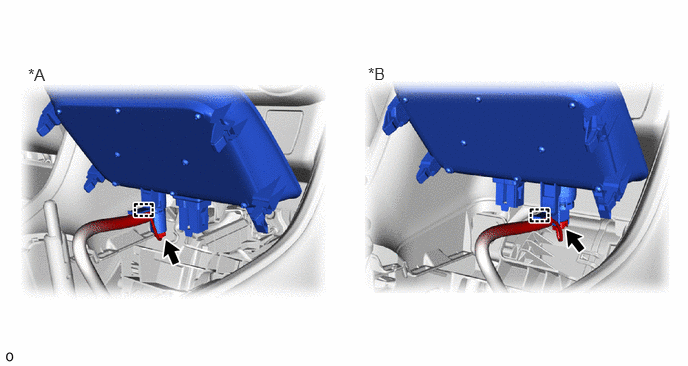
| *A | except Manual Transaxle | *B | for Manual Transaxle |
58805C
9.REMOVE REAR UPPER CONSOLE PANEL SUB-ASSEMBLY
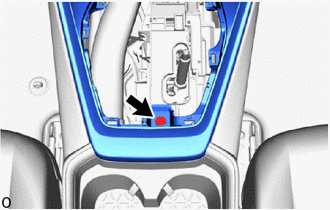
Remove the bolt.
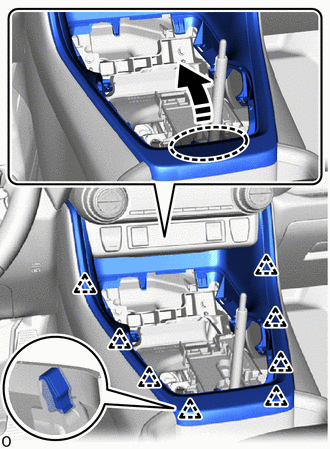

|
Place Hand Here |
|
|
Remove in this Direction |
Place your hand at the position shown in the illustration and lift up in the direction indicated by the arrow shown in the illustration to detach the clip.
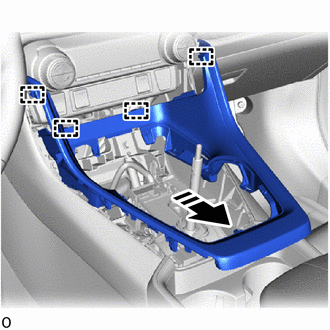
|
|
Remove in this Direction |
Pull in the direction indicated by the arrow shown in the illustration to detach the guide and remove the rear upper console panel sub-assembly.
58803C
10.REMOVE CONSOLE CUP HOLDER BOX SUB-ASSEMBLY
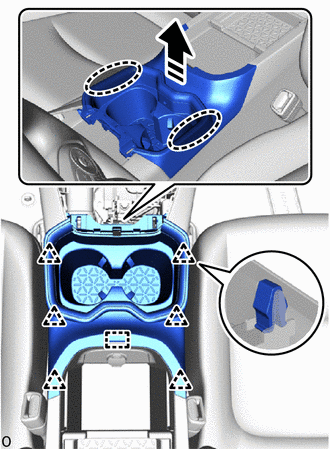
|
|
Place Hands Here |
|
|
Remove in this Direction |
Place both hands at the position shown in the illustration and lift up in the direction indicated by the arrow to detach the clip and guide and remove the console cup holder box sub-assembly.
w/ Illumination:
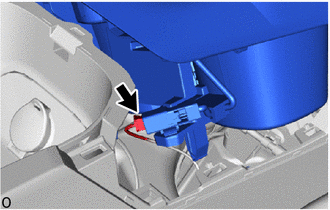
Disconnect the connector.
58903A
11.REMOVE REAR CONSOLE END PANEL SUB-ASSEMBLY
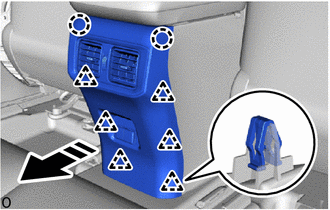
|
|
Remove in this Direction |
Pull in the direction indicated by the arrow to detach the clip and claw.
Disconnect each connector and remove the rear console end panel sub-assembly.
58817A
12.REMOVE FRONT NO. 2 CONSOLE BOX INSERT
Rotate in the direction indicated by the arrow (1) shown in the illustration to detach the clip.
Pull in the direction indicated by the arrow (2) shown in the illustration to detach the guide and remove the front No. 2 console box insert.
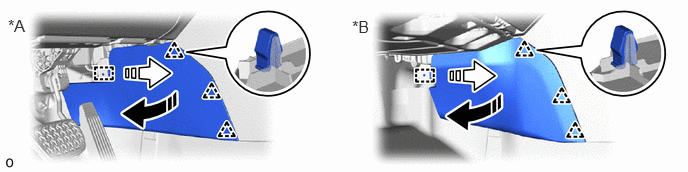
| *A | for LHD | *B | for RHD |
|
|
Remove in this Direction (1) |
|
Remove in this Direction (2) |
58816C
13.REMOVE FRONT NO. 1 CONSOLE BOX INSERT
Rotate in the direction indicated by the arrow (1) shown in the illustration to detach the clip.
Pull in the direction indicated by the arrow (2) shown in the illustration to detach the guide and remove the front No. 1 console box insert.
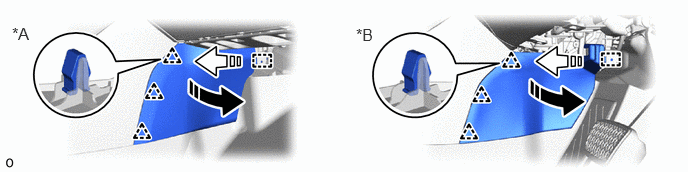
| *A | for LHD | *B | for RHD |
|
|
Remove in this Direction (1) |
|
Remove in this Direction (2) |
58825A
14.REMOVE CONSOLE BOX POCKET (w/Console Box Tray)
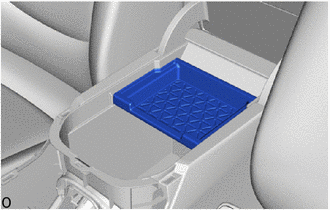
Remove the console box pocket.
58815F
15.REMOVE CONSOLE BOX CARPET
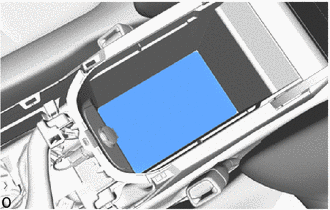
Remove the console box carpet.
58810J
16.REMOVE CONSOLE BOX ASSEMBLY
except Manual Transaxle:
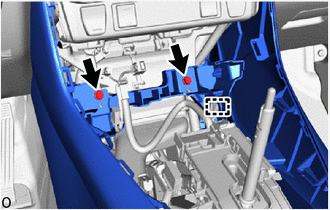
Detach the clamp and remove the 2 bolts.
for Manual Transaxle:
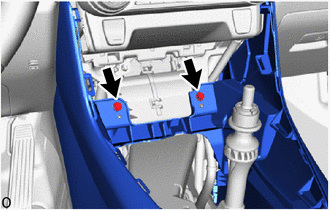
Remove the 2 bolts.
Disconnect each connector.
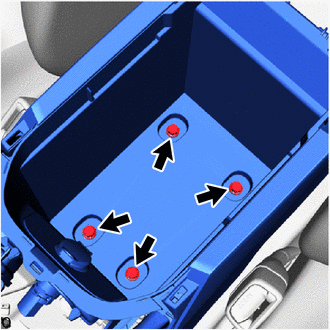
Remove the 4 bolts.
|
|
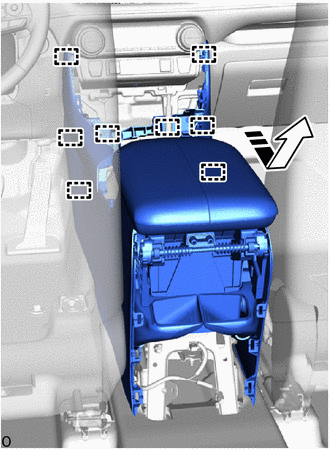
Remove in this Direction |
While avoiding the shift lever, pull in the direction indicated by the arrow shown in the illustration to detach the guide and remove the console box assembly.