SUPPLEMENTAL RESTRAINT SYSTEMS FRONT AIRBAG SENSOR INSTALLATION
CAUTION / NOTICE / HINT
- HINT:
- ·
Use the same procedure for the RH and LH sides.
·The procedure listed below is for the LH side.
PROCEDURE

 89174A
1.INSTALL FRONT AIRBAG SENSOR LH
Check that the ignition switch is off.
Check that the cable is disconnected from the negative (-) auxiliary battery terminal.
- CAUTION:
- ·
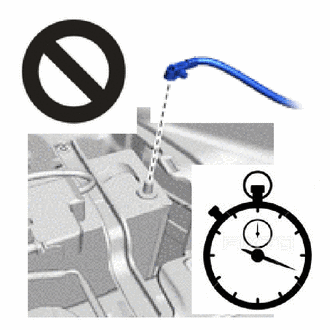
Wait at least 90 seconds after disconnecting the cable from the negative (-) auxiliary battery terminal to disable the SRS system.
·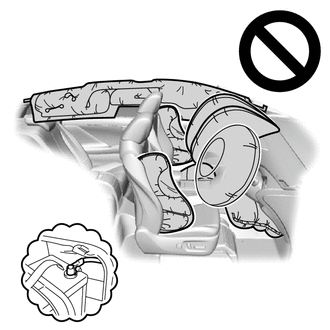
If this procedure is performed without disconnecting the negative (-) auxiliary battery terminal, the airbag may deploy even if an impact is applied only to the front airbag sensor LH. Therefore, make sure that the negative (-) auxiliary battery terminal is disconnected before performing this procedure.
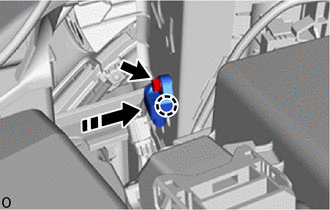

|
Install in this Direction |
Attach the claw and hold the front airbag sensor LH in place.
Install the bolt.
- Torque:
- 9.0 N*m (92 kgf*cm, 80 in.*lbf)
- NOTICE:
- ·
If the front airbag sensor LH has been dropped, replace it with a new one.
·When installing the front airbag sensor LH, be careful that the SRS wiring does not interfere with or is not pinched between other parts.
·Tighten the nut while holding the front airbag sensor LH because the front airbag sensor LH guide is easily damaged.
Check that there is no looseness in the installation parts of the front airbag sensor LH.
Connect the airbag connector.
- NOTICE:
-
When connecting any airbag connector, take care not to damage the airbag wire harness.
Before connecting the connector, check that the position of the housing lock is correct as shown in the illustration.
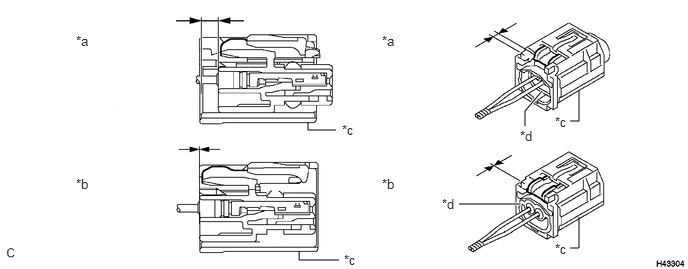
| *a | Correct | *b | Incorrect |
| *c | CPA | *d | Housing |
While holding the CPA, be sure to engage the connectors until they are locked and check that the CPA is in its original position (when locking, make sure that a click sound can be heard).
- NOTICE:
-
Do not push down the upper part of the CPA shown in the illustration when connecting the airbag connector.
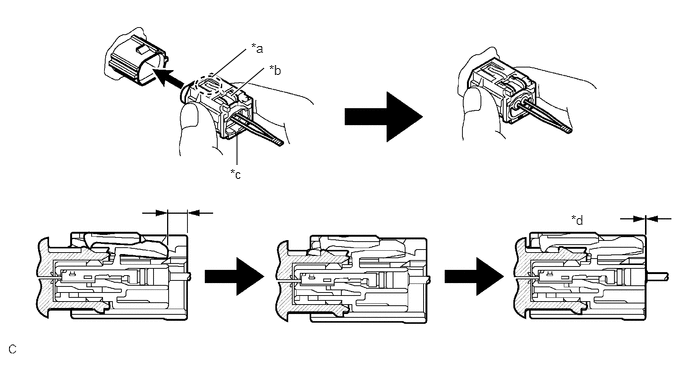
| *a | CPA Upper Part | *b | Housing Lock |
| *c | CPA | *d | Connection is Completed |
2.CONNECT CABLE TO NEGATIVE AUXILIARY BATTERY TERMINAL
for A25A-FKS:
for M20A-FKS:
for A25A-FXS:
Click hereGeneral>MAINTENANCE>A25A-FXS AUXILIARY BATTERY>INSTALLATION
for A25B-FXS:
Click hereGeneral>MAINTENANCE>A25B-FXS AUXILIARY BATTERY>INSTALLATION
- NOTICE:
-
When disconnecting the cable, some systems need to be initialized after the cable is reconnected.
-
Click hereGeneral>INTRODUCTION>REPAIR INSTRUCTION>INITIALIZATION
65351A
3.INSTALL BATTERY HOLE COVER (for HV Model)
58416K
4.INSTALL REAR NO. 2 FLOOR BOARD (for HV Model)
58410B
5.INSTALL DECK BOARD ASSEMBLY (for HV Model)
6. PERFORM DIAGNOSTIC SYSTEM CHECK
w/o Occupant Classification System:
for Gasoline Model with Occupant Classification System:
for HV Model with Occupant Classification System:
7.CHECK SRS WARNING LIGHT
w/o Occupant Classification System:
for Gasoline Model with Occupant Classification System:
for HV Model with Occupant Classification System:
8.PERFORM SYSTEM INITIALIZATION AND CALIBRATION