WINDOW / GLASS WINDSHIELD DEICER SYSTEM Windshield Deicer does not Operate
DESCRIPTION
When the windshield deicer switch turns is turned ON, a windshield deicer activation request signal is sent via the LIN communication line to the air conditioning amplifier. Then the air conditioning amplifier operates the windshield deicer.
WIRING DIAGRAM
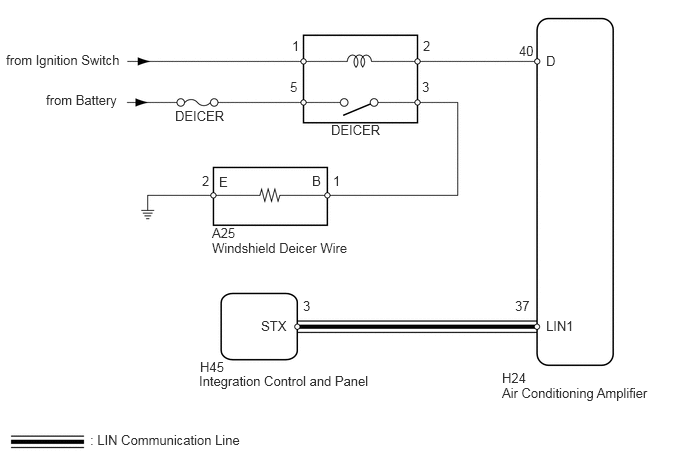
PROCEDURE
Connect the Techstream to the DLC3.
Turn the ignition switch to ON.
Turn the Techstream on.
Enter the following menus: Body Electrical / Air Conditioner / Active Test / Deicer Relay (Front)
Check that the deicer operation.
| Tester Display | Test Part | Control Range | Diagnostic Note |
|---|---|---|---|
| Deicer Relay (Front) | Deicer relay operation | OFF or ON | - |
- OK:
Deicer operates on and off.
OK
NG
Operate the integration control and panel to change the set temperature and check that the temperature at the outlets changes.
- OK:
The outlet temperature changes in accordance with the operation of the control panel
OK
NG
Temporarily replace the integration control and panel with a new or normally functioning one (See page Vehicle Interior>HEATING / AIR CONDITIONING>AIR CONDITIONING PANEL>REMOVAL).
NEXT
Check that the malfunction disappears.
- OK:
Malfunction disappears.
OK
NG
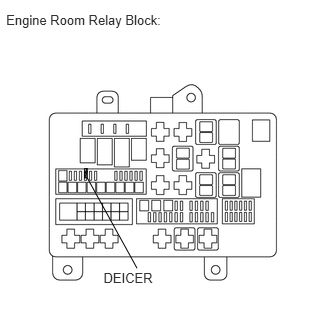
Remove the DEICER fuse from the engine room relay block.
Measure the resistance according to the value(s) in the table below.
- Standard Resistance:
Tester Connection Condition Specified Condition DEICER fuse Always Below 1 Ω
Reinstall the DEICER fuse.
OK
NG
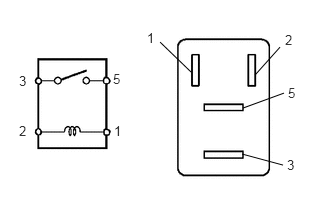
Remove the DEICER relay from the engine room relay block.
Measure the resistance according to the value(s) in the table below.
- Standard Resistance:
Tester Connection Condition Specified Condition 3 - 5 When battery voltage is not applied between terminals 1 and 2 10 kΩ or higher When battery voltage is applied to terminals 1 and 2 Below 1 Ω
Reinstall the DEICER relay.
OK
NG
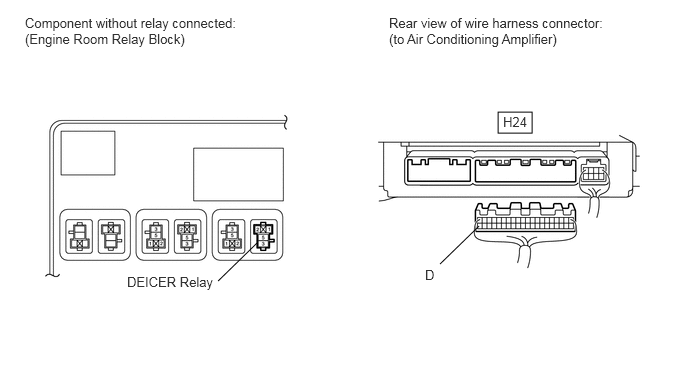
Remove the DEICER relay from the engine room relay block.
Disconnect the H24 air conditioning amplifier connector.
Measure the voltage according to the value(s) in the table below.
- Standard Voltage:
Tester Connection Switch Condition Specified Condition DEICER relay terminal 1 - Body ground Ignition switch ON 11 to 14 V DEICER relay terminal 5 - Body ground Always 11 to 14 V
Measure the resistance according to the value(s) in the table below.
- Standard Resistance:
Tester Connection Condition Specified Condition DEICER relay terminal 2 - H24-40 (D) Always Below 1 Ω DEICER relay terminal 2 - Body ground Always 10 kΩ or higher
Reconnect the air conditioning amplifier connector.
Reinstall the DEICER relay.
OK
NG
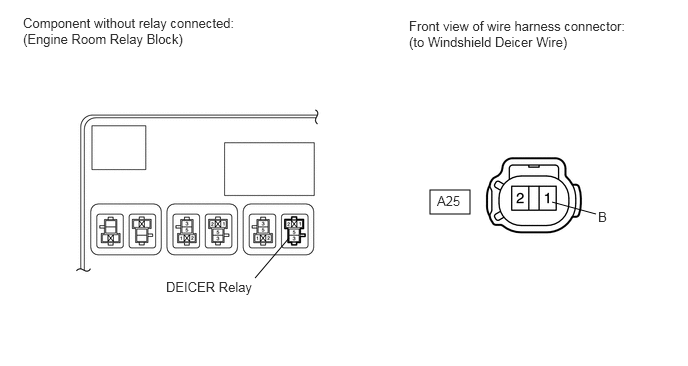
Remove the DEICER relay from the engine room relay block.
Disconnect the A25 windshield deicer wire connector.
Measure the resistance according to the value(s) in the table below.
- Standard Resistance:
Tester Connection Condition Specified Condition A25-1 (B) - DEICER relay terminal 3 Always Below 1 Ω DEICER relay terminal 3 - Body ground Always 10 kΩ or higher
Reconnect the A25 windshield deicer wire connector.
Reinstall the DEICER relay.
OK
NG
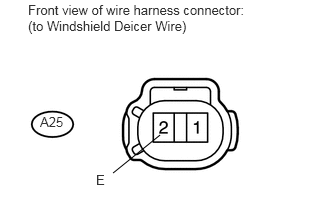
Disconnect the A25 windshield deicer wire connector.
Measure the resistance according to the value(s) in the table below.
- Standard Resistance:
Tester Connection Condition Specified Condition A25-2 (E) - Body ground Always Below 1 Ω
Reconnect the windshield deicer wire connector.
OK
NG
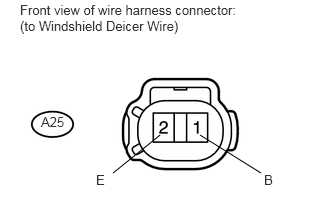
Disconnect the A25 windshield deicer wire connector.
Measure the voltage according to the value(s) in the table below.
- Standard Voltage:
Tester Connection Switch Condition Specified Condition A25-1 (B) - A25-2 (E) Ignition switch ON
Windshield deicer switch ON11 to 14 V
Reconnect the windshield deicer wire connector.
OK
NG