Home › DRIVE LINE › DRIVE SHAFT › FRONT DRIVE SHAFT

FRONT DRIVE SHAFT > INSTALLATION

for Preparation Click here


1. INSTALL FRONT DRIVE SHAFT ASSEMBLY LH
  1. Coat the spline of the inboard joint shaft assembly with ATF.


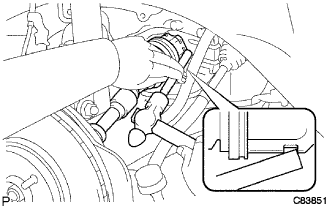
    C083851
  1. Align the shaft splines and install the drive shaft assembly with a brass bar and hammer.

    NOTICE:
    1. Set the snap ring with the opening side facing down.
    2. Be careful not to damage the drive shaft dust cover, boot and oil seal.
    3. Move the drive shaft assembly while keeping it level.
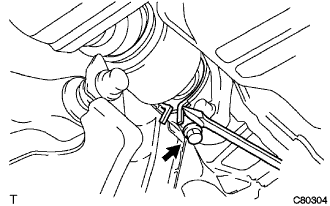


2. INSTALL FRONT DRIVE SHAFT ASSEMBLY RH (for 2WD)


    C080304
  1. Using a screwdriver, install a new bearing bracket hole snap ring.

    NOTICE:
    Do not damage the oil seal and boot.

  1. Install the bolt.

    Torque:
    32 N*m{ 330 kgf*cm , 24 ft.*lbf }


3. INSTALL FRONT DRIVE SHAFT ASSEMBLY RH (for 4WD)

HINT:
Install the RH side using the same procedures as for the LH side.

NOTICE:
  1. Set the snap ring with the opening side facing downward.
  2. Be careful not to damage the transaxle case oil seal, inboard joint boot and drive shaft dust cover.


4. INSTALL FRONT AXLE ASSEMBLY LH


    F047689E06
  1. Install the drive shaft assembly LH to the front axle assembly LH.

    NOTICE:
    1. Be careful not to damage the outboard joint boot.
    2. Be careful not to damage the speed sensor rotor.


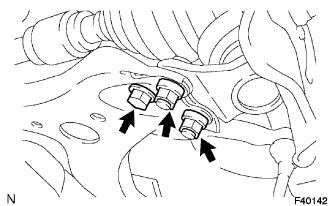
5. INSTALL NO. 1 FRONT SUSPENSION ARM SUB-ASSEMBLY LOWER LH


    F040142
  1. Install the lower ball joint to the front suspension arm sub-assembly lower with the bolt and nuts.

    Torque:
    127 N*m{ 1,300 kgf*cm , 94 ft.*lbf }


6. INSTALL TIE ROD END SUB-ASSEMBLY LH
  1. Install the tie rod end to the steering knuckle with the nut.

    Torque:
    49 N*m{ 500 kgf*cm , 36 ft.*lbf }

  1. Install a new cotter pin.

    NOTICE:
    If the holes for the cotter pin are not aligned, tighten the nut up to 60° further.


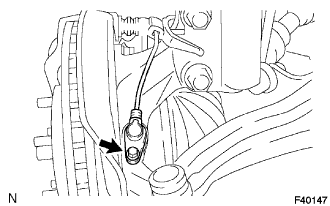
7. INSTALL SPEED SENSOR FRONT LH


    F040147
  1. Install the speed sensor to the steering knuckle with the bolt.

    Torque:
    8.0 N*m{ 82 kgf*cm , 71 in.*lbf }

    NOTICE:
    Prevent foreign matter from adhering to the speed sensor.


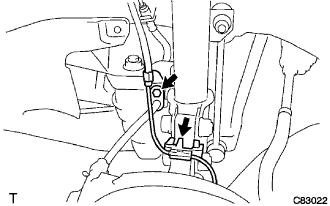
    C083022
  1. Install the flexible hose and the speed sensor to the shock absorber with the bolt and set the clip of sensor on knuckle.

    Torque:
    19 N*m{ 192 kgf*cm , 14 ft.*lbf }

    NOTICE:
    1. Be careful not to damage the speed sensor.
    2. Prevent foreign matter from adhering to the speed sensor.
    3. Do not twist the sensor wire when installing the speed sensor.


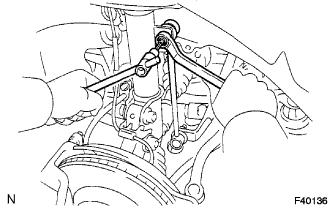
8. INSTALL FRONT STABILIZER LINK ASSEMBLY LH


    F040136
  1. Install the stabilizer link assembly LH with the nut.

    Torque:
    74 N*m{ 755 kgf*cm , 55 ft.*lbf }

    HINT:
    If the ball joint turns together with nut. use a hexagon (6 mm) wrench to hold the stud.


9. INSTALL FRONT AXLE SHAFT LH NUT
  1. Clean the threaded parts on the drive shaft and front axle shaft nut using a non-residue solvent.

    NOTICE:
    1. Be sure to perform this work for a new drive shaft.
    2. Keep the threaded parts free of oil and foreign objects.


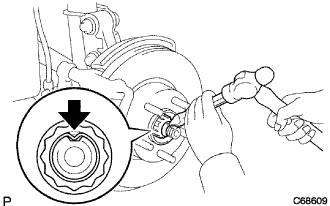
    C068609
  1. Using a socket wrench (30 mm), install a new axle hub LH nut.

    Torque:
    294 N*m{ 3,000 kgf*cm , 217 ft.*lbf }

  1. Using a chisel and hammer, stake the axle hub LH nut.


10. INSTALL FRONT WHEEL

Torque:
103 N*m{ 1,050 kgf*cm , 76 ft.*lbf }


11. ADD AUTOMATIC TRANSAXLE FLUID

HINT:
  1. for U151E: (Click here)
  2. for U151F: (Click here)


12. ADD TRANSFER OIL (for 4WD)

HINT:
(Click here)


13. INSPECT AND ADJUST FRONT WHEEL ALIGNMENT

HINT:
(Click here)


14. CHECK ABS SPEED SENSOR SIGNAL

HINT:
  1. for ANTI-LOCK BRAKE SYSTEM: (Click here)
  2. for VEHICLE STABILITY CONTROL SYSTEM: (Click here)