BRAKE CONTROL / DYNAMIC CONTROL SYSTEMS BRAKE ACTUATOR REMOVAL
CAUTION / NOTICE / HINT
- CAUTION:
- ·
Vehicle may slip off the vehicle hoist if the vehicle hoist is handled incorrectly.
Danger! Life-threatening injuries!
-Observe safety information on raising the vehicle using a vehicle hoist.
-For additional information see:
Click hereGeneral>INTRODUCTION>REPAIR INSTRUCTION>VEHICLE LIFT AND SUPPORT LOCATIONS
- HINT:
- ·
Do not interchange brake lines. If necessary, mark the brake lines before disassembly.
·Note various equipment specifications with different line seizure.
·Do not bend brake lines.
·Close off connecting bores with seal plugs.
PROCEDURE

 1.INSTALL BRAKE PEDAL PRESSURE
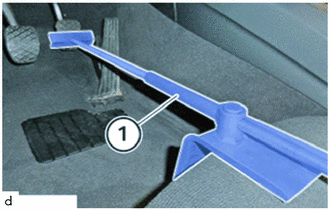
Press the brake pedal to the floor and fix the brake pedal pressure (1).
- HINT:
-
Do not release the brake pedal pressure (1) until the brake lines have been reconnected. This prevents brake fluid from emerging from the expansion tank when the brake lines are opened.
2.REMOVE FRONT WHEEL
53879
3.REMOVE FRONT FENDER LINER LH
16470
4.REMOVE RADIATOR RESERVE TANK ASSEMBLY
16482
5.REMOVE RADIATOR RESERVE TANK SUB-ASSEMBLY
6.REMOVE BRAKE ACTUATOR WITH BRACKET
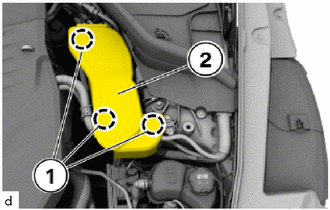
Release snap-lock couplings (1).
Feed the engine room ECU cover (2) out toward the top and remove.
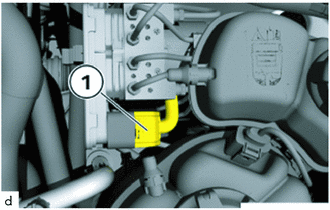
Unlock plug connection (1) and disconnect.
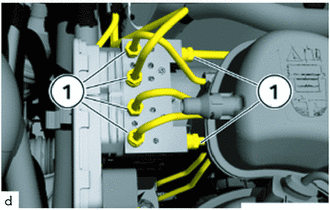
Unfasten 11 mm and 12 mm union nuts of the brake lines (1).
- SST
- 09700-WA070
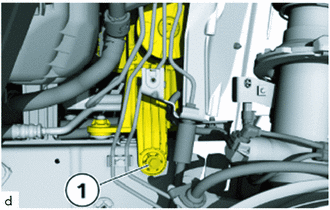
Unfasten bolt (1).
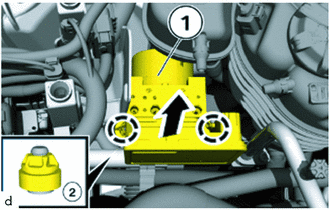
Guide the brake actuator with bracket (1) upwards out of the holders (2).
7.REMOVE SKID CONTROL ECU ASSEMBLY
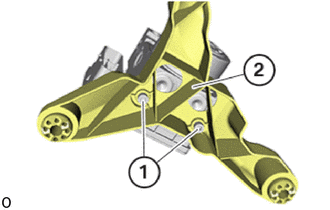
Loosen T25 screws (1) and remove brake actuator bracket assembly (2) for skid cntrol ECU assembly.
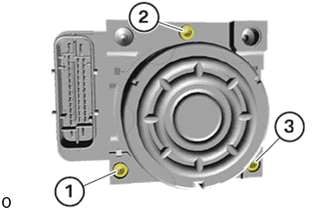
Loosen T25 bolts (1) to (3).
Remove skid cntrol ECU assembly from the brake actuator assembly carefully.