DOOR / HATCH FRONT DOOR DISASSEMBLY
CAUTION / NOTICE / HINT
- CAUTION:
- ·
Working on 12 V vehicle electrical system.
Risk of short circuits! Risk of fire!
-Detach the cable from the negative (-) battery terminal.
·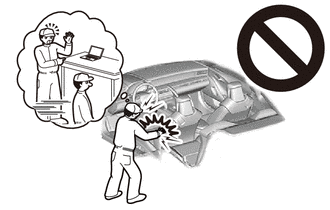
Airbag unit.
Danger! Immobilization period-threatening injuries!
-All work on pyrotechnic parts may be carried out by technically experienced and appropriately trained personnel only.
-Replace any damaged part or ones that have been dropped.
-Before performing any work on the airbag, always disconnect the battery earth lead from the battery.
-For additional information see:
Click hereVehicle Interior>SUPPLEMENTAL RESTRAINT SYSTEMS>AIRBAG SYSTEM>PRECAUTION
- HINT:
- ·
Use the same procedure for the RH and LH sides.
·The procedure listed below is for the LH side.
PROCEDURE

 1.DISCONNECT CABLE FROM NEGATIVE BATTERY TERMINAL
for B48:
Click hereGeneral>MAINTENANCE>B48 BATTERY>REMOVAL
for B58:
Click hereGeneral>MAINTENANCE>B58 BATTERY>REMOVAL
- CAUTION:
- ·
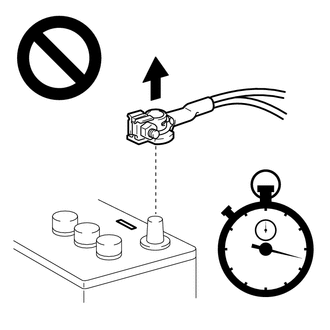
Wait at least 60 seconds after disconnecting the cable from the negative (-) battery terminal to disable the SRS system.
·If the airbag deploys for any reason, it may cause a serious accident.
67862
2.REMOVE FRONT DOOR WEATHERSTRIP
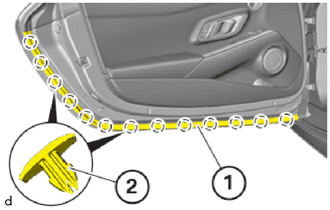
Disconnect the front door weatherstrip (1) from the front door panel sub-assembly at the clips (2) marked and remove.
75072A
3.REMOVE FRONT DOOR OUTSIDE MOULDING SUB-ASSEMBLY
75720
4.REMOVE FRONT DOOR BELT MOULDING ASSEMBLY
68102
5.LOOSEN FRONT DOOR GLASS SUB-ASSEMBLY
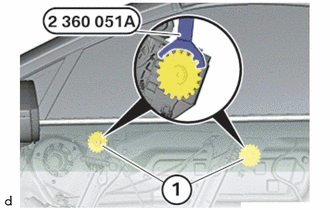
Loosen multi-tooth screws (1) on front door glass sub-assembly by turning 2 to 3 rotations using the special tool 2 360 051 (A).
- SST
- 09800-WA130
81230
6.REMOVE COURTESY LIGHT ASSEMBLY (w/ Courtesy Light)
67602
7.REMOVE FRONT DOOR TRIM BOARD SUB-ASSEMBLY
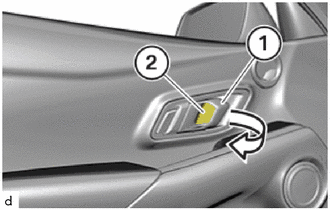
Press and hold door opener (1) in the arrow direction.
Use the special tool 0 493 681 (64 1 020) to remove the No. 2 door inside handle bezel (2).
- SST
- 09200-WA280
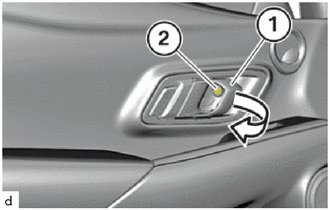
Press and hold door opener (1) in the arrow direction.
Loosen T20 screw (2).
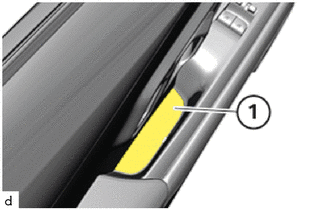
Remove the door trim cover (1) using the special tool 0 493 681 (64 1 020).
- SST
- 09200-WA280
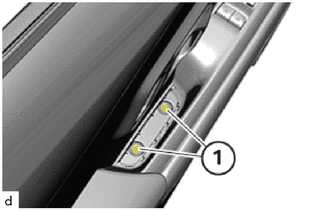
Loosen T20 screws (1).
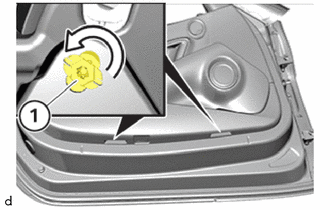
Unlock the locks (1) in the direction of the arrow.
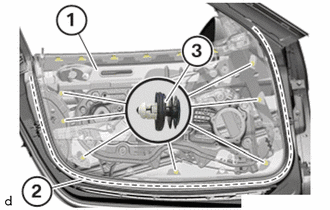
Unclip the front door trim board sub-assembly (1) from the clips (3) in the marked area (2).
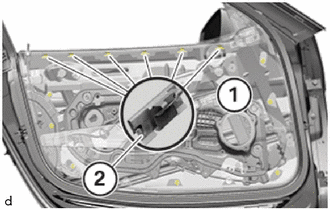
Remove front door trim board sub-assembly (1) from the clamps (2).
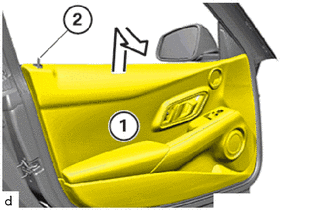
Slide front door trim board sub-assembly (1) over the front door lock open rod (2) and then tilt it in the direction of arrow.
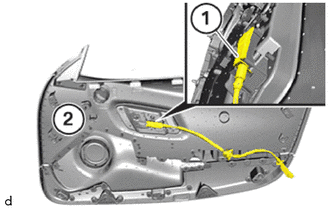
Release and remove the front door inside locking lock and unlock knob cable (1).
Unlock and disconnect all related plug connections for the front door trim board sub-assembly (2).
Remove front door trim board sub-assembly (2).
69272D
8.REMOVE FRONT DOOR INSIDE HANDLE
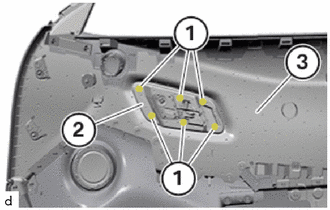
Drill out or grind down all marked spot-welds (1).
Remove front door inside handle (2) from front door trim board sub-assembly (3).
84930
9.REMOVE DOOR CONTROL SWITCH ASSEMBLY
84840
10.REMOVE LUGGAGE COMPARTMENT DOOR OPENING SWITCH ASSEMBLY (for Driver Side)
84820
11.REMOVE POWER WINDOW REGULATOR MASTER SWITCH ASSEMBLY (for Driver Side)
84810
12.REMOVE POWER WINDOW REGULATOR SWITCH ASSEMBLY (for Front Passenger Side)
86160P
13.REMOVE FRONT NO. 2 SPEAKER ASSEMBLY (w/ Front No. 2 Speaker)
14.REMOVE SIDE AIRBAG PRESSURE SENSOR
86160
15.REMOVE FRONT NO. 1 SPEAKER ASSEMBLY
16.REMOVE SOUND INSULATION
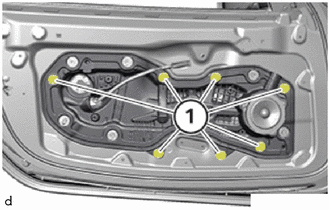
Loosen T30 bolts (1).
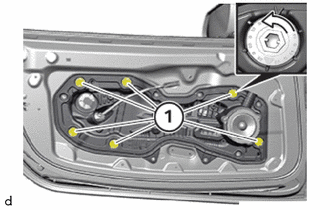
Unlock the locks (1) in the direction of the arrow.
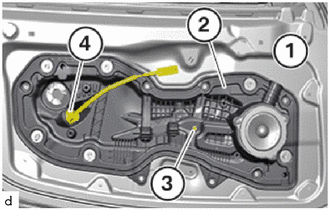
Loosen nut (3).
Remove the front door inside locking lock and unlock knob cable (4) from the sound insulation (2).
Unlock and disconnect all associated plug connections.
Release the mounting clips of the vehicle wiring harness from the sound insulation.
Remove the sound insulation (2) from the front door panel sub-assembly (1).
68172A
17.REMOVE FRONT DOOR GLASS INNER WEATHERSTRIP
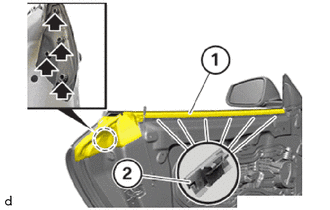
Release the mounting elements (arrows).
Release the front door glass inner weatherstrip (1) from the clamps (2) and remove upwards.
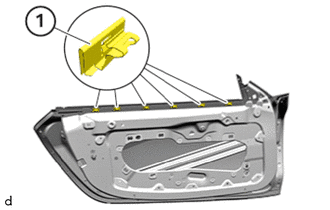
Remove the clamps (1).
68102
18.REMOVE FRONT DOOR GLASS SUB-ASSEMBLY
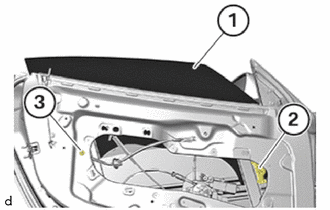
Position front door glass sub-assembly (1) as shown.
- NOTICE:
-
The attachment points (2) and (3) must be accessible.
Completely unscrew and remove multi-tooth screws (2) and (3) from the front door glass sub-assembly (1).
Guide the front door glass sub-assembly (1) out of the door to the top.
69820
19.REMOVE FRONT DOOR WINDOW REGULATOR ASSEMBLY
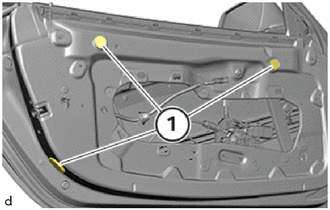
Remove the seal plug (1).
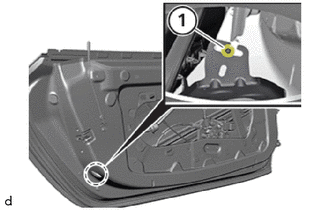
Loosen nut (1).
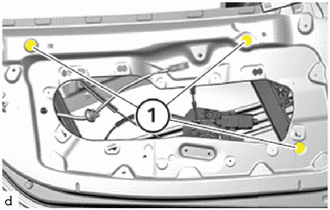
Remove nuts (1) with the special tool 0 496 726 (51 0 400). While doing so, counter support at the bolt.
- SST
- 09800-WA110
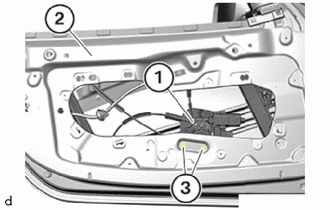
Loosen nuts (3).
Unlock and disconnect all associated plug connections for the front door window regulator assembly (1).
Guide out and remove front door window regulator assembly (1) from the front door panel sub-assembly (2).
20.REMOVE FRONT DOOR LOWER FRAME BRACKET GARNISH
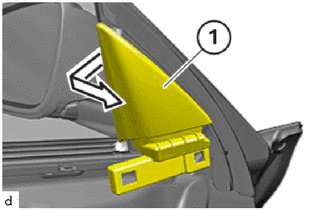
Release, guide out and remove front door lower frame bracket garnish (1) from the front door panel sub-assembly in the direction of the front door panel sub-assembly.
87940
21.REMOVE OUTER REAR VIEW MIRROR ASSEMBLY
67496C
22.REMOVE FRONT DOOR FRONT LOWER FRAME UPPER COVER
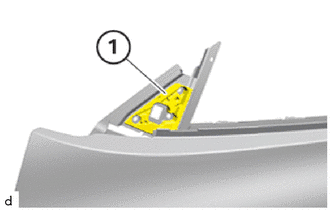
Remove the front door front lower frame upper cover (1).
68193C
23.REMOVE FRONT DOOR BELT FRONT SEAL
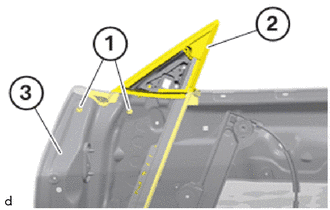
Remove the mounting elements (1) for the front door belt front seal (2) from the inner door panel (3).
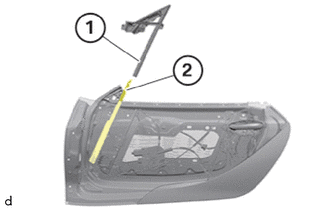
Pull up the front door belt front seal (1) out of the window guide rail (2).
69220
24.REMOVE FRONT DOOR OUTSIDE HANDLE ASSEMBLY
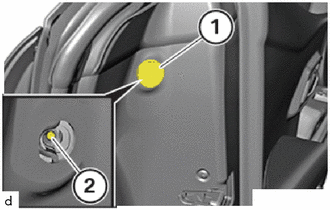
Remove the seal plug (1).
Release the clamping bolt (2) from the front door outside handle frame sub-assembly with the special tool 2 450 364.
- SST
- 09800-WA230
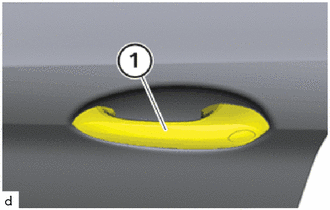
Pull the front door outside handle assembly (1) to the outside and remove it in the process.
Pivot the front door outside handle assembly (1) further towards the outside and in this process, remove it at the front.
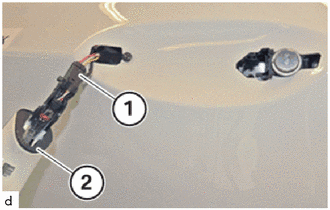
Unlock and disconnect connector (1).
Remove the front door outside handle assembly (2).
69040A
25.REMOVE FRONT DOOR LOCK WITH MOTOR ASSEMBLY
69202A
26.REMOVE FRONT DOOR OUTSIDE HANDLE FRAME SUB-ASSEMBLY
69317A
27.REMOVE DOOR LOCK SPACER (for Driver Side)
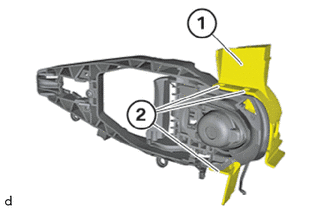
Release door lock spacer (1) at detents (2).
Remove the door lock spacer (1).
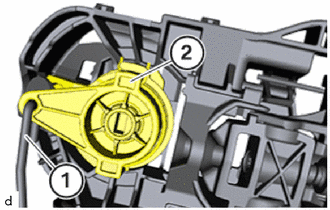
Disconnect the front door lock control link sub-assembly (1).
Twist lock cylinder (2) in clockwise direction and remove it.
68620
28.REMOVE FRONT DOOR CHECK ASSEMBLY
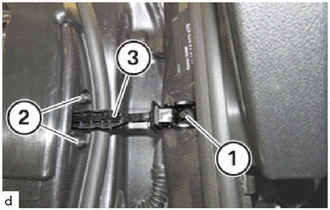
Loosen E10 bolt (1).
Loosen nuts (2).
Slide out front door check assembly (3).
82152
29.REMOVE FRONT DOOR WIRE
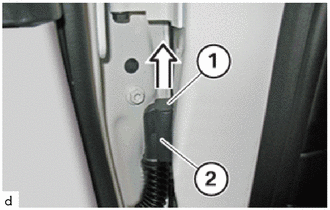
Pull the lock (1) upward in the arrow direction and disconnect the plug connection (2).
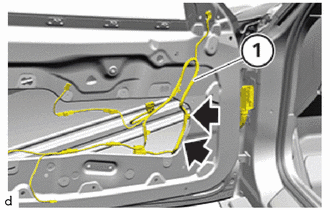
Unclip the front door wire (1) at the marked positions (arrows).
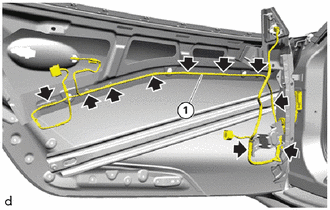
Unclip the front door wire (1) at the marked positions (arrows).
67866F
30.REMOVE NO. 3 FRONT DOOR WEATHERSTRIP
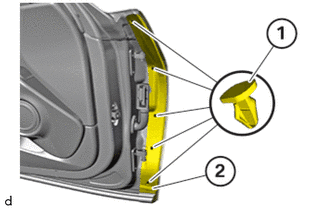
Remove clips (1).
Feed out and remove No. 3 front door weatherstrip (2).
31.REMOVE EXPANSION NUT
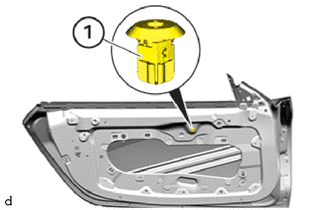
Remove the expansion nut (1).
32.REMOVE PROTECTIVE CAP
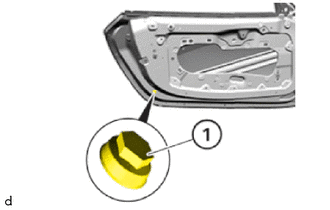
Remove the protective cap (1).