Q510 HYBRID TRANSMISSION / TRANSAXLE MOTOR CABLE INSTALLATION
CAUTION / NOTICE / HINT
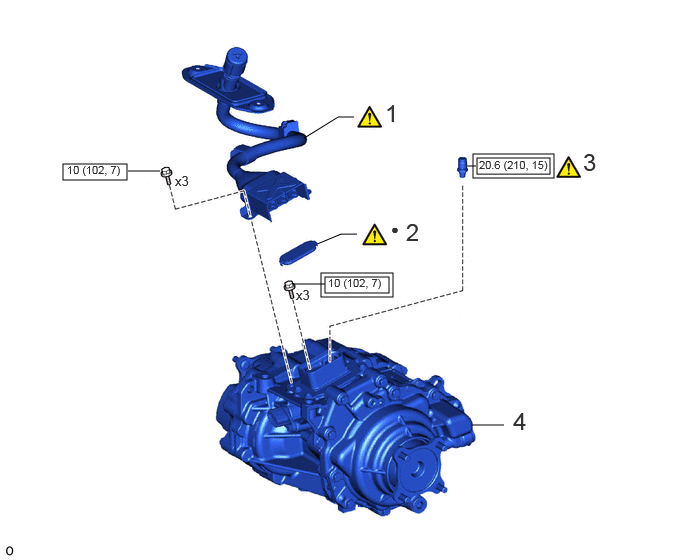
| Procedure | Part Name Code | 
|

|

|
|
|---|---|---|---|---|---|
| 1 | REAR TRACTION MOTOR CABLE | G1149 | ( ) |
- | - |
| 2 | MOTOR CABLE TERMINAL CAP | G114D | ()
|
- | - |
| 3 | REAR TRACTION MOTOR BREATHER PLUG | 30900T | ()
|
- | - |
| 4 | REAR TRACTION MOTOR WITH TRANSAXLE ASSEMBLY | G1050 | - | - | - |

|
Tightening torque for "Major areas involving basic vehicle performance such as moving/turning/stopping" : N*m (kgf*cm, ft.*lbf) | 
|
N*m (kgf*cm, ft.*lbf): Specified torque |
| ● | Non-reusable part | - | - |
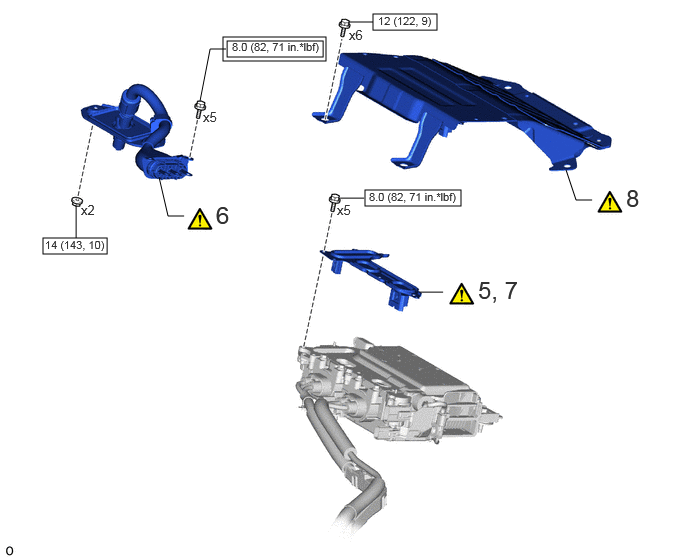
| Procedure | Part Name Code |
|
|
|
|
|---|---|---|---|---|---|
| 5 | REMOVE INVERTER TERMINAL COVER | G9223 | ()
|
- | - |
| 6 | REAR TRACTION MOTOR CABLE | G1149 | ()
|
- | - |
| 7 | INSTALL INVERTER TERMINAL COVER | G9223 | ()
|
- | - |
| 8 | HYBRID INVERTER PROTECTOR ASSEMBLY | G92D0 | ()
|
- | - |
|
|
Tightening torque for "Major areas involving basic vehicle performance such as moving/turning/stopping" : N*m (kgf*cm, ft.*lbf) |
|
N*m (kgf*cm, ft.*lbf): Specified torque |
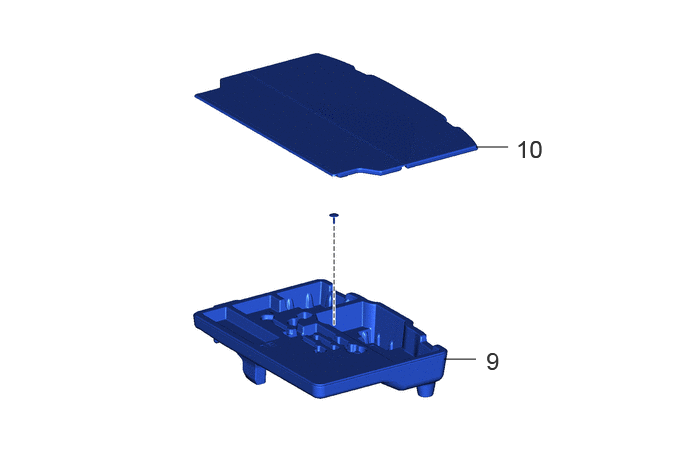
| Procedure | Part Name Code |
|
|
|
|
|---|---|---|---|---|---|
| 9 | REAR DECK FLOOR BOX | 64993 | - | - | - |
| 10 | DECK BOARD ASSEMBLY | 58410B | - | - | - |
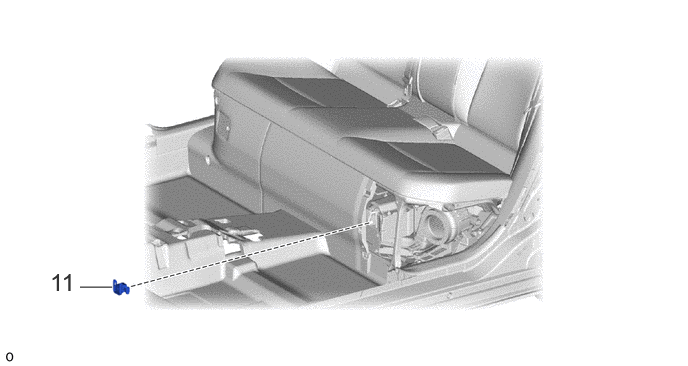
| Procedure | Part Name Code |
|
|
|
|
|---|---|---|---|---|---|
| 11 | SERVICE PLUG GRIP | G3834 | - | - | - |
PROCEDURE

 G1149
1.INSTALL REAR TRACTION MOTOR CABLE
|
|
|
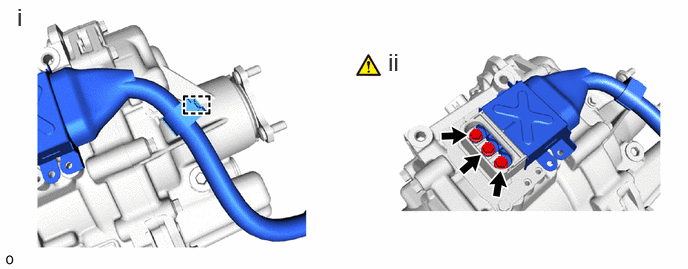
Engage the clamp.
Using an insulated tool, install the rear traction motor cable to the rear traction motor with transaxle assembly with the 3 bolts.
- Torque:
- 10 N*m (102 kgf*cm, 7 ft.*lbf)
- NOTICE:
-
Keep the rear traction motor cable terminals and their installation area free from foreign matter, water, etc.
G114D
2.INSTALL MOTOR CABLE TERMINAL CAP
|
|
|
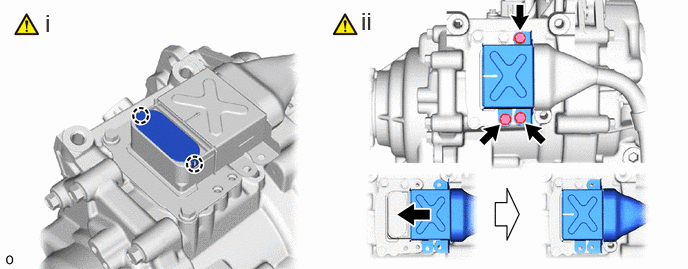
Engage the 2 claws to install a new motor cable terminal cap to the rear traction motor with transaxle assembly.
- NOTICE:
- ·
Keep the motor cable terminal cap and their installation area free from foreign matter, water, etc.
·Do not pinch the O-ring.
·Check that the motor cable terminal cap is securely installed.
Slide the connector cover assembly and install the 3 bolts as shown in the illustration.
- Torque:
- 10 N*m (102 kgf*cm, 7 ft.*lbf)
30900T
3.INSTALL REAR TRACTION MOTOR BREATHER PLUG
|
|
Click here()
|
G1050
4.INSTALL REAR TRACTION MOTOR WITH TRANSAXLE ASSEMBLY
G9223
5.REMOVE INVERTER TERMINAL COVER
|
|
Click here()
|
G1149
6.CONNECT REAR TRACTION MOTOR CABLE
|
|
|
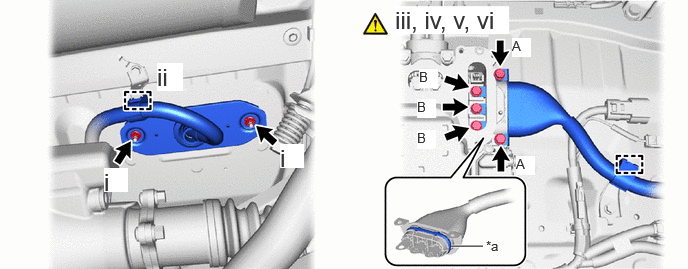
| *a | Waterproof Seal | - | - |
Pass the rear traction motor cable through into the vehicle body, and install the 2 nuts to the vehicle body.
- Torque:
- 14 N*m (143 kgf*cm, 10 ft.*lbf)
Engage the clamp.
Using an insulated tool, temporarily connect the rear traction motor cable to the rear hybrid motor control inverter assembly with the 5 bolts.
- NOTICE:
- ·
To prevent the threads from being damaged, temporarily tighten the 5 bolts by hand.
·Do not touch the waterproof seal or terminals of the rear traction motor cable.
·Do not damage the terminals, connector housing or rear hybrid motor control inverter assembly during connection.
Using an insulated tool, fully tighten the 2 bolts (A).
- Torque:
- 8.0 N*m (82 kgf*cm, 71 in.*lbf)
Using an insulated tool, fully tighten the 3 bolts (B).
- Torque:
- 8.0 N*m (82 kgf*cm, 71 in.*lbf)
Engage the clamp.
G9223
7.INSTALL INVERTER TERMINAL COVER
|
|
Click here()
|
G92D0
8.INSTALL HYBRID INVERTER PROTECTOR ASSEMBLY
|
|
Click here()
|
64993
9.INSTALL REAR DECK FLOOR BOX
58410B
10.INSTALL DECK BOARD ASSEMBLY
G3834
11.INSTALL SERVICE PLUG GRIP