M15A-FKS LUBRICATION OIL PUMP REMOVAL
CAUTION / NOTICE / HINT
The necessary procedures (adjustment, calibration, initialization, or registration) that must be performed after parts are removed and installed, or replaced during oil pump removal/installation are shown below.
| Replaced Part or Performed Procedure | Necessary Procedure | Effect/Inoperative Function when Necessary Procedure not Performed | Link |
|---|---|---|---|
·
Throttle body with motor assembly ·
Cleaning the deposits from the throttle body with motor assembly ·
Engine assembly ·
Mass air flow meter sub-assembly ·
Air fuel ratio sensor (sensor 1) ·
Air fuel ratio sensor (sensor 2) ·
Ignition coil assembly ·
EGR valve assembly ·
Air leaks from intake system ·
Gas leaks from exhaust system |
Inspection after repair | ·
Poor idle, etc. ·
Engine start function, etc. |
( ) |
PROCEDURE

 1.INSTALL ENGINE TO ENGINE STAND
2.REMOVE ENGINE HANGER
12262
3.REMOVE NO. 2 VENTILATION HOSE
44771
4.REMOVE VACUUM TUBE CONNECTOR HOSE
23901
5.REMOVE FUEL TUBE SUB-ASSEMBLY
23902
6.REMOVE NO. 2 FUEL TUBE SUB-ASSEMBLY
23801P
7.REMOVE NO. 1 FUEL PIPE SUB-ASSEMBLY
23100X
8.REMOVE FUEL PUMP ASSEMBLY (for High Pressure)
19500
9.REMOVE IGNITION COIL ASSEMBLY
15370
10.REMOVE CAMSHAFT TIMING OIL CONTROL SOLENOID ASSEMBLY
15370
11.REMOVE CAM TIMING OIL CONTROL SOLENOID ASSEMBLY
12.REMOVE O-RING
13470
13.REMOVE CRANKSHAFT PULLEY ASSEMBLY
11201
14.REMOVE CYLINDER HEAD COVER SUB-ASSEMBLY
11193
15.REMOVE SPARK PLUG TUBE GASKET
12315A
16.REMOVE ENGINE MOUNTING BRACKET RH
17.REMOVE STRAIGHT SCREW PLUG
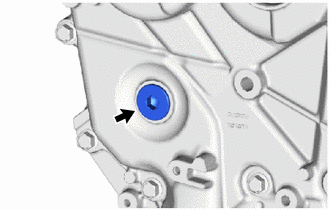
Using a 10 mm hexagon wrench, remove the straight screw plug from the No. 2 timing chain cover assembly.
11320B
18.REMOVE NO. 2 TIMING CHAIN COVER ASSEMBLY
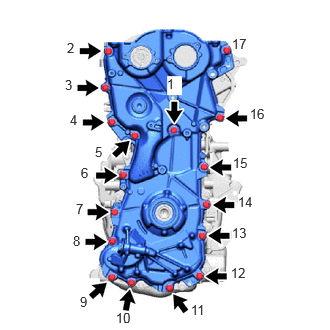
Remove the 17 bolts.
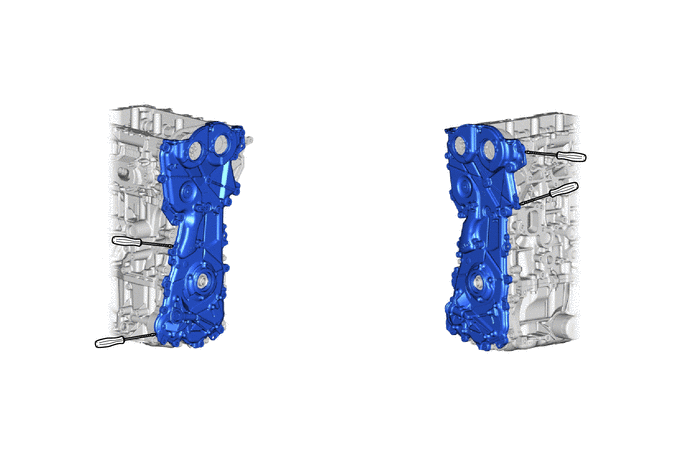
Remove the No. 2 timing chain cover assembly from the timing chain cover assembly by prying the No. 2 timing chain cover assembly with a screwdriver with its tip wrapped with protective tape.
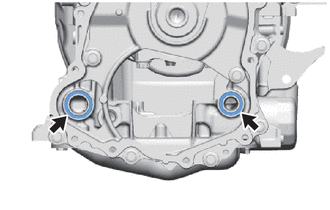
Remove the oil pump gasket from the cylinder block sub-assembly.
- NOTICE:
-
Be careful not to damage the contact surfaces of the No. 2 timing chain cover assembly and timing chain cover assembly.
11301C
19.REMOVE TIMING CHAIN COVER OIL SEAL