BRAKE SYSTEM (OTHER) VACUUM PUMP(for TMC Made G16E-GTS) REMOVAL
CAUTION / NOTICE / HINT
The necessary procedures (adjustment, calibration, initialization, or registration) that must be performed after parts are removed and installed, or replaced during vacuum pump assembly removal/installation are shown below.
| Replaced Part or Performed Procedure | Necessary Procedure | Effect/Inoperative Function when Necessary Procedure not Performed | Link |
|---|---|---|---|
| Auxiliary battery terminal is disconnected/reconnected | Memorize steering angle neutral point | Parking assist monitor system | ( ) |
- HINT:
-
When the cable is disconnected / reconnected to the auxiliary battery terminal, systems temporarily stop operating. However, each system has a function that completes learning the first time the system is used.
- ·
Learning completes when vehicle is driven
Effect/Inoperative Function When Necessary Procedures are not Performed Necessary Procedures Link Lane tracing assist system Drive the vehicle straight ahead at 35 km/h (22 mph) or more for 5 second or more. ( )
Pre-collision system Stop and start system Drive the vehicle until stop and start control is permitted (approximately 5 to 60 minutes) ( )
·Learning completes when vehicle is operated normally
Effect/Inoperative Function When Necessary Procedures are not Performed Necessary Procedures Link Power door lock control system
·Back door opener
Perform door unlock operation with door control switch or electrical key transmitter sub-assembly switch. ( )
Air conditioning system After the ignition switch is turned to ON, the servo motor standard position is recognized. -
PROCEDURE

 51410
1.REMOVE NO. 1 ENGINE UNDER COVER ASSEMBLY
2.DRAIN ENGINE COOLANT
12601B
3.REMOVE NO. 1 ENGINE COVER SUB-ASSEMBLY
89661
4.REMOVE ECM
23901
5.SEPARATE FUEL TUBE SUB-ASSEMBLY
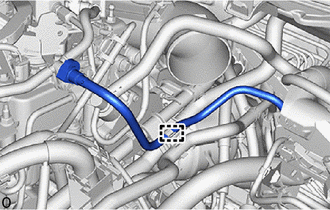
Disengage the clamp to separate the fuel tube sub-assembly.
23826
6.SEPARATE NO. 1 FUEL VAPOR FEED HOSE
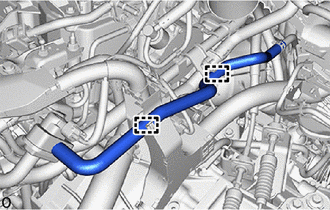
Disengage the 2 clamps to separate the No. 1 fuel vapor feed hose.
82121
7.SEPARATE ENGINE WIRE
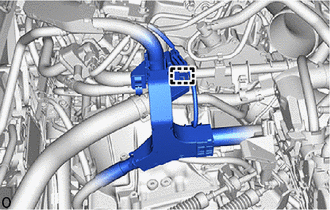
Disengage the clamp to separate the engine wire.
87246
8.DISCONNECT OUTLET HEATER WATER HOSE
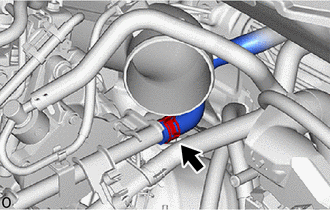
Slide the clip and disconnect the outlet heater water hose from the No. 1 water by-pass pipe.
16268
9.SEPARATE NO. 1 WATER BY-PASS PIPE
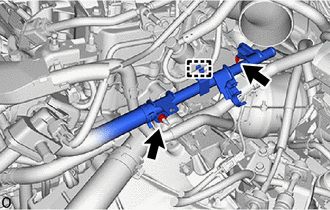
Remove the 2 nuts to separate the No. 1 water by-pass pipe.
Disengage the clamp.
44774
10.DISCONNECT UNION TO CONNECTOR TUBE HOSE
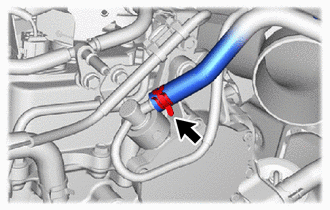
Slide the clip and disconnect the union to connector tube hose from the vacuum pump assembly.
25781A
11.DISCONNECT NO. 3 VACUUM TRANSMITTING HOSE
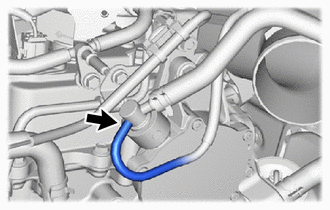
Disconnect the No. 3 vacuum transmitting hose from the vacuum pump assembly.
29300
12.REMOVE VACUUM PUMP ASSEMBLY
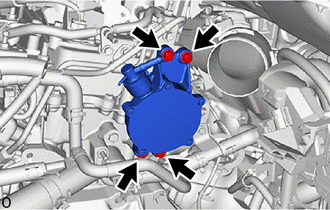
Remove the 4 bolts and vacuum pump assembly from the engine assembly.
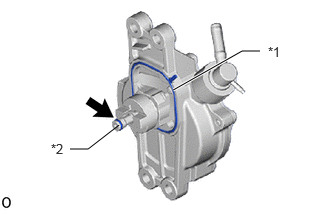
| *1 | No. 2 O-ring |
| *2 | No. 4 O-ring |
Remove the No. 2 and No. 4 O-rings from the vacuum pump assembly.