Turbocharger Removal and Installation
Precautions: General safety (00)
 CAUTION:
Touching a hot exhaust system component will cause a burn.
Do not perform any service work on the exhaust system until the exhaust system is cool.
NOTICE:
The turbocharger will lose its original performance if it is disassembled.
Do not disassemble the turbocharger.
If any faulty condition is found, replace the turbocharger with a new one.
Removal
1)Disconnect negative (–) cable at battery.
2)Remove engine cover. 
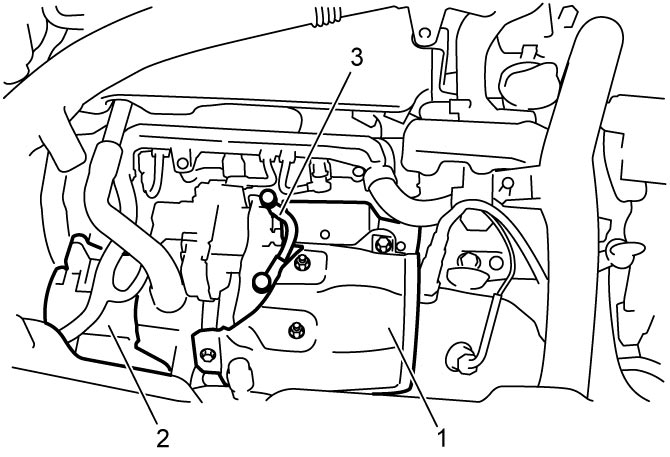
3)Remove exhaust manifold upper cover (1).
4)Remove EGR-2 valve (2).
5)Remove turbocharger lubrication pipe (3) and gaskets from turbocharger.

6)Remove DPF®.
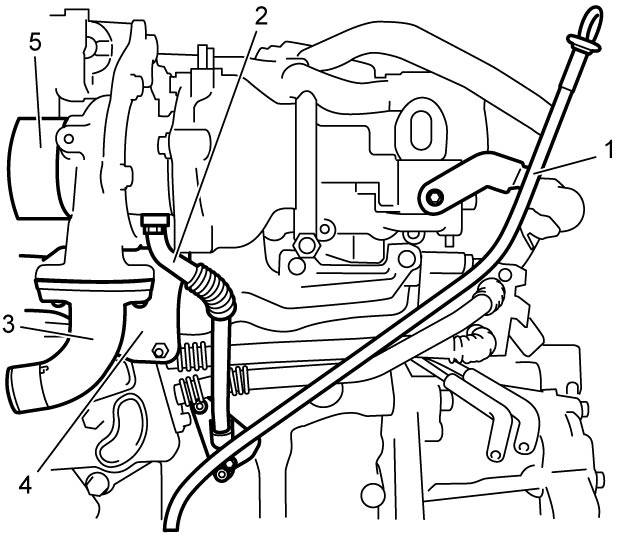
7)Remove oil level gauge pipe (1).
8)Remove oil return pipe (2).
9)Remove turbocharger outlet air joint (3) and gasket from turbocharger.
10)Remove exhaust manifold cover (4).
11)Remove turbocharger inlet air hose (5).
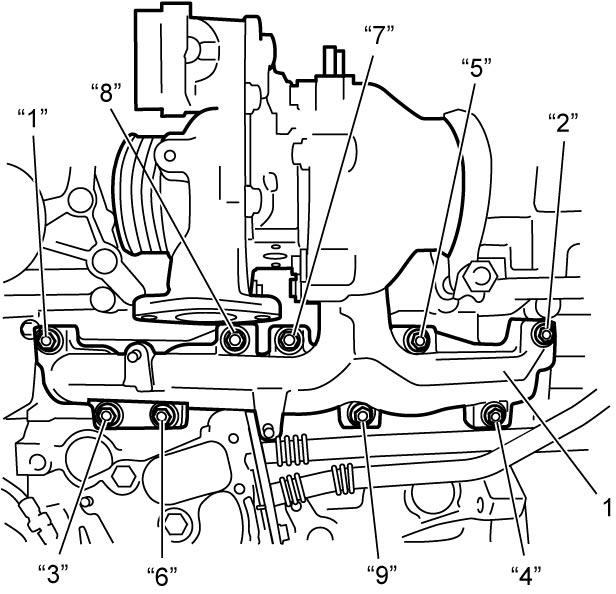
12)Remove exhaust manifold nuts in numerical order (“1” – “9”) evenly and gradually.
13)Remove turbocharger with exhaust manifold (1) and gasket.
Installation
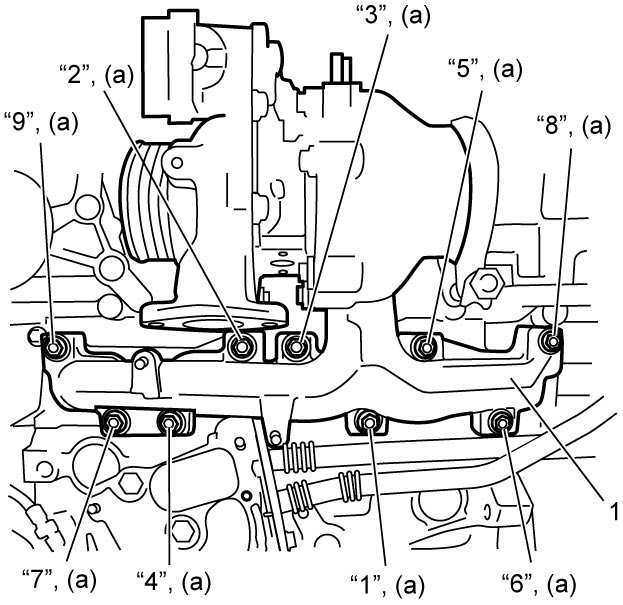
1)Install turbocharger with exhaust manifold (1) with new gasket.
2)Tighten new exhaust manifold nuts in numerical order (“1” – “9”) evenly and gradually by repeating tightening procedure two or three times until specified torque is obtained.
3)Install turbocharger inlet air hose (1).
4)Install exhaust manifold cover (2).
5)Install oil return pipe (3) with new gasket to turbocharger.
6)Apply engine oil to new O-ring and then install O-ring to oil return pipe.
7)Install oil return pipe to cylinder block.
8)Apply engine oil to new O-ring and then install O-ring to oil level gauge pipe (4).
9)Install oil level gauge pipe.
10)Install turbocharger outlet air joint (5) with new gasket to turbocharger.
Tighten turbocharger outlet air joint bolt to specified torque.
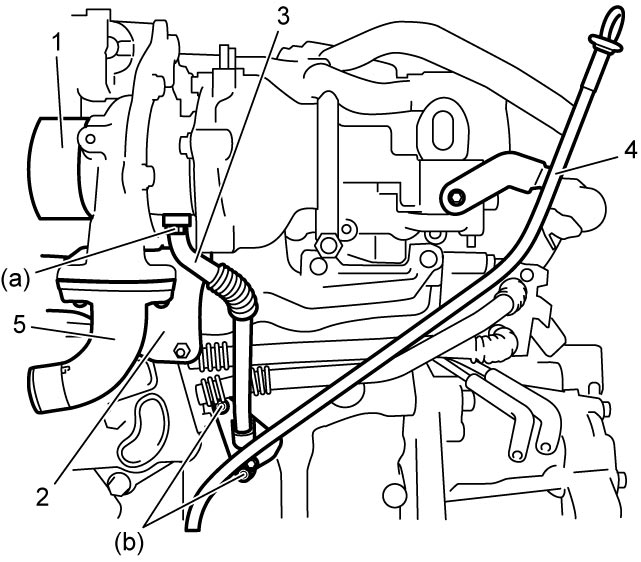
Tighten turbocharger outlet air joint bolt to specified torque.
11)Install DPF®.
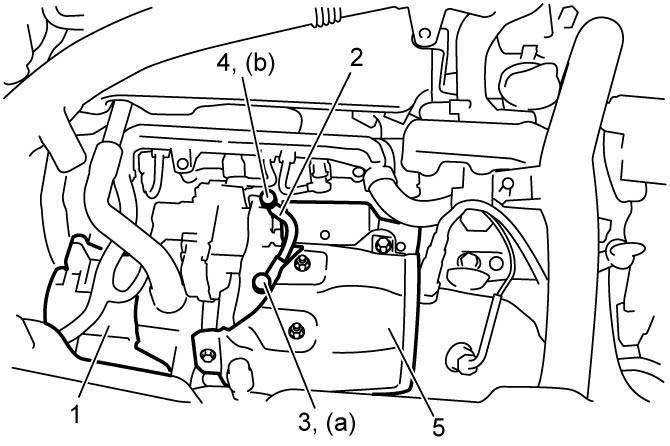
12)Install EGR-2 valve (1).
13)Install turbocharger lubrication pipe (2) with new gaskets.
14)Tighten turbocharger lubrication pipe bolts as follows.
a)Tighten turbocharger lubrication pipe bolts by hand.
b)Tighten turbocharger lubrication pipe No.1 bolt (3) to 15 N·m (1.5 kgf-m, 11.0 lbf-ft).
c)Tighten turbocharger lubrication pipe No.2 bolt (4) to 10 N·m (1.0 kgf-m, 7.5 lbf-ft).
d)Retighten turbocharger lubrication pipe No.1 bolt to 27 N·m (2.8 kgf-m, 20.0 lbf-ft).
e)Retighten turbocharger lubrication pipe No.2 bolt to 20 N·m (2.0 kgf-m, 15.0 lbf-ft).
15)Install exhaust manifold upper cover (5).
16)Install engine cover.
17)Connect negative (–) cable at battery.
18)When replacing new turbocharger with exhaust manifold, initialize turbocharger parameter in ECM.
19)Run engine and check for exhaust gas leakage.