AIR CONDITIONING FRONT HEATER UNIT REMOVAL
CAUTION / NOTICE / HINT
- HINT:
- ·
Use the same procedure for LHD and RHD vehicles.
·The procedure listed below is for RHD vehicles.
PROCEDURE

 52119A
1.REMOVE FRONT BUMPER COVER
w/ Snorkel Air Cleaner
Click hereVehicle Interior>EXTERIOR>FRONT BUMPER (w/ Snorkel Air Cleaner)>REMOVAL
w/o Snorkel Air Cleaner
Click hereVehicle Interior>EXTERIOR>FRONT BUMPER(w/o Snorkel Air Cleaner)>REMOVAL
2.DRAIN ENGINE COOLANT (for 14B)
3.DRAIN ENGINE COOLANT (for 1HZ)
4.DRAIN ENGINE COOLANT (for 2TR-FE)
5.DRAIN ENGINE COOLANT (for N04C-UH, N04C-VL, N04C-VQ)
for N04C-UH
Click hereEngine / Hybrid System>N04C-UH (COOLING)>COOLANT>REPLACEMENT
for N04C-VL
Click hereEngine / Hybrid System>N04C-VL (COOLING)>COOLANT>REPLACEMENT
for N04C-VQ
Click hereEngine / Hybrid System>N04C-VQ (COOLING)>COOLANT>REPLACEMENT
17940D
6.REMOVE INTERCOOLER ASSEMBLY (w/ Intercooler)
for N04C-UH
Click hereEngine / Hybrid System>N04C-UH (INTAKE)>INTERCOOLER>REMOVAL
for N04C-VL
Click hereEngine / Hybrid System>N04C-VL (INTAKE)>INTERCOOLER>REMOVAL
for N04C-VQ
Click hereEngine / Hybrid System>N04C-VQ (INTAKE)>INTERCOOLER>REMOVAL
87246A
7.DISCONNECT HEATER WATER OUTLET HOSE A
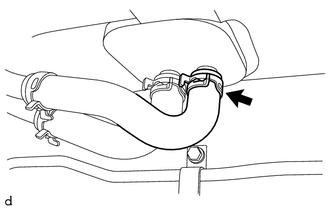
Slide the clamp and disconnect the heater water outlet hose A from the heater assembly.
- NOTICE:
- ·
Do not apply excessive force to the heater water outlet hose A.
·Prepare a drain pan or cloth in case the coolant leaks.
87245A
8.DISCONNECT HEATER WATER INLET HOSE A
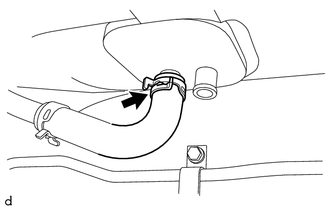
Slide the clamp and disconnect the heater water inlet hose A from the heater assembly.
- NOTICE:
- ·
Do not apply excessive force to the heater water inlet hose A.
·Prepare a drain pan or cloth in case the coolant leaks.
9.REMOVE INSTRUMENT PANEL ASSEMBLY
10.REMOVE STEERING COLUMN ASSEMBLY
89539E
11.REMOVE ECU BRACKET
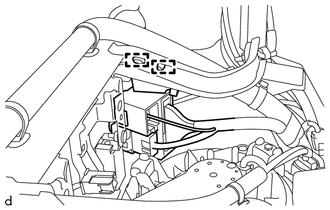
Detach the clamps.
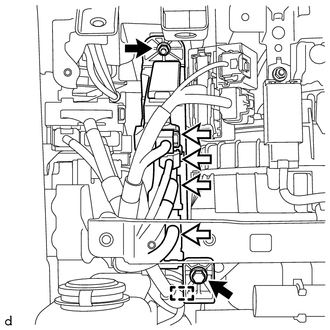
Disconnect connector and detach the clamp.
Remove the nut and bolt.
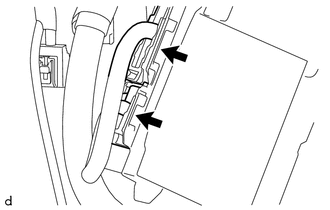
Disconnect the each connector and remove the ECU bracket.
12.REMOVE INSTRUMENT PANEL REINFORCEMENT PANEL BRACE
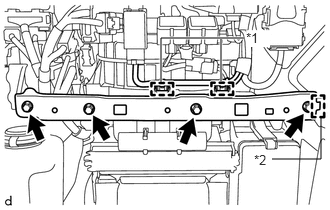
Detach the 2 clamps.
Remove the 4 bolts.
Detach the guide and remove the instrument panel reinforcement panel brace.
| *1 | Guide |
| *2 | Clamp |
13.REMOVE NO. 1 INSTRUMENT PANEL BRACE SUBASSEMBLY
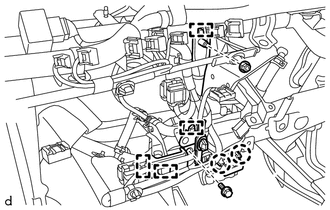
Detach the 2 claws.
Detach the clamp.
Remove the nut, bolt and No. 1 instrument panel brace sub-assembly.
55086A
14.REMOVE HEATER TO REGISTER CENTER DUCT SUB-ASSEMBLY
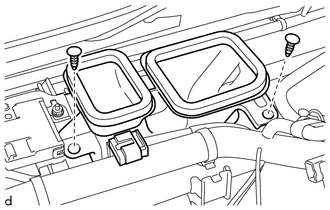
Remove the 2 clips and heater to register center duct sub-assembly.
82141
15.DISCONNECT INSTRUMENT PANEL WIRE
for RHD:
Remove the bolts and ground wires.
Remove the bolts and nuts.
Disconnect the connectors.
Detach the clamps and disconnect the instrument panel wire from the instrument panel reinforcement assembly.
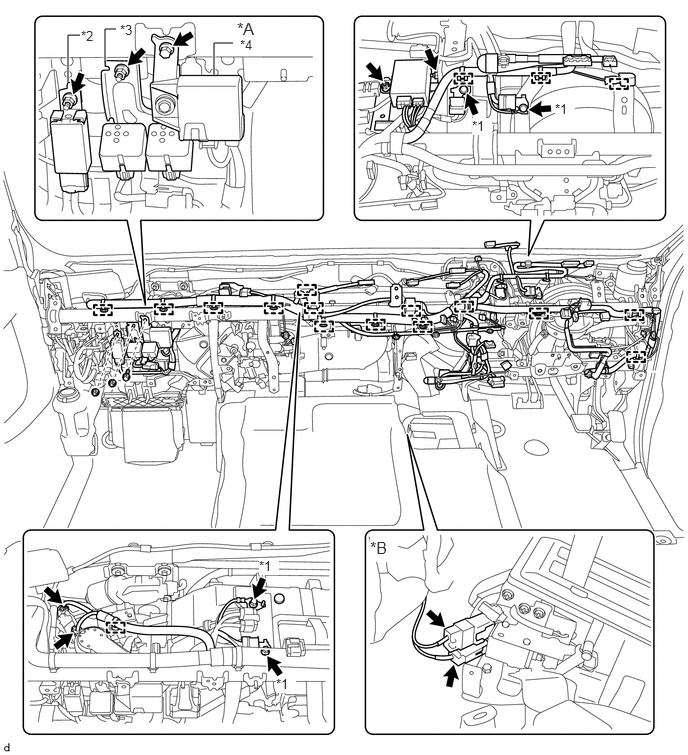
| *A | for Manual Air Conditioning System | *B | for Automatic Transmission |
| *1 | Ground Wire | *2 | Door Control Relay |
| *3 | No. 2 Buzzer Assembly | *4 | Air Conditioner Amplifier Assembly |
for LHD:
Remove the bolts and ground wires.
Remove the bolts and nuts.
Disconnect the connectors.
Detach the clamps and disconnect the instrument panel wire from the instrument panel reinforcement assembly.
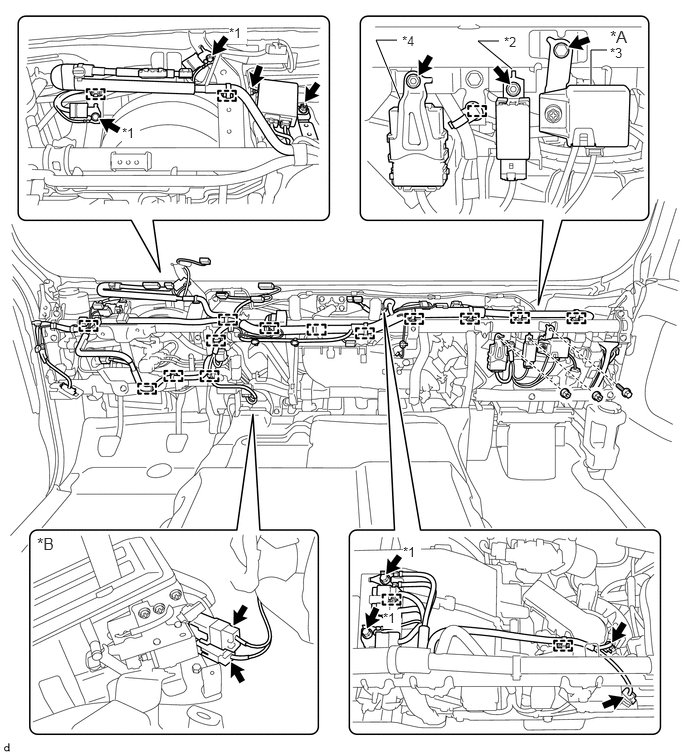
| *A | for Manual Air Conditioning System | *B | for Automatic Transmission |
| *1 | Ground Wire | *2 | Door Control Relay |
| *3 | Air Conditioner Amplifier Assembly | *4 | Network Gateway ECU |
55330B
16.REMOVE INSTRUMENT PANEL REINFORCEMENT ASSEMBLY
Remove the 4 screws.
Remove the 13 bolts, then remove the instrument panel reinforcement assembly.
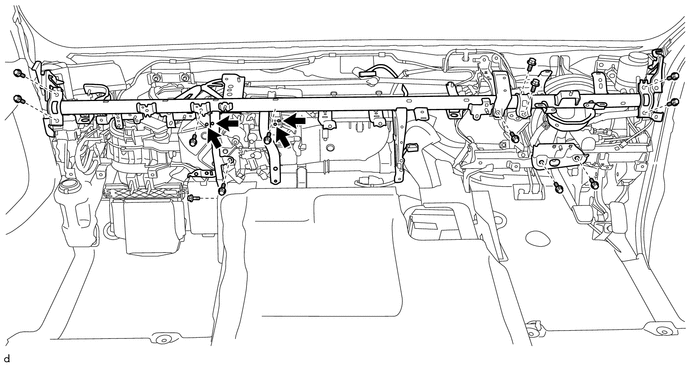

|
Screw | - | - |
87110
17.REMOVE HEATER ASSEMBLY
Remove the 3 bolts and heater assembly.
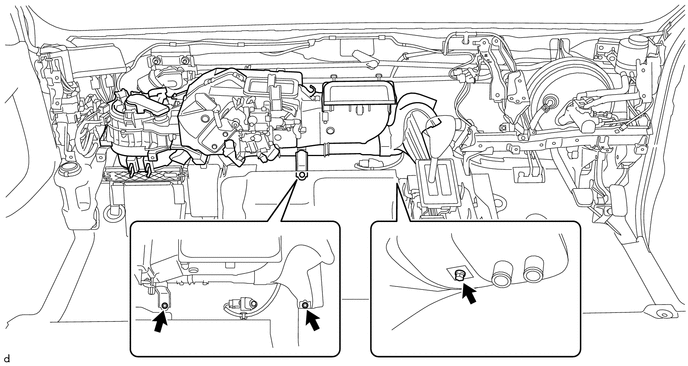
85330
18.REMOVE WINDSHIELD WASHER JAR ASSEMBLY
19.DISCONNECT RELAY BLOCK
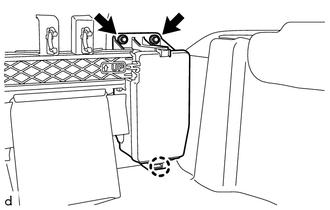
Remove the 2 bolts.
Detach the claw and disconnect the relay block.
87210H
20.REMOVE AIR DAMPER CASE ASSEMBLY
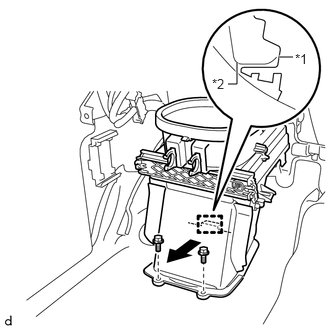
Remove the 2 bolts and the air damper case assembly in the direction of the arrow shown in the illustration.
| *1 | Air Damper Case Assembly |
| *2 | Vehicle Side Mounting Surface |