AIR CONDITIONING FRONT HEATER UNIT REMOVAL
CAUTION / NOTICE / HINT
- HINT:
- ·
Use the same procedure for LHD and RHD vehicles.
·The procedure listed below is for RHD vehicles.
PROCEDURE

 52119A
1.REMOVE FRONT BUMPER COVER
w/ Snorkel Air Cleaner:
Click hereVehicle Interior>EXTERIOR>FRONT BUMPER (w/ Snorkel Air Cleaner)>REMOVAL
w/o Snorkel Air Cleaner:
Click hereVehicle Interior>EXTERIOR>FRONT BUMPER(w/o Snorkel Air Cleaner)>REMOVAL
2.DRAIN ENGINE COOLANT (for 1HZ)
3.DRAIN ENGINE COOLANT (for 2TR-FE)
4.DRAIN ENGINE COOLANT (for N04C-UH, N04C-VL, N04C-VQ, N04C-WA)
for N04C-UH:
Click hereEngine / Hybrid System>N04C-UH (COOLING)>COOLANT>REPLACEMENT
for N04C-VL:
Click hereEngine / Hybrid System>N04C-VL (COOLING)>COOLANT>REPLACEMENT
for N04C-VQ:
Click hereEngine / Hybrid System>N04C-VQ (COOLING)>COOLANT>REPLACEMENT
for N04C-WA:
Click hereEngine / Hybrid System>N04C-WA (COOLING)>COOLANT>REPLACEMENT
17940D
5.REMOVE INTERCOOLER ASSEMBLY (w/ Intercooler)
for N04C-UH:
Click hereEngine / Hybrid System>N04C-UH (INTAKE)>INTERCOOLER>REMOVAL
for N04C-VL:
Click hereEngine / Hybrid System>N04C-VL (INTAKE)>INTERCOOLER>REMOVAL
for N04C-VQ:
Click hereEngine / Hybrid System>N04C-VQ (INTAKE)>INTERCOOLER>REMOVAL
for N04C-WA:
Click hereEngine / Hybrid System>N04C-WA (INTAKE)>INTERCOOLER>REMOVAL
87246A
6.DISCONNECT HEATER WATER OUTLET HOSE A
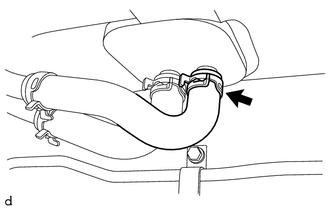
Slide the clamp and disconnect the heater water outlet hose A from the heater assembly.
- NOTICE:
- ·
Do not apply excessive force to the heater water outlet hose A.
·Prepare a drain pan or cloth in case the coolant leaks.
87245A
7.DISCONNECT HEATER WATER INLET HOSE A
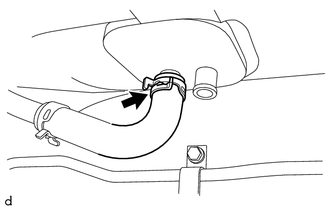
Slide the clamp and disconnect the heater water inlet hose A from the heater assembly.
- NOTICE:
- ·
Do not apply excessive force to the heater water inlet hose A.
·Prepare a drain pan or cloth in case the coolant leaks.
8.REMOVE INSTRUMENT PANEL ASSEMBLY
9.REMOVE STEERING COLUMN ASSEMBLY
89539E
10.REMOVE ECU BRACKET
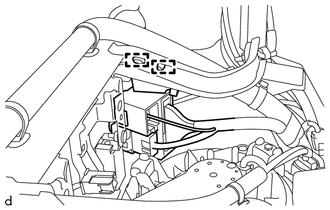
Detach the 2 wire harness clamps.
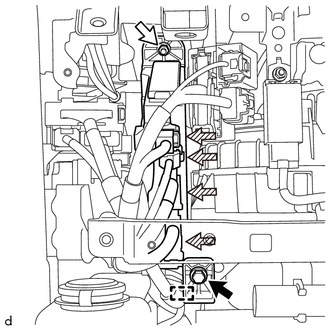

|
Bolt |

|
Nut |

|
Connector |
Disconnect each connector and detach the wire harness clamp.
Remove the nut and bolt.
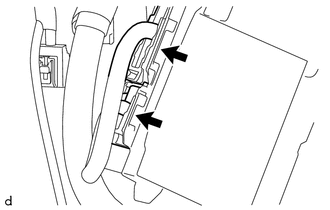
Disconnect each connector and remove the ECU bracket.
11.REMOVE INSTRUMENT PANEL REINFORCEMENT PANEL BRACE
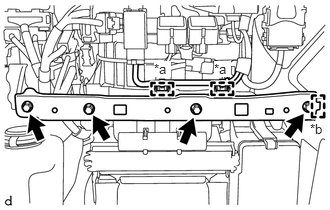
| *a | Clamp |
| *b | Guide |
Detach the 2 clamps.
Remove the 4 bolts.
Detach the guide and remove the instrument panel reinforcement panel brace.
12.REMOVE NO. 1 INSTRUMENT PANEL BRACE SUB-ASSEMBLY
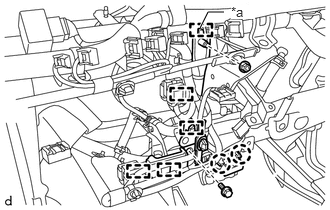
| *a | Hook |
Detach the 2 claws.
Detach the each clamp.
Remove the nut and bolt.
Detach the hook and remove the No. 1 instrument panel brace sub-assembly.
55086A
13.REMOVE HEATER TO REGISTER CENTER DUCT SUB-ASSEMBLY
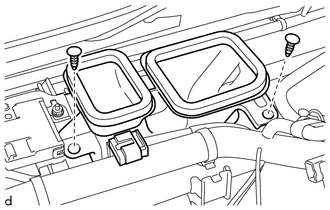
Remove the 2 clips and heater to register center duct sub-assembly.
82141
14.DISCONNECT INSTRUMENT PANEL WIRE
for RHD:
Remove the 4 bolts and 4 ground wires.
Remove the bolt and the 3 nuts.
Disconnect each connector.
Detach each clamp and disconnect the instrument panel wire from the instrument panel reinforcement assembly.
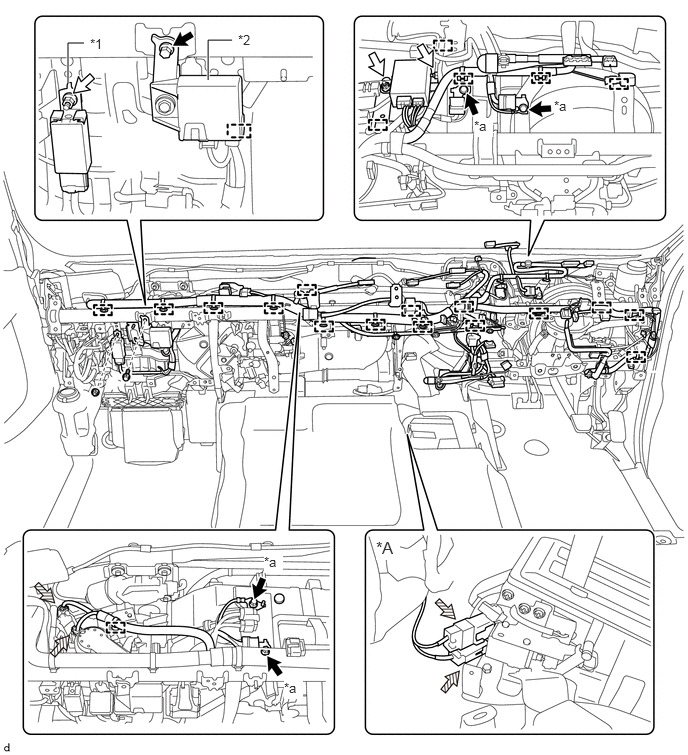
| *A | for Automatic Transmission | - | - |
| *1 | Door Control Relay | *2 | Air Conditioner Amplifier Assembly |
| *a | Ground Wire | - | - |
|
|
Bolt |
|
Nut |
|
|
Connector | - | - |
for LHD:
Remove the 4 bolts and the 4 ground wires.
Remove the bolts and the 4 nuts.
Disconnect each connector.
Detach each clamp and disconnect the instrument panel wire from the instrument panel reinforcement assembly.
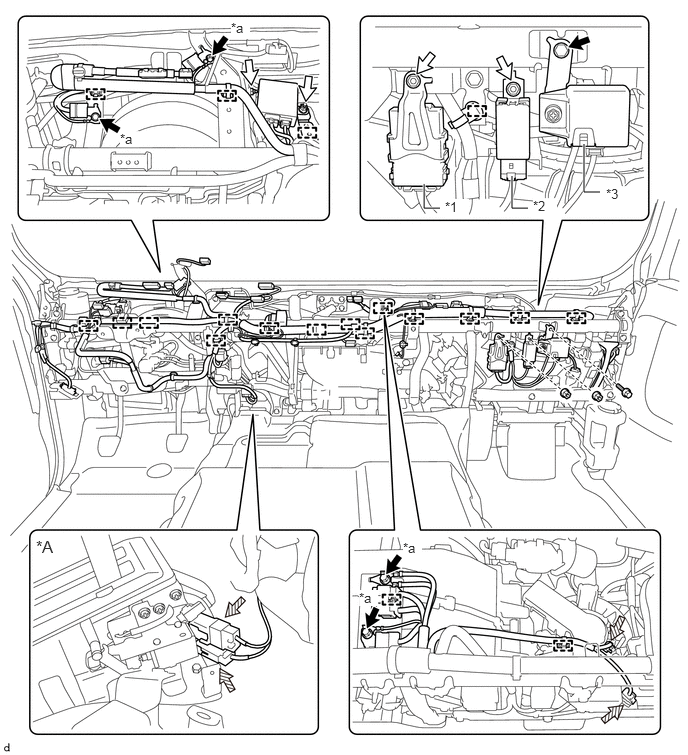
| *A | for Automatic Transmission | - | - |
| *1 | Network Gateway ECU | *2 | Door Control Relay |
| *3 | Air Conditioner Amplifier Assembly | - | - |
| *a | Ground Wire | - | - |
|
|
Bolt |
|
Nut |
|
|
Connector | - | - |
55330B
15.REMOVE INSTRUMENT PANEL REINFORCEMENT ASSEMBLY
Remove the 4 screws.
Remove the 14 bolts, then remove the instrument panel reinforcement assembly.
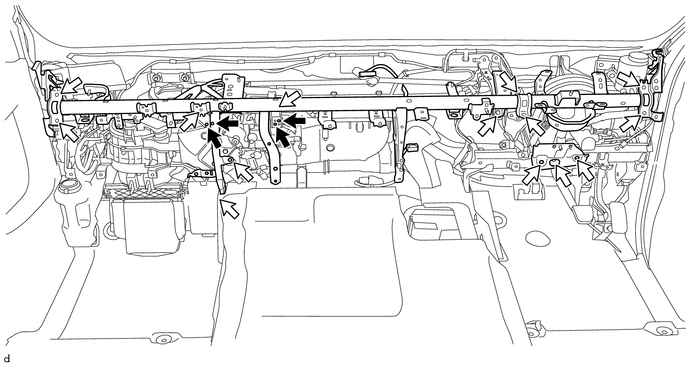
|
|
Screw |
|
Bolt |
87110
16.REMOVE HEATER ASSEMBLY
Remove the 3 bolts and heater assembly.
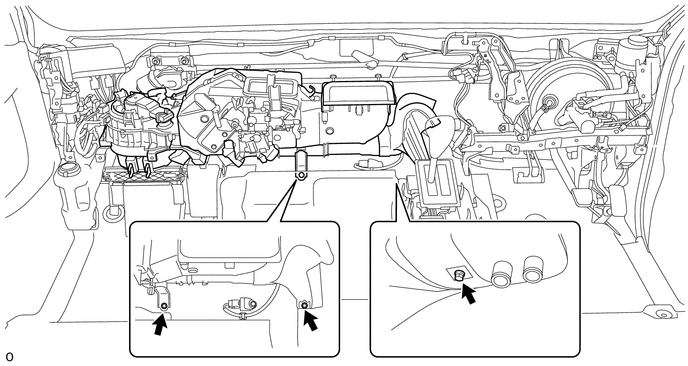
85330
17.REMOVE WINDSHIELD WASHER JAR ASSEMBLY
18.DISCONNECT RELAY BLOCK
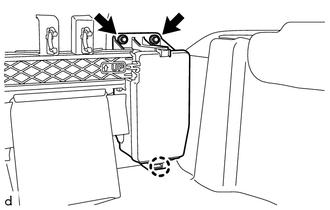
Remove the 2 bolts.
Detach the claw and disconnect the relay block.
87210H
19.REMOVE AIR DAMPER CASE ASSEMBLY
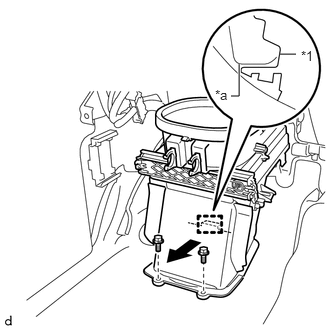
| *1 | Air Damper Case Assembly |
| *a | Vehicle Side Mounting Surface |
Remove the 2 bolts and the air damper case assembly in the direction of the arrow shown in the illustration.