K112 CVT DIFFERENTIAL OIL SEAL REPLACEMENT
PROCEDURE

 1.REMOVE FRONT WHEELS
53702
2.REMOVE FRONT FENDER APRON LH
3.DRAIN CONTINUOUSLY VARIABLE TRANSAXLE FLUID
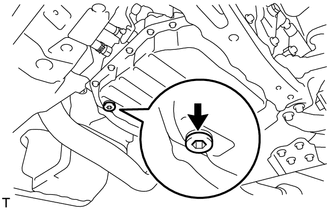
Using a 6 mm socket hexagon wrench, remove the overflow plug and gasket from the continuously variable transaxle assembly.
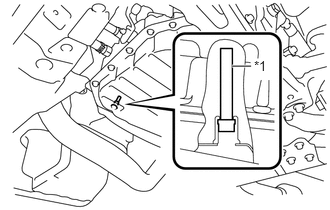
Using a 6 mm socket hexagon wrench, remove the No. 1 transmission oil filler tube from the continuously variable transaxle assembly and drain the continuously variable transaxle fluid.
| *1 | No. 1 Transmission Oil Filler Tube |
Using a 6 mm socket hexagon wrench, install the No. 1 transmission oil filler tube to the continuously variable transaxle assembly.
- Torque:
- 1.7 N*m (17 kgf*cm, 15 in.*lbf)
Temporarily install the gasket and overflow plug.
- HINT:
-
Reuse the old gasket. The plug will be removed again to adjust the fluid level.
4.REMOVE FRONT DRIVE SHAFT ASSEMBLY
30400C
5.REMOVE CVT TYPE T OIL SEAL LH
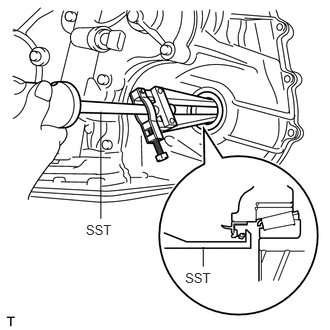
Using SST, remove the oil seal from the transaxle case.
- SST
- 09308-00010
- NOTICE:
-
Do not damage the transaxle case.
30400B
6.REMOVE CVT TYPE T OIL SEAL RH
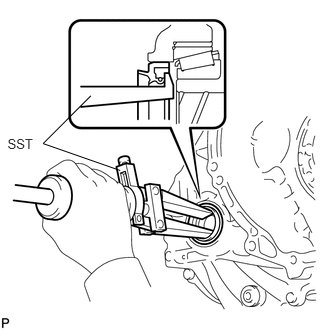
Using SST, remove the oil seal from the transaxle housing.
- SST
- 09308-00010
- NOTICE:
-
Do not damage the transaxle housing.
30400C
7.INSTALL CVT TYPE T OIL SEAL LH
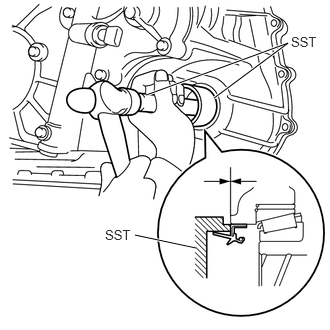
Using SST and a hammer, tap in a new oil seal to the transaxle case.
- SST
- 09726-27012 (09726-02041)
09950-70010 (09951-07200)
- Standard depth:
-0.5 to 0.5 mm (-0.0197 to 0.0197 in.)
- NOTICE:
-
Do not damage the oil seal lip.
Coat the lip of the oil seal with MP grease.
30400B
8.INSTALL CVT TYPE T OIL SEAL RH
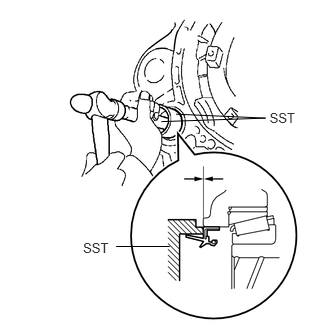
Using SST and a hammer, tap in a new oil seal to the transaxle housing.
- SST
- 09387-00010
09950-70010 (09951-07200)
- Standard depth:
-0.5 to 0.5 mm (-0.0197 to 0.0197 in.)
- NOTICE:
-
Do not damage the oil seal lip.
Coat the lip of the oil seal with MP grease.
9.INSTALL FRONT DRIVE SHAFT ASSEMBLY
10.ADD CONTINUOUSLY VARIABLE TRANSAXLE FLUID
53702
11.INSTALL FRONT FENDER APRON LH
12.INSTALL FRONT WHEELS
13.INSPECT AND ADJUST FRONT WHEEL ALIGNMENT
14.CHECK ABS SPEED SENSOR SIGNAL
Check for the speed sensor signal (See page Brake>BRAKE CONTROL / DYNAMIC CONTROL SYSTEMS>VEHICLE STABILITY CONTROL SYSTEM>TEST MODE PROCEDURE).