2011-2016 FJ Cruiser · Service Manual ENGINE

REMOVAL

Removal / installation · Vehicles built Jul 2007 – Jul 2009

Versions by build date: Jul 2007 – Jul 2009 Aug 2009 – Oct 2010 Nov 2010 – Jul 2014 from Aug 2014


1. REMOVE BATTERY

2. DRAIN ENGINE COOLANT

A070279E01

CAUTION:
To avoid the danger of being burned, do not remove the radiator cap while the engine and radiator are still hot. Thermal expansion will cause hot engine coolant and steam to blow out from the radiator.

  1. Remove the service hole cover from the engine under cover.

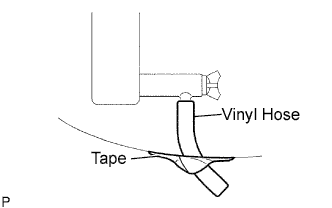
  1. Install a vinyl hose onto the drain on the radiator side.

  1. Fix the vinyl hose with tape.

  1. A076320E02
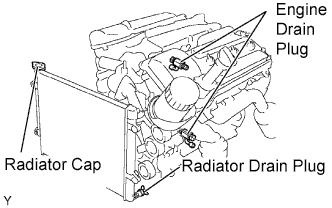
    Loosen the 3 drain plugs on the engine and radiator, and drain the coolant.

  1. Remove the radiator cap.

  1. Drain the coolant from the reservoir tank.

  1. Tighten the 3 drain plugs.

    Torque:
    13 N*m{ 130 kgf*cm , 9 ft.*lbf } for the engine

  1. Remove the vinyl hose from the radiator.


3. DRAIN ENGINE OIL
  1. Remove engine under cover seal No. 3.

  1. Remove the oil pan drain plug and drain the engine oil.

  1. Clean the oil pan drain plug and install it with a new gasket.

    Torque:
    40 N*m{ 408 kgf*cm , 30 ft.*lbf }


4. REMOVE POWER STEERING LINK ASSEMBLY
Refer to the procedures up to "REMOVE POWER STEERING LINK ASSEMBLY" (Click here).

5. REMOVE FRONT DIFFERENTIAL CARRIER ASSEMBLY
Refer to the procedures up to "REMOVE FRONT DIFFERENTIAL CARRIER ASSEMBLY" (Click here).

6. REMOVE FAN
Refer to the procedures up to "REMOVE FAN" (Click here).

7. REMOVE GENERATOR ASSEMBLY
Refer to the procedures up to "REMOVE GENERATOR ASSEMBLY" (Click here)

8. SEPARATE COOLER COMPRESSOR ASSEMBLY

G036154E01
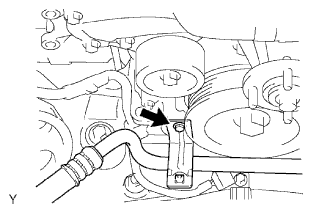
  1. Remove the bolt, then separate the suction hose sub-assembly.

  1. G036155E01
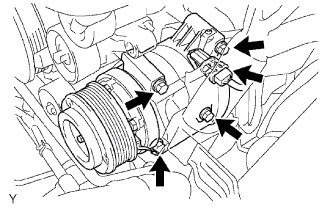
    Disconnect the cooler compressor assembly connector.

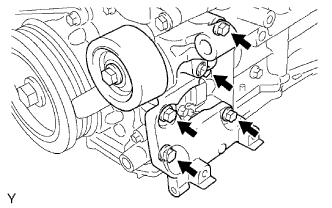
  1. Remove the 4 bolts, then separate the cooler compressor assembly from the V-ribbed belt tensioner assembly.


9. REMOVE V-RIBBED BELT TENSIONER ASSEMBLY

A076445E01
  1. Remove the 5 bolts, then remove the V-ribbed belt tensioner.


10. REMOVE OIL LEVEL GAUGE GUIDE
  1. Remove the oil level gauge.

  1. Remove the bolt and pull out the oil level gauge guide.

  1. Remove the O-ring from the oil level gauge guide.


11. SEPARATE VANE PUMP ASSEMBLY

A076444
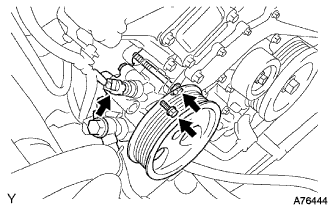
  1. Disconnect the power steering pressure switch connector.

  1. Remove the 2 bolts, then separate the vane pump.

    NOTICE:
    Do not hit the pulley with other parts when separating the vane pump.

    HINT:
    The vane pump is suspended securely.


12. REMOVE NO. 2 IDLER PULLEY SUB-ASSEMBLY

  1. A076338E01
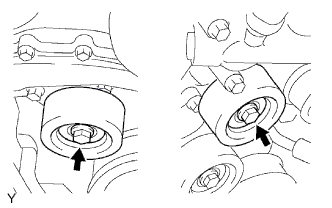
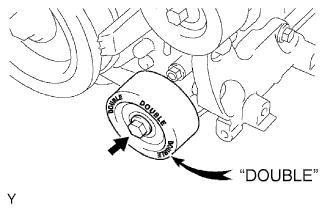
    Remove the 2 bolts, then remove the No. 2 idler pulleys.


13. REMOVE NO. 1 IDLER PULLEY SUB-ASSEMBLY

  1. A076438E01
    Remove the bolt, then remove the No. 1 idler pulley.


14. REMOVE CRANKSHAFT PULLEY

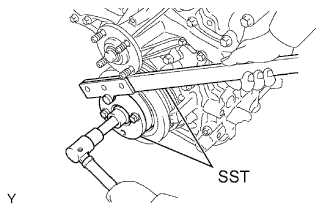
A072947E02
  1. Using SST, hold the crankshaft pulley and loosen the pulley set bolt.

    SST
    09213-54015   (91651-60855)
    09330-00021  

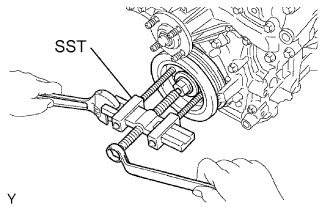
  1. A072948E01
    Using the pulley set bolt and SST, remove the crankshaft pulley.
    SST
    09950-50013   (09951-05010, 09952-05010, 09953-05020, 09954-05030)


15. REMOVE NO. 2 OIL PAN SUB-ASSEMBLY

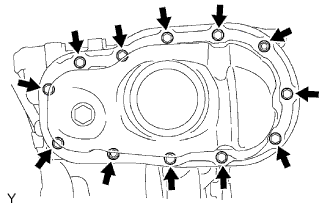
A072949E01
  1. Remove the 10 bolts and 2 nuts.

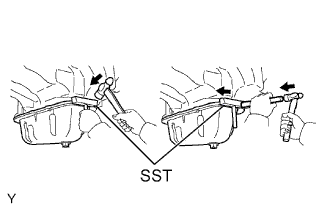
  1. A072950E02
    Insert the blade of SST between the oil pan and No. 2 oil pan, cut off applied sealer and remove the No. 2 oil pan.

    NOTICE:
    1. Be careful not to damage the contact surfaces of the oil pan and No. 2 oil pan.
    2. Be careful not to damage the No. 2 oil pan flange.


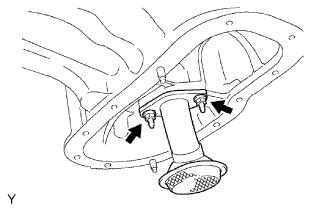
16. REMOVE OIL STRAINER SUB-ASSEMBLY

A072951E01
  1. Remove the 2 nuts, then remove the oil strainer and gasket.


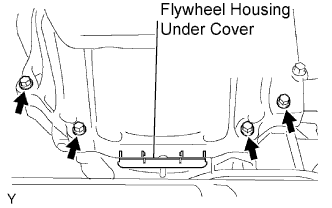
17. REMOVE OIL PAN SUB-ASSEMBLY

A076446E01
  1. Remove the 4 housing bolts.

  1. Remove the flywheel housing under cover.

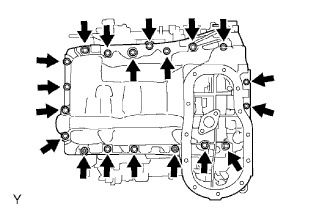
  1. A072952E01
    Remove the 17 bolts and 2 nuts.

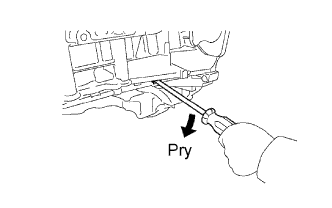
  1. G036806E01
    Using a screwdriver, remove the oil pan by prying between the oil pan and cylinder block.

    NOTICE:
    Be careful not to damage the contact surfaces of the cylinder block and oil pan.

  1. Remove the O-ring from the oil pump.


18. REMOVE AIR CLEANER ASSEMBLY

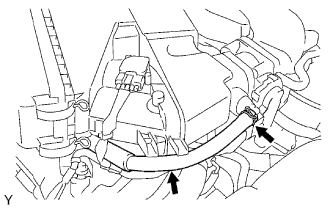
A075594E01
  1. Disconnect the No. 2 ventilation hose.

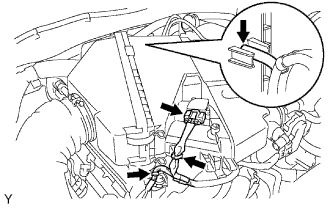
  1. A075595E01
    Disconnect the vacuum hose.

  1. Disconnect the mass air flow meter connector.

  1. Disengage the 2 wire harness clamps.

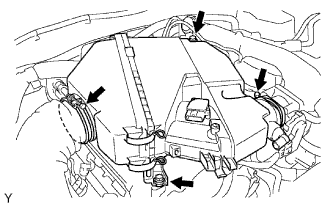
  1. A075596E01
    Loosen the 2 hose clamps.

  1. Remove the 2 bolts.

  1. Disconnect the air cleaner hose and remove the air cleaner.


19. REMOVE THROTTLE BODY BRACKET

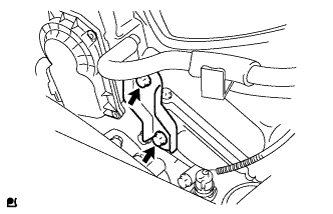
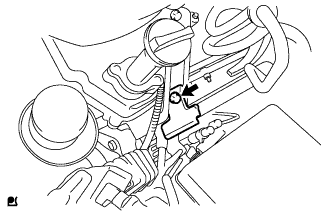
  1. A126392
    Remove the 2 bolts and the throttle body bracket.


20. REMOVE OIL BAFFLE PLATE

  1. A126390
    Remove the bolt and the oil baffle plate.


21. REMOVE NO. 1 SURGE TANK STAY

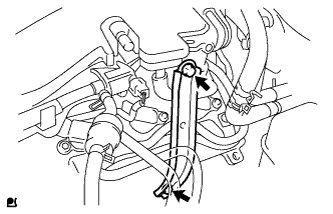
  1. A126389
    Remove the 2 bolts and the No. 1 surge tank stay.

22. REMOVE NO. 2 SURGE TANK STAY
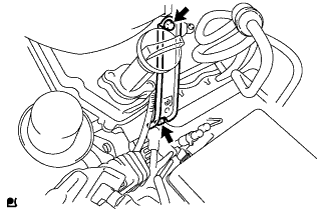
  1. A126391
    Remove the 2 bolts and the No. 2 surge tank stay.


23. REMOVE INTAKE AIR SURGE TANK

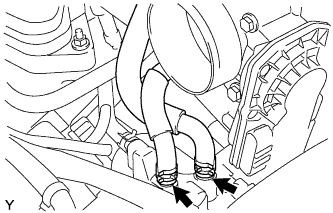
  1. A126395
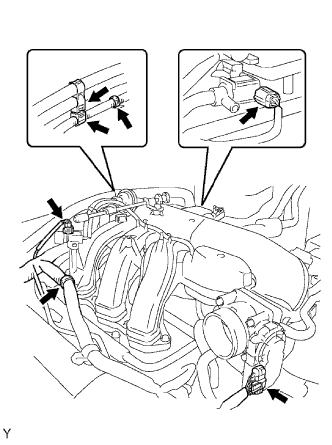
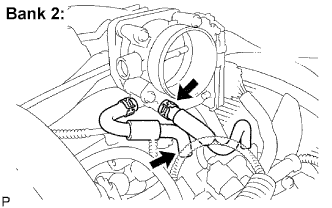
    Disconnect the 2 water by-pass hoses.

  1. A126449
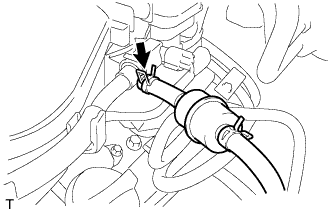
    Disconnect the fuel vapor feed hose.

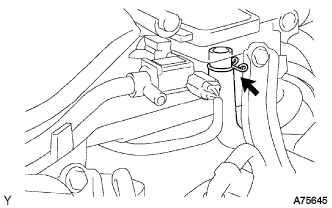
  1. A075645
    Disconnect the ventilation hose.

  1. A075646E01
    Disconnect the 2 VSV connectors.

  1. Disconnect the throttle body with motor connector.

  1. Separate the 3 wire harness clamps and the hose clamp.

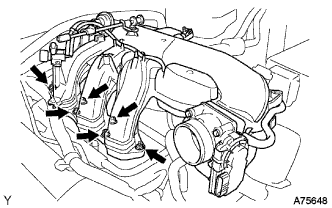
  1. A075648
    Remove the 2 nuts.

  1. Using a socket hexagon wrench 8, remove the 4 bolts, intake air surge tank and the gasket.


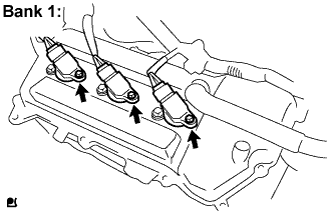
24. REMOVE IGNITION COIL ASSEMBLY

A126385E01
  1. For Bank 1:

    1. Disconnect the 3 connectors.

    2. Remove the 3 bolts, then remove the 3 ignition coils.

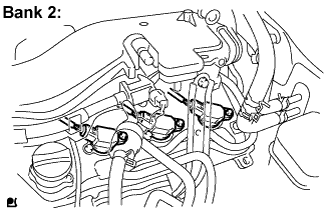
  1. A126386E01
    For Bank 2:

    1. Disconnect the 3 connectors.

    2. Remove the 3 bolts, then remove the 3 ignition coils.


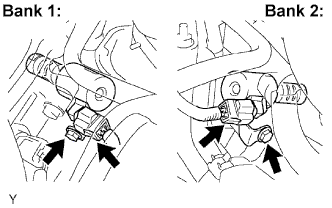
25. REMOVE CAMSHAFT TIMING OIL CONTROL VALVE ASSEMBLY

G036118E02
  1. Disconnect the 2 connectors.

  1. Remove the 2 bolts, then remove the 2 camshaft timing oil control valves.


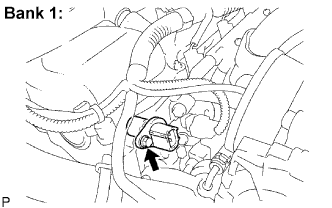
26. REMOVE VVT SENSOR

A076413E02
  1. Bank 1 side VVT sensor:

    1. Disconnect the VVT sensor connector.

    2. Remove the bolt and VVT sensor.

  1. A076414E02
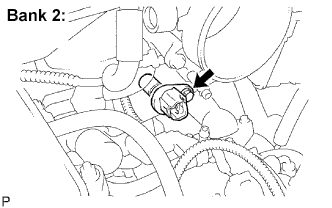
    Bank 2 side VVT sensor:

    1. Disconnect the No. 4 water by-pass hose and No. 5 water by-pass hose.

    2. Disconnect the VVT sensor connector.

    3. A076415E02
      Remove the bolt and VVT sensor.


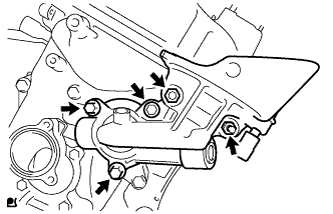
27. REMOVE WATER INLET

  1. A076335E02
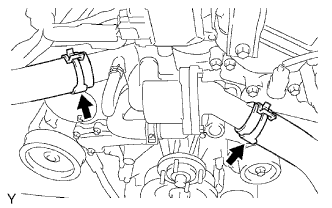
    Disconnect the 2 oil cooler hoses. (w/ Oil Cooler)

  1. Disconnect the 2 radiator hoses.

  1. A076336E02
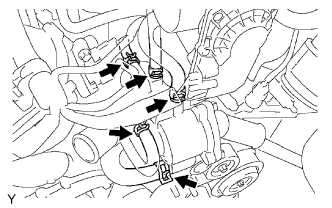
    Disconnect the 5 water by-pass hoses.

  1. A076337E03
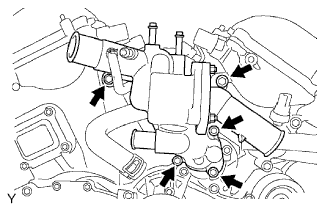
    Remove the 5 bolts and water inlet.

  1. Remove the O-ring from the water outlet pipe.

  1. Remove the gasket from the water pump.


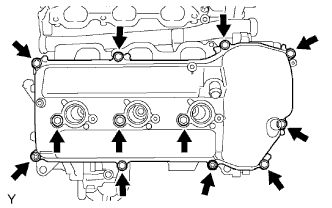
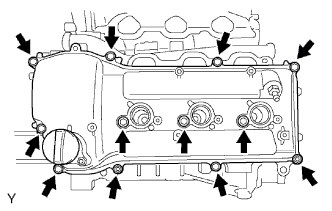
28. REMOVE CYLINDER HEAD COVER SUB-ASSEMBLY

A072943E01
  1. Remove the 10 bolts, 3 seal washers, 2 nuts, cylinder head cover and gasket.


29. REMOVE CYLINDER HEAD COVER SUB-ASSEMBLY LH

A076503E01
  1. Remove the 10 bolts, 3 seal washers, 2 nuts, cylinder head cover and gasket.


30. REMOVE OIL FILTER BRACKET SUB-ASSEMBLY

A120414
  1. Remove the 2 nuts, 3 bolts, oil filter bracket and gasket.


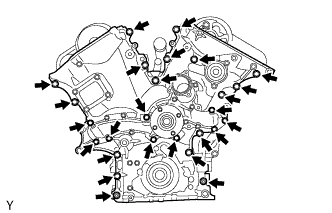
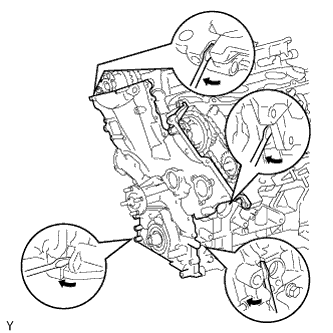
31. REMOVE TIMING CHAIN OR BELT COVER SUB-ASSEMBLY

A126429
  1. Remove the 24 bolts and 2 nuts.

  1. A126430
    Remove the timing chain cover by prying between the timing chain cover and cylinder head or cylinder block with a screwdriver.

    NOTICE:
    Be careful not to damage the contact surfaces of the timing chain cover, cylinder block and cylinder head.

  1. Remove the O-ring from the cylinder head LH.


32. REMOVE TIMING GEAR CASE OR TIMING CHAIN CASE OIL SEAL

A072957E01
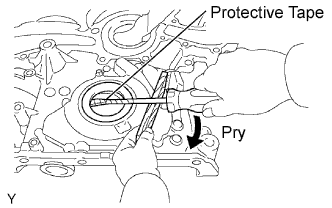
  1. Using a screwdriver with its tip wrapped in protective tape, pry out the oil seal.

    NOTICE:
    Do not damage the oil pump assembly.

← COMPONENTS (from Aug 2014)REMOVAL (Aug 2009 – Oct 2010) →