2014-2019 Hiace · Service Manual BRAKE

REMOVAL

Removal / installation · Vehicles built from Jan 2017

Versions by build date: Oct 2014 – Dec 2014 Jan 2015 – Dec 2016 from Jan 2017


1. DRAIN BRAKE FLUID

NOTICE:
Wash off brake fluid immediately if it comes in contact with any painted surface.


2. REMOVE BRAKE MASTER CYLINDER

  1. C318071E01
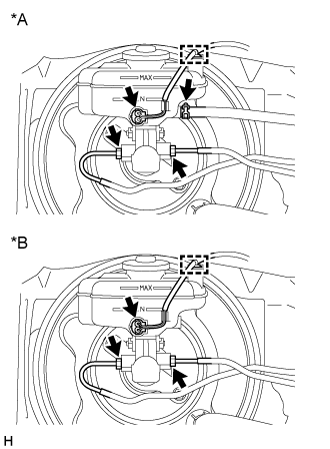
    Disconnect the warning switch connector and detach the clamp.
    Text in Illustration 
    *A
    for Manual Transmission
    *B
    for Automatic Transmission

  1. Using a union nut wrench, disconnect the 2 brake tubes from the brake master cylinder.

  1. for Manual Transmission:
    Slide the clip disconnect the clutch reservoir tube from the brake master cylinder.

  1. C318072
    for 1TR-FE, 2TR-FE:
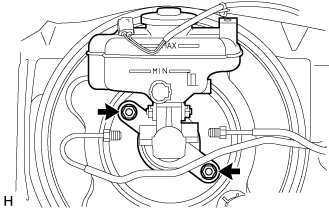
    Remove the 2 nuts and brake master cylinder.

  1. for 1KD-FTV, 2KD-FTV and 5L-E:

    1. Remove the 2 nuts, and disconnect the bracket.

    2. Remove the brake master cylinder from brake booster.

  1. Remove the O-ring from the brake master cylinder.

    NOTICE:
    1. The master cylinder requires careful handling. Do not allow the master cylinder to receive any impact, such as from being dropped. Do not reuse a master cylinder that has been dropped.
    2. Do not strike or pinch the master cylinder piston, and do not cause any damage the the master cylinder piston by any other means.
    3. When installing the master cylinder to the brake booster, or when removing the master cylinder from the brake booster, make sure that the master cylinder is kept horizontal or with its facing downward (the piston faces up ward) to prevent the master cylinder piston from falling out.
    4. Do not allow any foreign objects to contaminate the master cylinder piston. If a foreign object gets on the piston, remove it by using a piece of cloth, and then apply an even layer of lithium soap base glycol grease around the circumference (sliding part) of the piston.
    5. Do not use any other type of grease or fluid.
    6. Be careful not to damage the brake tubes.


3. REMOVE HEADLIGHT ASSEMBLY RH (for RHD with Standard Body)

HINT:
Remove of the headlight assembly RH is the same as the headlight assembly LH.

  1. for Halogen Headlight:
    (Click here)

  1. for LED Headlight:
    (Click here)


4. REMOVE HEADLIGHT ASSEMBLY RH (for RHD with Wide Body)

HINT:
Remove of the headlight assembly RH is the same as the headlight assembly LH.
  1. for Halogen Headlight:
    (Click here)

  1. for LED Headlight:
    (Click here)


5. REMOVE RADIATOR GRILLE (for LHD with Standard Body)
(Click here)

6. REMOVE WINDSHIELD WASHER JAR ASSEMBLY (for LHD with Standard Body)
(Click here)

7. REMOVE INSTRUMENT PANEL FINISH PANEL LOWER
(Click here)

8. SEPARATE MASTER CYLINDER PUSH ROD CLEVIS
  1. Remove the clip and clevis pin and separate the push rod clevis from the brake pedal.


9. SEPARATE BRAKE TUBE

  1. for Manual transmission:

    1. C113662
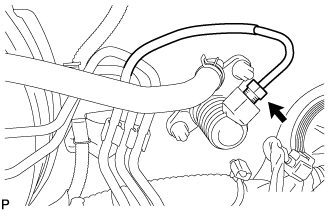
      Using a union nut wrench, disconnect the clutch tube from the clutch master cylinder.

    2. C106102
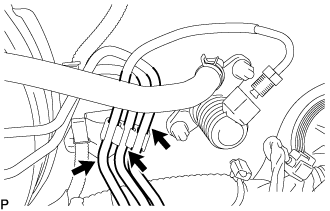
      Disengage the 3 tubes from the clamp.

  1. for Automatic transmission:
    Disengage the 2 tubes from the clamp.


10. REMOVE BRAKE BOOSTER ASSEMBLY

  1. C318078E01
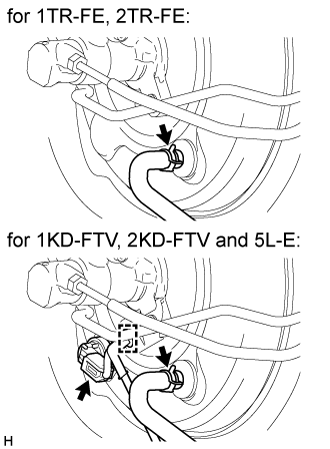
    Slide the clip, disconnect the vacuum hose.

  1. for 1KD-FTV, 2KD-FTV and 5L-E:
    Disconnect the vacuum warning switch connector and detach the clamp.

  1. C106101
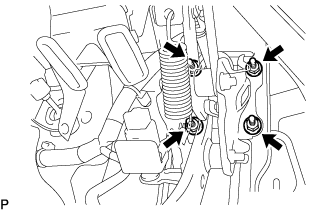
    Remove the 4 nuts and brake booster assembly.


11. REMOVE BRAKE BOOSTER GASKET

12. DISCONNECT WIRE HARNESS

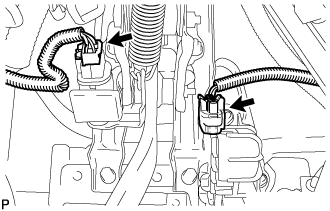
  1. C106112
    Disconnect the 2 connectors.


13. REMOVE ACCELERATOR PEDAL ROD ASSEMBLY

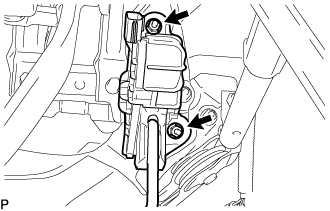
  1. C106094
    Remove the 2 nuts and accelerator pedal rod assembly.


14. REMOVE BRAKE PEDAL SUPPORT ASSEMBLY

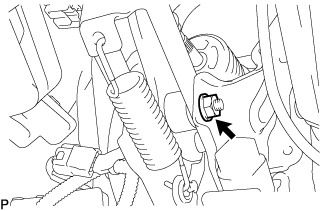
  1. C102531
    Loosening the bolt.

    CAUTION:
    Do not remove the loosened bolt.

    HINT:
    When loosening the nut, keep the bolt from rotating.

  1. C106095
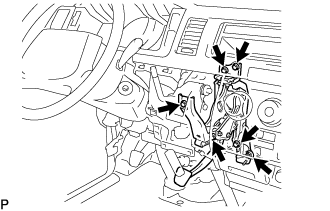
    Remove the 5 bolts, nut and the brake pedal support assembly.

← REMOVAL (Jan 2015 – Dec 2016)DISASSEMBLY (from Oct 2014) →