REMOVAL
Removal / installation · Vehicles built from Jan 2017
Versions by build date: Oct 2014 – Dec 2014 Jan 2015 – Dec 2016 from Jan 2017
| 1.
DRAIN BRAKE FLUID |
 |
- NOTICE:
- Wash off brake fluid immediately if it comes in contact with any painted surface.
| 2.
REMOVE BRAKE MASTER CYLINDER |
|
(Click here)
| 3.
REMOVE HEADLIGHT ASSEMBLY RH (for RHD with Standard Body) |
|
- HINT:
- Remove of the headlight assembly RH is the same as the headlight assembly LH.
for Halogen Headlight:
(Click here)
for LED Headlight:
(Click here)
| 4.
REMOVE HEADLIGHT ASSEMBLY RH (for RHD with Wide Body) |
|
- HINT:
- Remove of the headlight assembly RH is the same as the headlight assembly LH.
for Halogen Headlight:
(Click here)
for LED Headlight:
(Click here)
| 5.
REMOVE RADIATOR GRILLE (for LHD with Standard Body) |
|
(Click here)
| 6.
REMOVE WINDSHIELD WASHER JAR ASSEMBLY (for LHD with Standard Body) |
|
(Click here)
| 7.
REMOVE INSTRUMENT PANEL FINISH PANEL LOWER |
|
(Click here)
| 8.
SEPARATE MASTER CYLINDER PUSH ROD CLEVIS |
|
Remove the clip and clevis pin and separate the push rod clevis from the brake pedal.
| 9.
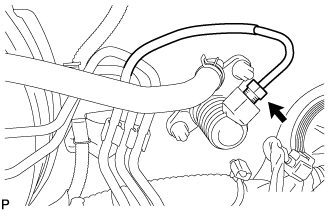
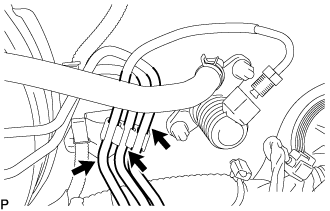
SEPARATE BRAKE TUBE |
|
for Manual transmission:
- Using a union nut wrench, disconnect the clutch tube from the clutch master cylinder.
- Disengage the 3 tubes from the clamp.
for Automatic transmission:
Disengage the 2 tubes from the clamp.
| 10.
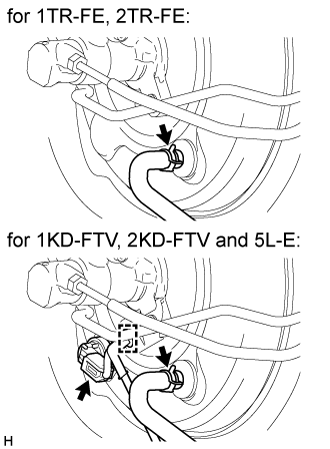
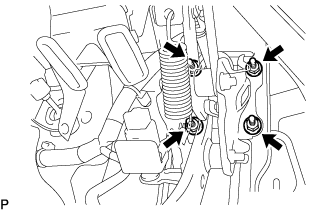
REMOVE BRAKE BOOSTER ASSEMBLY |
|
- Slide the clip, disconnect the vacuum hose.
for 1KD-FTV, 2KD-FTV and 5L-E:
Disconnect the vacuum warning switch connector and detach the clamp.
- Remove the 4 nuts and brake booster assembly.
| 11.
REMOVE BRAKE BOOSTER GASKET |
|
| 12.
REMOVE BRAKE VACUUM CHECK VALVE ASSEMBLY |
|
Remove the check valve assembly and grommet.
| 13.
REMOVE MASTER CYLINDER PUSH ROD CLEVIS |
|
Loosen the lock nut and remove the push rod clevis.
| 14.
REMOVE VACUUM WARNING SWITCH ASSEMBLY (for Diesel) |
|
(Click here)