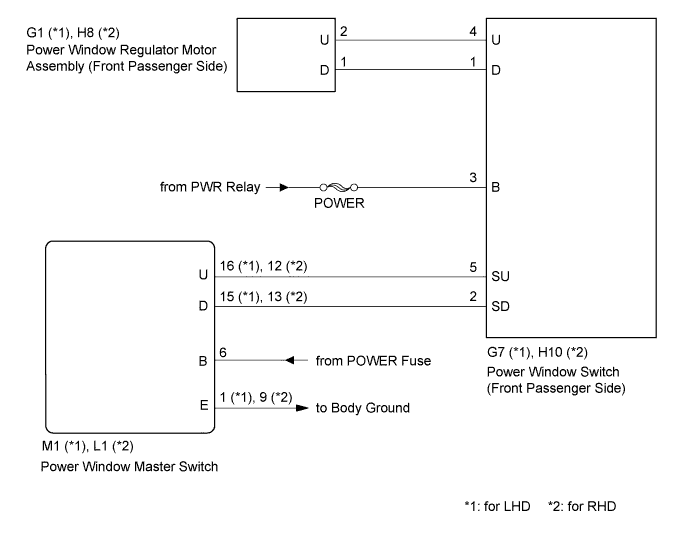
If the passenger side manual UP/DOWN function does not operate, a malfunction may exist in the power window regulator motor, power window switch, power window master switch or wire harness.
WIRING DIAGRAM
INSPECTION PROCEDURE
1. CHECK POWER WINDOW SWITCH (FRONT PASSENGER SIDE) (POWER SOURCE)
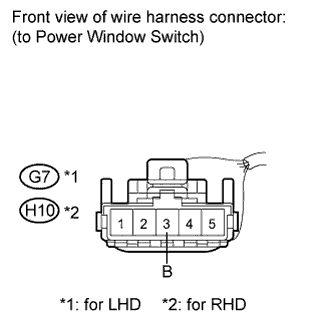
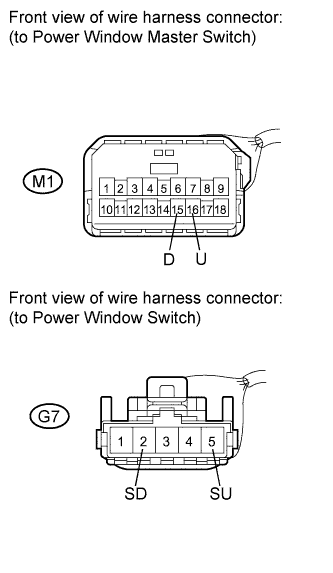
Disconnect the G7 connector (LHD).
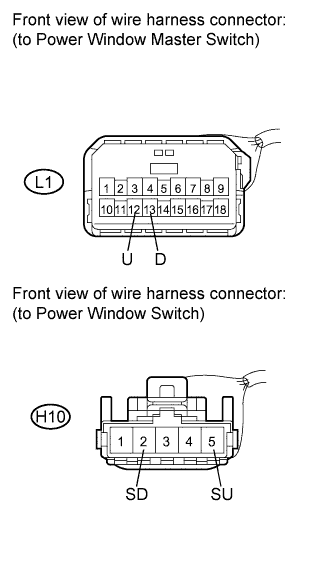
Disconnect the H10 connector (RHD).
Measure the voltage according to the value(s) in the table below.
Standard voltage:
for LHD:
Tester Connection
Condition
Specified Condition
G7-3 (B) - Body ground
Ignition switch on (IG)
11 to 14 V
for RHD:
Tester Connection
Condition
Specified Condition
H10-3 (B) - Body ground
Ignition switch on (IG)
11 to 14 V
NG
REPAIR OR REPLACE HARNESS OR CONNECTOR
OK
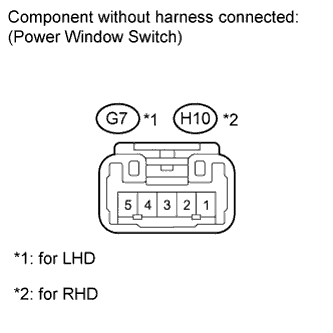
2. INSPECT POWER WINDOW SWITCH (FRONT PASSENGER SIDE)
Measure the resistance when the switch is operated according to the value(s) in the table below.
Standard resistance:
Tester Connection
Switch Condition
Specified Condition
1 (D) - 2 (SD)
UP
Below 1 Ω
3 (B) - 4 (U)
Below 1 Ω
1 (D) - 2 (SD)
OFF
Below 1 Ω
4 (U) - 5 (SU)
Below 1 Ω
4 (U) - 5 (SU)
DOWN
Below 1 Ω
1 (D) - 3 (B)
Below 1 Ω
NG
REPLACE POWER WINDOW SWITCH (FRONT PASSENGER SIDE) (Click here)
OK
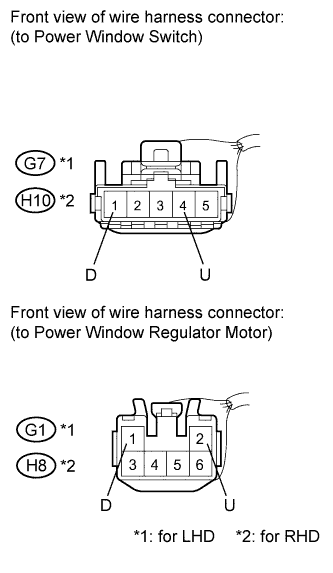
3. CHECK HARNESS AND CONNECTOR (SWITCH (FRONT PASSENGER SIDE) - MOTOR (FRONT PASSENGER SIDE))
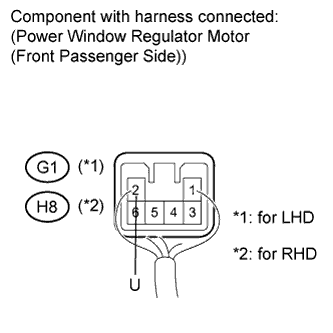
Disconnect the G7 and G1 connectors (LHD).
Disconnect the H10 and H8 connectors (RHD).
Measure the resistance according to the value(s) in the table below.
Standard resistance:
for LHD:
Tester Connection
Condition
Specified Condition
G7-4 (U) - G1-2 (U)
Always
Below 1 Ω
G7-1 (D) - G1-1 (D)
Always
Below 1 Ω
G7-4 (U) - Body ground
Always
10 kΩ or higher
G7-1 (D) - Body ground
Always
10 kΩ or higher
for RHD:
Tester Connection
Condition
Specified Condition
H10-4 (U) - H8-2 (U)
Always
Below 1 Ω
H10-1 (D) - H8-1 (D)
Always
Below 1 Ω
H10-4 (U) - Body ground
Always
10 kΩ or higher
H10-1 (D) - Body ground
Always
10 kΩ or higher
NG
REPAIR OR REPLACE HARNESS OR CONNECTOR
OK
4. INSPECT POWER WINDOW REGULATOR MOTOR ASSEMBLY (FRONT PASSENGER SIDE)
Check power window regulator motor operation.
Remove the power window regulator motor (Click here).
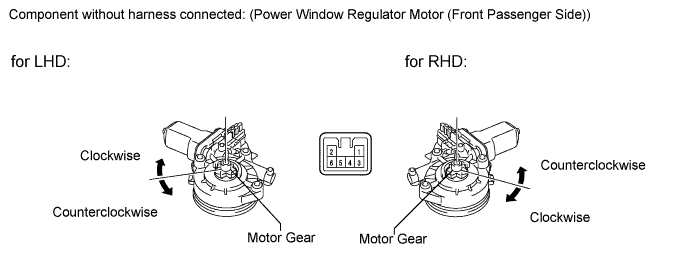
Apply battery voltage to the motor connector according to the table below.
NOTICE:
Do not apply battery voltage to any terminals except terminals 1 and 2.
The work must be performed with the power window regulator and door glass installed on the vehicle.
Install the power window regulator motor (Click here).
Connect an electrical tester DC 400 A probe to the wire harness of terminal 2.
NOTICE:
Match the arrow mark of the probe with the direction of the current flow.
Fully close the door glass by pressing the power window UP switch. Wait for approximately 60 seconds.
Continue to press the power window UP switch and measure how long it takes for the electrical current to change from a range of 16 to 28 A to approximately 1 A (Inspection of current shut-off).
Standard:
4 to 90 seconds
60 seconds after the previous step, press the power window DOWN switch (passenger side).
OK:
The passenger side window goes down.
NG
REPLACE POWER WINDOW REGULATOR MOTOR ASSEMBLY (FRONT PASSENGER SIDE) (Click here)