REMOVAL
Removal / installation · Vehicles built Aug 2012 – Jul 2013
Versions by build date: Jun 2011 – Jul 2012 Aug 2012 – Jul 2013 from Aug 2013
| 1. REMOVE CABLE FROM NEGATIVE BATTERY TERMINAL |

- CAUTION:
- Wait at least 90 seconds after disconnecting the cable from the negative (-) battery terminal to prevent airbag and seat belt pretensioner activation.
| 2. REMOVE CONSOLE BOX ASSEMBLY |
| 3. REMOVE SHIFT LEVER BOOT ASSEMBLY |
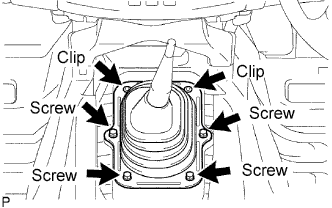  |
w/o Console Box:
Remove the front seat, front door scuff plate, etc. and fold back the floor carpet so that the shift lever can be removed.
Remove the 4 screws, 2 clips and shift lever boot.
| 4. REMOVE FLOOR SHIFT SHIFT LEVER ASSEMBLY |
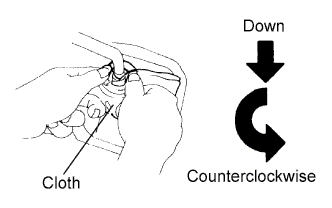 |
Cover the shift lever cap with a cloth.
Press down on the shift lever cap and rotate it counterclockwise to remove it.
Pull out the shift lever.
| 5. REMOVE NO. 1 ENGINE UNDER COVER |
| 6. REMOVE NO. 2 ENGINE UNDER COVER |
| 7. DRAIN MANUAL TRANSMISSION OIL |
Remove the drain plug and gasket to drain the oil.
Install a new gasket and the drain plug.
- Torque:
- 37 N*m{ 377 kgf*cm , 27 ft.*lbf }
| 8. REMOVE NO. 2 FRAME CROSSMEMBER ASSEMBLY |
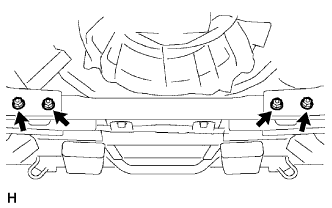 |
Remove the 4 bolts, 4 nuts and frame crossmember.
| 9. REMOVE REAR PROPELLER SHAFT ASSEMBLY |
for TMT Made: (Click here)
| 10. REMOVE FRONT EXHAUST PIPE ASSEMBLY |
for 1GR-FE: (Click here)
for 1KD-FTV: (Click here)
for 2KD-FTV: (Click here)
for 2KD-FTV for DPF: (Click here)
| 11. DISCONNECT WIRE HARNESS |
Disconnect the back-up light switch connector and speedometer sensor connector.
| 12. DISCONNECT CLUTCH RELEASE CYLINDER ASSEMBLY (for 1KD-FTV, 2TR-FE) |
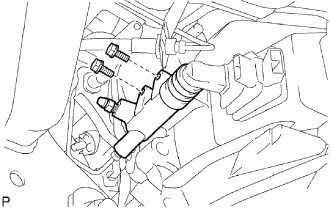 |
Remove the 2 bolts and disconnect the release cylinder assembly.
| 13. REMOVE CLUTCH RELEASE CYLINDER ASSEMBLY (for 1GR-FE) |
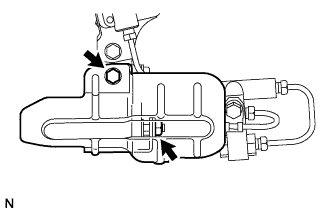 |
Remove the bolts, nut and release cylinder heat insulator.
Using a union nut wrench, remove the flexible tube.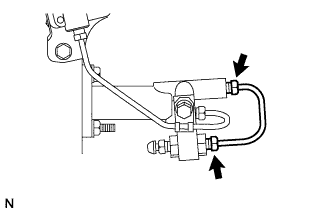
- HINT:
- Use a container to catch the fluid.
Disconnect the clutch release cylinder to flexible hose tube.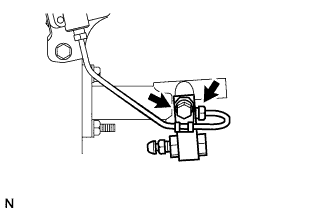
Remove the bolt and 2 way.
Remove the 2 bolts and release cylinder.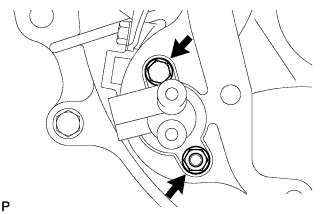
Using a union nut wrench, disconnect the 2 flexible hose tubes.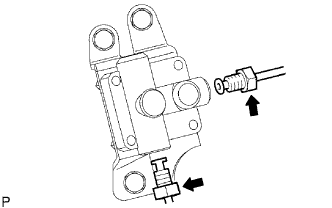
| 14. REMOVE STARTER ASSEMBLY |
for 2TR-FE 1.6 kW Type: (Click here)
for 2TR-FE 1.7 kW Type: (Click here)
for 1GR-FE: (Click here)
for 1KD-FTV 2.2 kW Type Bosch Made: (Click here)
for 1KD-FTV 2.2 kW Type Denso Made: (Click here)
for 2KD-FTV 2.2 kW Type: (Click here)
for 2KD-FTV 2.7 kW Type: (Click here)
| 15. REMOVE NO. 3 FRAME CROSSMEMBER SUB-ASSEMBLY |
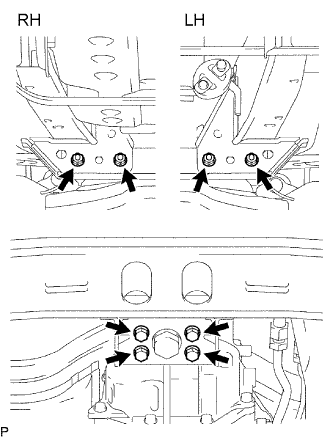 |
Support the transmission rear side with a support stand.
Remove the 4 set bolts of the No. 1 engine mounting insulator rear.
Remove the 4 bolts, 4 nuts and frame crossmember.
| 16. REMOVE REAR NO. 1 ENGINE MOUNTING INSULATOR |
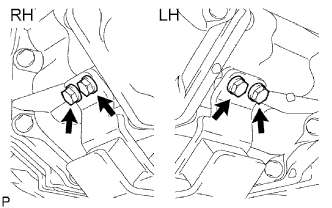 |
Remove the 4 bolts and mounting insulator.
| 17. REMOVE EXHAUST MANIFOLD STAY (for 2TR-FE) |
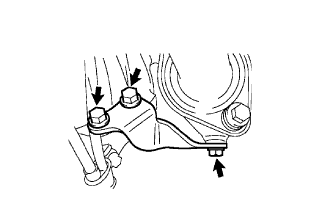 |
Remove the 3 bolts and exhaust manifold stay.
| 18. REMOVE STIFFENER PLATE (for 1KD-FTV) |
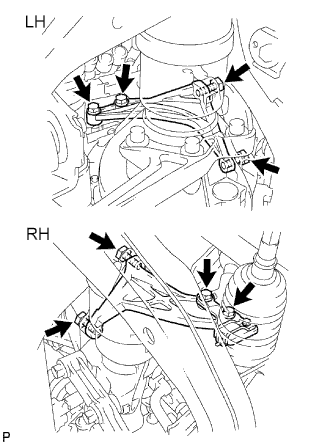 |
Remove the 4 bolts and stiffener plate RH.
Remove the 4 bolts and stiffener plate LH.
| 19. REMOVE MANUAL TRANSMISSION UNIT ASSEMBLY |
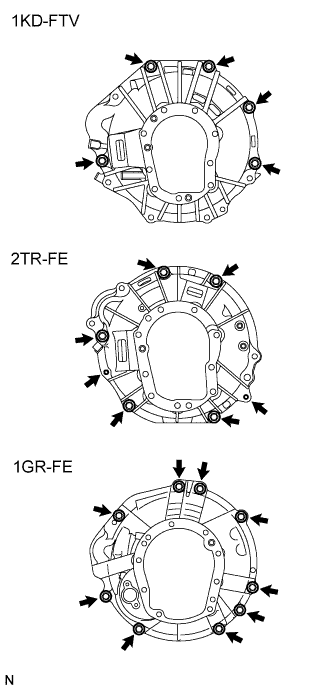 |
Using a transmission jack, support the transmission.
Remove the support stand from the rear side.
for 1KD-FTV:
Remove the 5 bolts and transmission.
for 2TR-FE:
Remove the 7 bolts and transmission.
for 1GR-FE:
Remove the 9 bolts and transmission.