Home › ENGINE › 2KD-FTV INTAKE › INTAKE MANIFOLDREMOVAL
Removal / installation · Vehicles built Aug 2012 – Jul 2013
Versions by build date: Jun 2011 – Jul 2012 Aug 2012 – Jul 2013 from Aug 2013
1.
PRECAUTION
NOTICE:
After turning the ignition switch off, waiting time may be required before disconnecting the cable from the battery terminal. Therefore, make sure to read the disconnecting the cable from the battery terminal notice before proceeding with work (Click here ).
2.
DISCONNECT CABLE FROM NEGATIVE BATTERY TERMINAL
NOTICE:
When disconnecting the cable, some systems need to be initialized after the cable is reconnected (Click here ).
3.
DRAIN ENGINE COOLANT (w/ Intercooler)
w/ EGR Cooler:Click here )
w/o EGR Cooler:Click here )
4.
REMOVE DIESEL THROTTLE BODY ASSEMBLY
w/ EGR Cooler:Click here )
w/o EGR Cooler:Click here )
5.
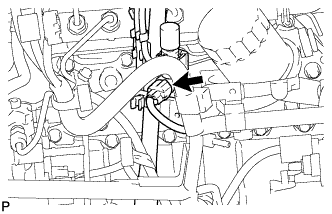
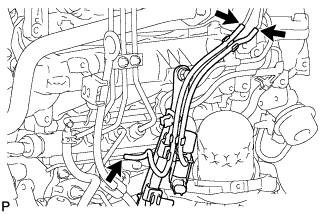
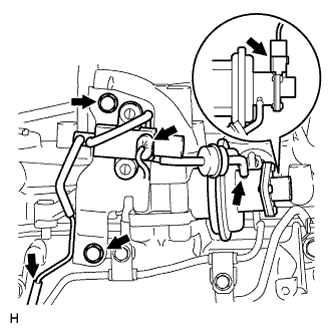
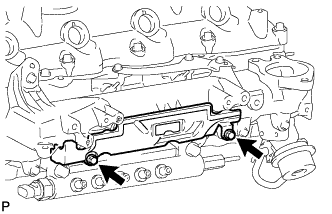
REMOVE MANIFOLD STAY WITH VACUUM SWITCHING VALVE (w/ Intercooler)
Disconnect the vacuum switching valve connector.
Disconnect the 3 vacuum transmitting hoses.
Remove the 2 bolts and manifold stay with vacuum switching valve.
6.
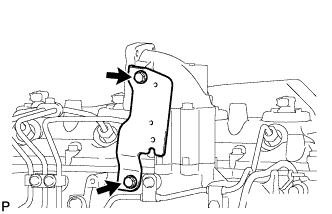
REMOVE MANIFOLD STAY (w/o Intercooler)
Remove the 2 bolts and manifold stay.
7.
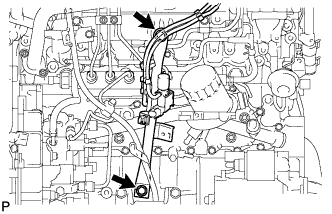
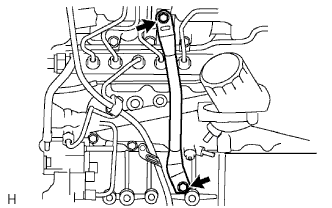
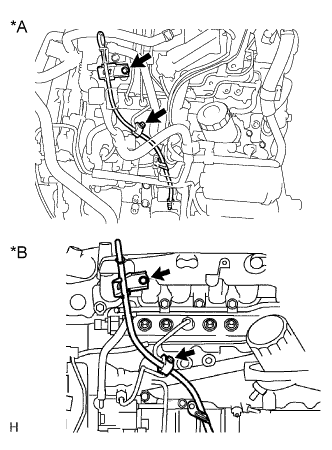
REMOVE ENGINE OIL LEVEL DIPSTICK GUIDE
Remove the bolt and injection pipe clamp.
Text in Illustration
*A
w/ Intercooler
*B
w/o Intercooler
Remove the bolt and engine oil level dipstick guide.
Remove the O-ring from the engine oil level dipstick guide.
8.
REMOVE EGR COOLER
(Click here )
9.
REMOVE ELECTRIC EGR CONTROL VALVE ASSEMBLY WITH NO. 1 EGR PIPE SUB-ASSEMBLY (w/ Intercooler)
(Click here )
10.
REMOVE VACUUM SWITCHING VALVE BRACKET (w/o Intercooler)
w/ EGR System without EGR Cooler:
Remove the 2 connectors from the E-VRV and EGR valve. Disconnect the vacuum hoses from the 2 locations.
Remove the 2 bolts and vacuum switching valve bracket.
w/o EGR System:
Remove the 2 bolts and vacuum switching valve bracket.
11.
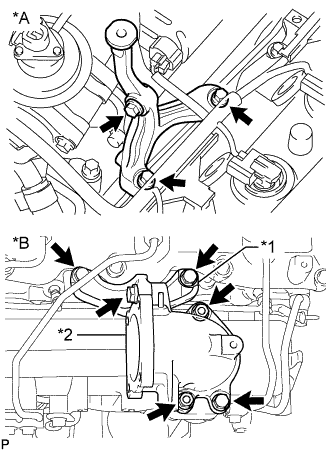
REMOVE NO. 2 INTAKE AIR CONNECTOR BRACKET (w/o Intercooler)
Remove the 3 bolts and No. 2 intake air connector bracket.
Text in Illustration
*A
w/ Intercooler
*B
w/o Intercooler
*1
No. 2 Intake Air Connector Bracket
*2
Intake Air Connector
12.
REMOVE INTAKE AIR CONNECTOR (w/o Intercooler)
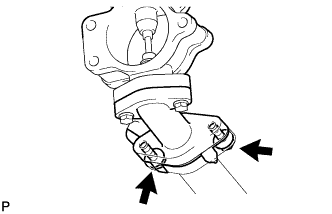
Remove the 2 nuts, bolt, intake air connector and gasket.
13.
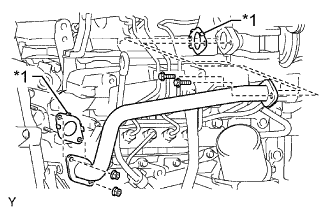
REMOVE NO. 1 EGR PIPE SUB-ASSEMBLY (w/o Intercooler)
w/ Intercooler: Remove the 2 bolts, No. 1 EGR pipe and gasket from the EGR valve adapter.
w/o Intercooler: Remove the 2 bolts, 2 nuts, No. 1 EGR pipe and 2 gaskets.
Text in Illustration
*1
Gasket
14.
REMOVE ELECTRIC EGR CONTROL VALVE ASSEMBLY (w/o Intercooler)
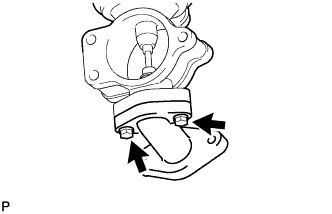
w/ Intercooler: Remove the 2 bolts, electric EGR control valve and gasket from the EGR valve adapter. w/o Intercooler:
Disconnect the EGR valve position sensor connector.
Remove the electric EGR control valve and gasket.
15.
REMOVE NO. 1, NO. 2 AND NO. 3 INJECTION PIPE SUB-ASSEMBLY
w/ Intercooler:Click here )
w/o Intercooler:Click here )
16.
REMOVE NO. 4 INJECTION PIPE SUB-ASSEMBLY
w/ Intercooler:Click here )
w/o Intercooler:Click here )
17.
REMOVE NO. 2 NOZZLE LEAKAGE PIPE ASSEMBLY
w/ Intercooler:Click here )
w/o Intercooler:Click here )
18.
REMOVE NO. 3 INTERCOOLER SUPPORT BRACKET (w/ Intercooler)
Remove the bolt and support bracket.
19.
REMOVE INTAKE MANIFOLD INSULATOR (w/ Intercooler)
Remove the 2 bolts and insulator from the manifold.
20.
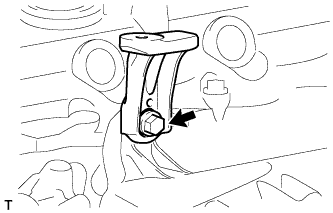
REMOVE NO. 2 MANIFOLD STAY (w/ Intercooler)
Remove the bolt and No. 2 manifold stay.
21.
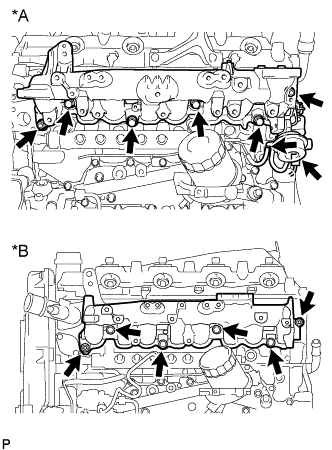
REMOVE INTAKE MANIFOLD
w/ Intercooler: Disconnect the vacuum hose and vacuum switching valve connector.
Text in Illustration
*A
w/ Intercooler
*B
w/o Intercooler
Remove the 2 nuts, 4 bolts, intake manifold and gasket.