Home › Vehicle Interior › HEATING / AIR CONDITIONING › REAR AIR CONDITIONING UNITREMOVAL
Removal / installation · Vehicles built from Aug 2014
Versions by build date: Aug 2013 – Jul 2014 from Aug 2014
NOTICE:
Before beginning this procedure, make sure that the rear air conditioning FOOT mode functions are not operating.
1.
REMOVE UPPER RADIATOR SUPPORT SEAL
Remove the 13 clips and upper radiator support seal.
2.
RECOVER REFRIGERANT FROM REFRIGERATION SYSTEM
Start the engine.
Operate the cooler compressor under the conditions shown below:
Item
Condition
Engine Speed
Idling
Operating Time
3 minutes or more
A/C Switch Status
On
Blower Switch Status
HI
Set Temperature
MAX COOL
This causes most of the compressor oil from the various components of the A/C system to collect in the A/C compressor.
NOTICE:
It is not necessary to operate the cooler compressor if the A/C does not operate because of compressor lock, etc.
Stop the engine.
Recover the refrigerant from the A/C system using a refrigerant recovery unit.
HINT:
Use the refrigerant recovery unit in accordance with the manufacturer's instruction manual.
3.
DRAIN ENGINE COOLANT
for 1GR-FE: Drain the engine coolant (Click here ).
for 2TR-FE: Drain the engine coolant (Click here ).
for 1KD-FTV: Drain the engine coolant (Click here ).
for 5L-E: Drain the engine coolant (Click here ).
4.
DISCONNECT CABLE FROM NEGATIVE BATTERY TERMINAL
CAUTION:
Wait at least 90 seconds after disconnecting the cable from the negative (-) battery terminal to disable the SRS system.
NOTICE:
After turning the ignition switch off, waiting time may be required before disconnecting the cable from the battery terminal. Therefore, make sure to read the disconnecting the cable from the battery terminal notice before proceeding with work. (Click here )
When disconnecting the cable, some systems need to be initialized after the cable is reconnected (Click here ).
5.
REMOVE REAR NO. 2 SEAT ASSEMBLY
for Manual Seat: Remove the rear No. 2 seat assembly (Click here ).
for Power Seat: Remove the rear No. 2 seat assembly (Click here ).
for Face to Face Seat Type: Remove the rear No. 2 seat assembly (Click here ).
6.
REMOVE REAR NO. 1 SEATBACK ASSEMBLY
for 60/40 Split Double-folding Seat Type LH Side: Remove the rear No. 1 seatback assembly (Click here ).
for 60/40 Split Double-folding Seat Type RH Side: Remove the rear No. 1 seatback assembly (Click here ).
7.
REMOVE REAR NO. 1 FLOOR STEP COVER (w/ Rear No. 2 Seat)
HINT:
Use the same procedure for all rear No. 1 floor step covers.
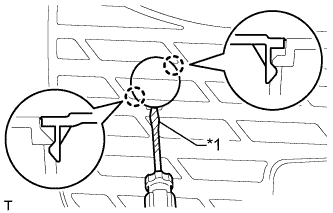
Using a screwdriver, detach the 2 claws and remove the rear No. 1 floor step cover.
HINT:
Tape the screwdriver tip before use.
Text in Illustration
*1
Protective Tape
8.
REMOVE QUARTER SCUFF PLATE RH (w/ Rear No. 2 Seat)
HINT:
Use the same procedure described for the LH side.
9.
REMOVE REAR DOOR SCUFF PLATE RH
HINT:
Use the same procedure described for the LH side.
10.
REMOVE REAR DOOR OPENING TRIM WEATHERSTRIP RH
HINT:
Use the same procedure described for the LH side.
11.
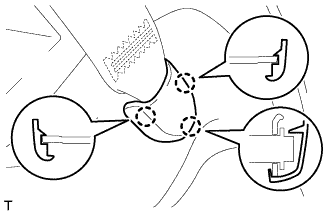
REMOVE OUTER LAP BELT ANCHOR COVER
HINT:
Use the same procedure for the other outer lap belt anchor cover.
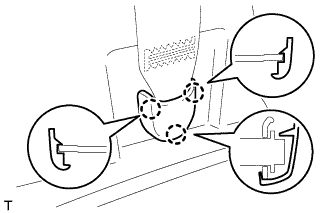
Detach the 3 claws and remove the outer lap belt anchor cover.
12.
REMOVE TONNEAU COVER ASSEMBLY (w/ Tonneau Cover)
Remove the tonneau cover.
13.
REMOVE FRONT LUGGAGE COMPARTMENT TRIM COVER (w/o Rear No. 2 Seat)
HINT:
Use the same procedure for the other front luggage compartment trim cover.
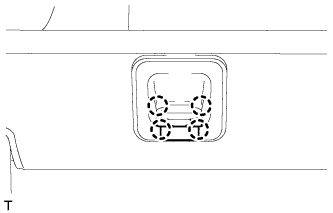
Detach the 4 claws and remove the cap.
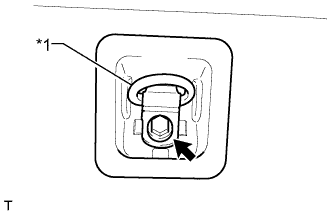
Remove the bolt, luggage hold belt striker and front luggage compartment trim cover.
Text in Illustration
*1
Luggage Hold Belt Striker
14.
REMOVE NO. 1 DECK BOARD SUB-ASSEMBLY (w/o Rear No. 2 Seat)
Detach the clip and remove the No. 1 deck board.
15.
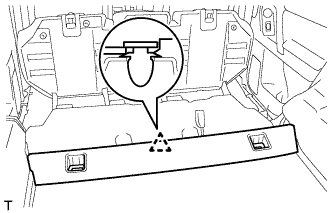
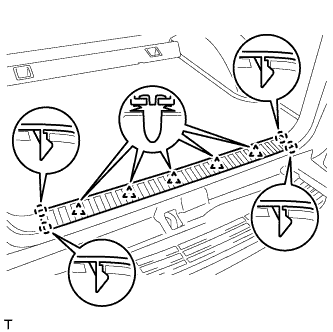
REMOVE REAR FLOOR MAT REAR SUPPORT PLATE (w/o Rear No. 2 Seat)
Detach the 5 clips and 4 claws and remove the rear floor mat rear support plate.
16.
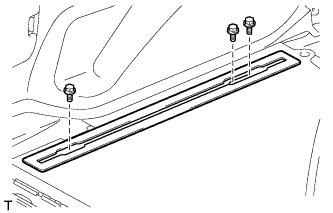
REMOVE FLOOR SIDE RAIL LH (w/ Deck Rail)
Remove the 3 bolts and floor side rail.
17.
REMOVE FLOOR SIDE RAIL RH (w/ Deck Rail)
HINT:
Use the same procedure described for the LH side.
18.
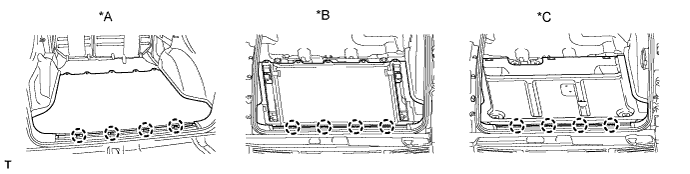
REMOVE REAR FLOOR CARPET ASSEMBLY (w/o Rear No. 2 Seat)
Detach the 4 claws and remove the rear floor carpet.
Text in Illustration
*A
w/o Deck Rail
*B
w/ Deck Rail
*C
for Face to Face Seat Type
-
-
19.
REMOVE REAR NO. 1 SEAT OUTER LAP BELT ANCHOR COVER
HINT:
Use the same procedure for the other rear No. 1 seat outer lap belt anchor cover.
Detach the 3 claws and remove the rear No. 1 seat outer lap belt anchor cover.
20.
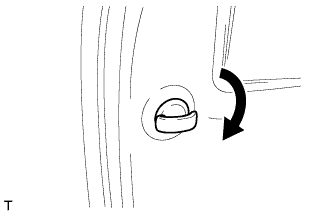
REMOVE NO. 1 LUGGAGE COMPARTMENT TRIM HOOK (w/o Rear No. 2 Seat)
HINT:
Use the same procedure for the other No. 1 luggage compartment trim hook.
Remove the luggage compartment trim hook by turning it clockwise.
21.
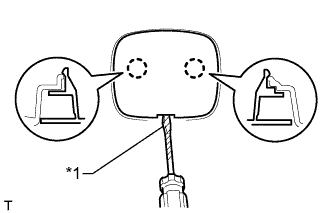
REMOVE NO. 1 TONNEAU COVER HOLDER CAP (w/o Tonneau Cover)
HINT:
Use the same procedure for the other No. 1 tonneau cover holder cap.
Using a screwdriver, detach the 2 claws and remove the No. 1 tonneau cover holder cap.
HINT:
Tape the screwdriver tip before use.
Text in Illustration
*1
Protective Tape
22.
REMOVE FRONT DECK SIDE TRIM COVER RH (w/ Tonneau Cover)
HINT:
Use the same procedure for the other front deck side trim cover.
Using a screwdriver, detach the 2 claws and remove the front deck side trim cover.
HINT:
Tape the screwdriver tip before use.
Text in Illustration
*1
Protective Tape
23.
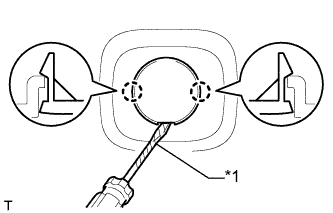
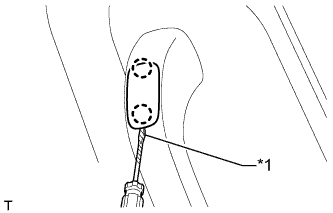
REMOVE ASSIST GRIP PLUG (w/ Rear No. 2 Seat)
HINT:
Use the same procedure for all assist grip plugs.
Using a screwdriver, detach the 2 claws and remove the assist grip plug.
HINT:
Tape the screwdriver tip before use.
Text in Illustration
*1
Protective Tape
24.
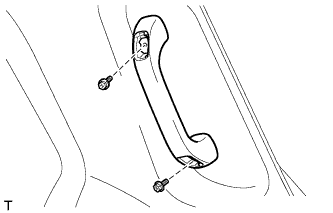
REMOVE ASSIST GRIP SUB-ASSEMBLY (w/ Rear No. 2 Seat)
HINT:
Use the same procedure for the other assist grip.
Remove the 2 bolts and assist grip.
25.
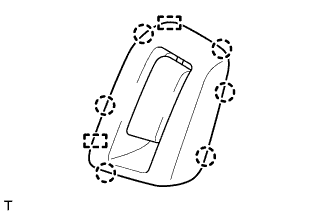
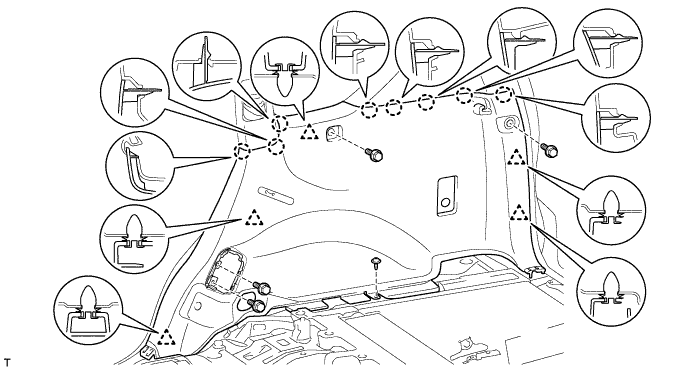
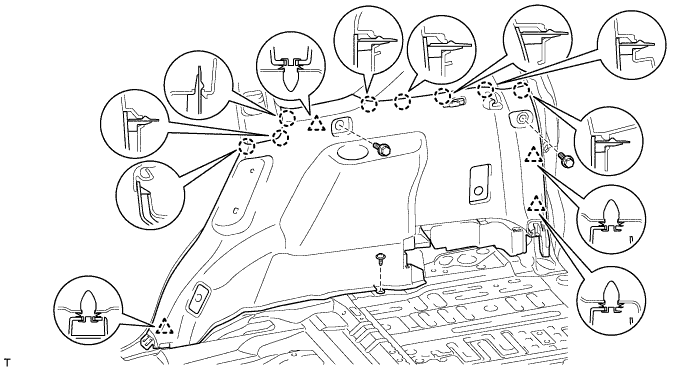
REMOVE DECK TRIM SIDE PANEL ASSEMBLY RH
w/o Rear No. 2 Seat:
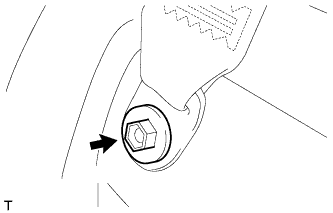
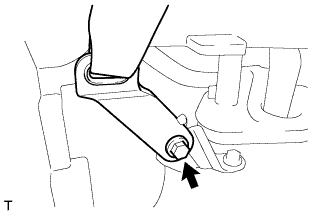
Remove the bolt and disconnect the rear No. 1 seat outer belt floor anchor.
Detach the 6 claws and 2 guides and disconnect the rear seatback lock control lever base. Remove the 4 bolts and screws.
Detach the 5 clips and 8 claws.
Disconnect each connector.
Pass the rear seatback lock control lever base through the deck trim side panel and remove the deck trim side panel.
w/ Rear No. 2 Seat:
Remove the bolt and disconnect the rear No. 1 seat outer belt floor anchor.
Remove the bolt and disconnect the rear No. 2 seat outer belt floor anchor. Remove the 2 bolts and screw.
Detach the 4 clips and 8 claws.
Disconnect each connector and remove the deck trim side panel.
26.
REMOVE REAR QUARTER TRIM PANEL ASSEMBLY RH
HINT:
Use the same procedure described for the LH side.
27.
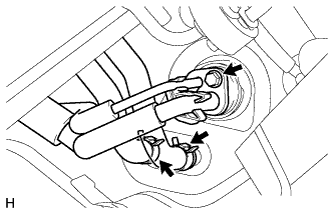
DISCONNECT AIR CONDITIONING TUBE AND ACCESSORY ASSEMBLY
Remove the bolt. Disconnect the air conditioning tube and accessory assembly.
NOTICE:
Do not use a screwdriver or similar tool to disconnect the tube.
Seal the openings of the disconnected parts using vinyl tape to prevent moisture and foreign matter from entering them.
Remove the 2 O-rings from the air conditioning tube and accessory assembly.
Using pliers, grip the claws of the clips and slide the 2 clips.
Disconnect the heater water inlet hose and heater water outlet hose.
28.
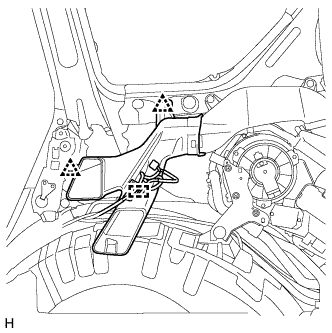
REMOVE REAR SIDE NO. 2 AIR DUCT
Detach the 2 clips. Detach the clamp and remove the duct.
29.
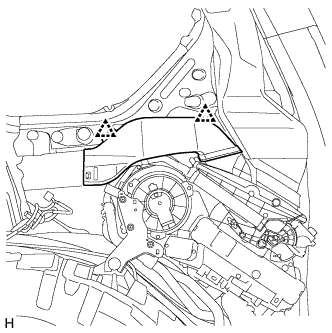
REMOVE REAR SIDE NO. 3 AIR DUCT
Detach the 2 clips and remove the duct.
30.
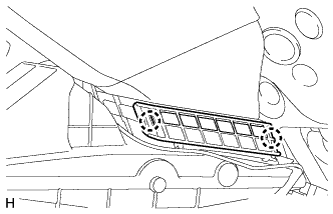
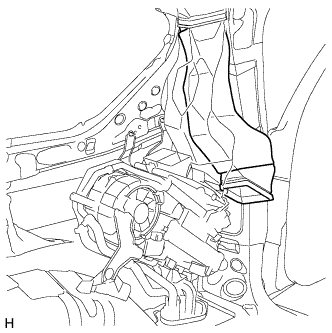
REMOVE REAR SIDE NO. 1 AIR DUCT
Detach the 2 claws and remove the cooler plate.
Swing the bottom of the duct sideways and remove the duct.
31.
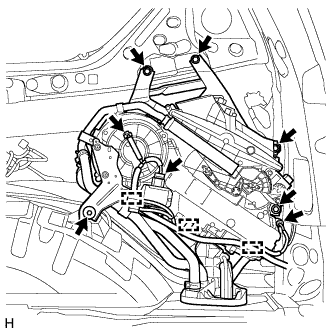
REMOVE REAR COOLING UNIT ASSEMBLY
Disconnect the 3 connectors and detach the 3 clamps. Remove the 5 bolts and rear cooling unit.
32.
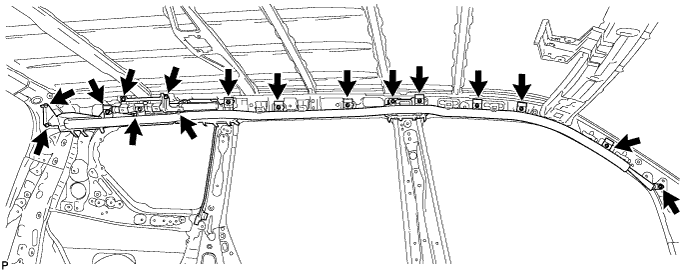
REMOVE CURTAIN SHIELD AIRBAG ASSEMBLY RH
Disconnect the connector.
NOTICE:
When handling the airbag connector, take care not to damage the airbag wire harness.
Remove the 17 bolts and curtain shield airbag.
33.
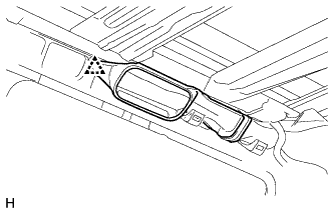
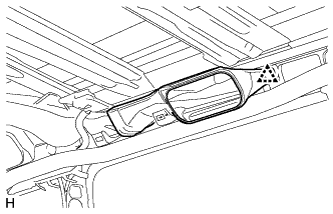
REMOVE REAR ROOF NO. 5 AIR DUCT
Detach the clip and remove the duct.
34.
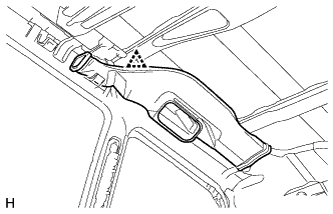
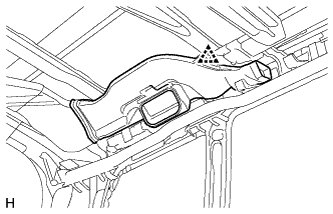
REMOVE REAR ROOF NO. 4 AIR DUCT
Detach the clip and remove the duct.
35.
REMOVE REAR ROOF NO. 3 AIR DUCT
Detach the clip and remove the duct.
36.
REMOVE REAR ROOF NO. 2 AIR DUCT
Detach the clip and remove the duct.
37.
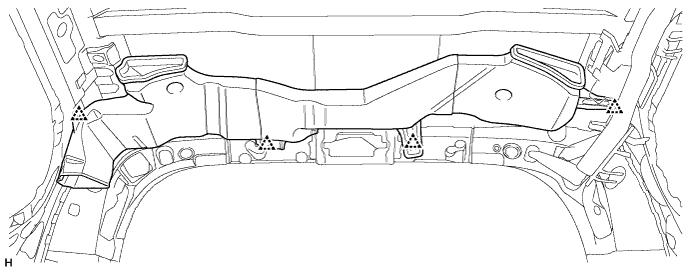
REMOVE REAR ROOF NO. 1 AIR DUCT
Detach the 4 clips and remove the duct.