C1246/46 Master Cylinder Pressure Sensor Malfunction
Diagnostic trouble codes · Vehicles built Sep 2011 – Dec 2011
DESCRIPTION
The master cylinder pressure sensor is connected to the skid control ECU in the master cylinder solenoid.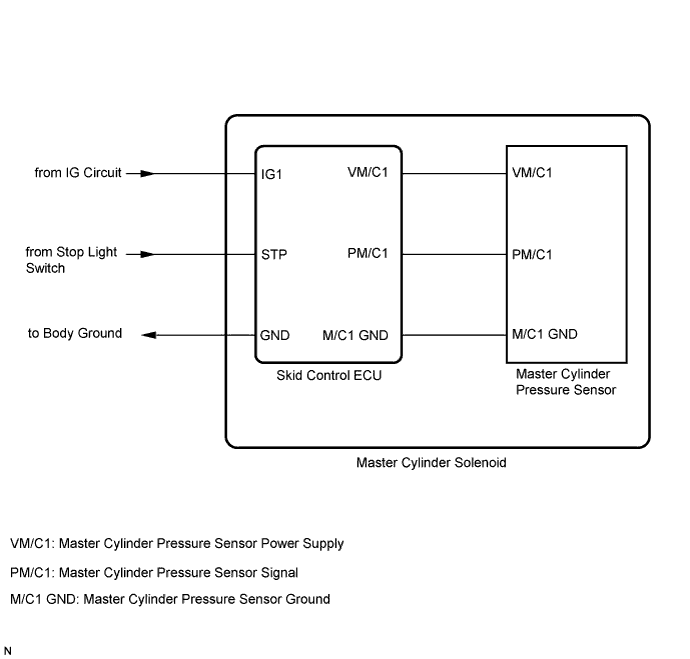

| DTC Code |
DTC Detection Condition |
Trouble Area |
| C1246/46 |
When any of the following conditions is detected: 1. All of the following conditions continue for at least 30 seconds.
3. Both of the following conditions continue for at least 1.2 seconds.
|
|
INSPECTION PROCEDURE
- NOTICE:
- Inspect the fuses for circuits related to this system before performing the following inspection procedure.
- When replacing the master cylinder solenoid, perform zero point calibration (Click here).
- Inspect the fuses for circuits related to this system before performing the following inspection procedure.
| 1. CHECK DTC |

Clear the DTC (Click here).
Turn the ignition switch off.
Start the engine.
Depress the brake pedal.
Check for DTC (Click here).
Result Result
Proceed to
DTC C1246/46 is output
A
DTCs C1246/46 and C1249/49 are output
B
|
|
||||

| A | |
 |
| 2. READ VALUE USING INTELLIGENT TESTER (MASTER CYLINDER SENSOR) |
Connect the intelligent tester to the DLC3.
Turn the ignition switch to ON and turn the intelligent tester on.
Enter the following menus: Chassis / ABS/VSC/TRC / Data List.
ABS/VSC/TRC Tester Display
Measurement Item/Range
Normal Condition
Diagnostic Note
Master Cylinder Sensor
Master cylinder pressure sensor reading / min.: 0.00 V, max.: 5.00 V
When brake pedal is released: 0.3 to 0.9 V
The reading increases when the brake pedal is depressed.
Check that the master cylinder pressure value of the master cylinder pressure sensor displayed on the intelligent tester changes when depressing the brake pedal.
Result Result
Proceed to
Master cylinder pressure sensor value does not change
LHD
A
RHD
B
Master cylinder pressure sensor value changes but it is not normal
C
Master cylinder pressure sensor value changes normally
|
|
||||
|
|
||||

| A | ||
 |
||
| ||
| 3. CHECK BRAKE PEDAL AND STOP LIGHT SWITCH INSTALLATION |
Check the brake pedal height (LHD: Click here/RHD: Click here).
Check the stop light switch installation (LHD: Click here/RHD: Click here).
- OK:
- The brake pedal and stop light switch are normal.
Result Result
Proceed to
OK
A
NG
LHD
B
RHD
C
|
|
||||
|
|
||||
| A | |
|
| 4. CHECK HARNESS AND CONNECTOR (STOP LIGHT SWITCH POWER SOURCE TERMINAL) |
Disconnect the A30 stop light switch connector.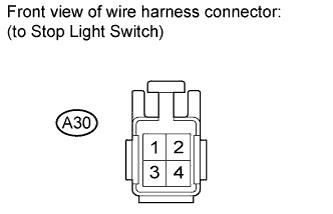
Measure the voltage according to the value(s) in the table below.
- Standard Voltage:
Tester Connection
Condition
Specified Condition
A30-2 - Body ground
Always
11 to 14 V
|
|
||||
| OK | |
|
| 5. INSPECT STOP LIGHT SWITCH ASSEMBLY |
Remove the stop light switch assembly.
Measure the resistance according to the value(s) in the table below.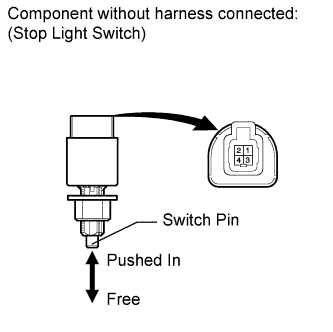
- Standard Resistance:
Tester Connection
Switch Condition
Specified Condition
1 - 2
Switch pin free
Below 1 Ω
Switch pin pushed in
10 kΩ or higher
|
|
||||
| OK | |
|
| 6. RECONFIRM DTC |
Clear the DTC (Click here).
Check if the same DTC is output (Click here).
Result Result
Proceed to
DTC is not output
A
DTC is output
LHD
B
RHD
C
|
|
||||
|
|
||||
| A | ||
|
||
| ||