P0660 Intake Manifold Tuning Valve Control Circuit / Open (Bank 1)
Diagnostic trouble codes · Vehicles built Sep 2011 – Dec 2011
DESCRIPTION
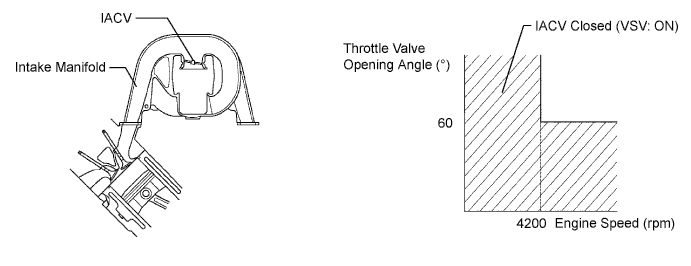
This circuit opens and closes the Intake Air Control Valve (IACV) in response to changes in the engine load in order to increase the intake efficiency (ACIS: Acoustic Control Induction System).When the engine speed is between 0 and 4200 rpm and the throttle valve opening angle is 60° or more, the ECM supplies current to the VSV (ON status), to close the IACV. Under other conditions, the VSV is usually OFF and the IACV is open.

| DTC Code |
DTC Detection Condition |
Trouble Area |
| P0660 |
The following conditions are met simultaneously for 0.5 seconds or more (2 trip detection logic):
|
|
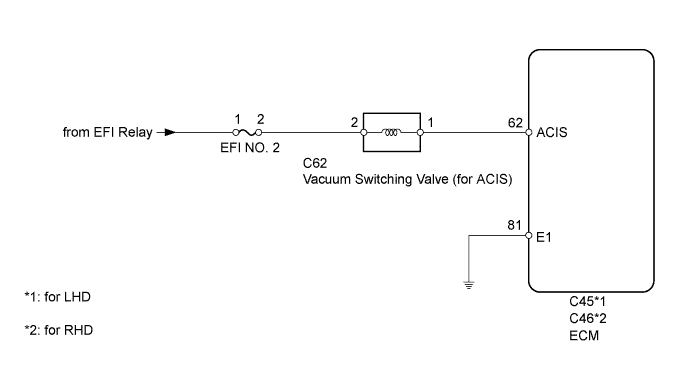
WIRING DIAGRAM
INSPECTION PROCEDURE
| 1. PERFORM ACTIVE TEST USING INTELLIGENT TESTER (VSV (for ACIS)) |

Connect the intelligent tester to the DLC3.
Start the engine and turn the tester on.
Enter the following menus: Powertrain / Engine / Active Test / Active the VSV for Intake Control.
Check if operating noise can be heard when operating the air intake control valve using the intelligent tester.
- OK:
- Operating noise can be heard.
|
|
||||

| OK | ||
 |
||
| ||
| 2. INSPECT VACUUM SWITCHING VALVE ASSEMBLY (for ACIS) |
Inspect the vacuum switching valve assembly (Click here).
|
|
||||

| OK | |
 |
| 3. CHECK VACUUM SWITCHING VALVE ASSEMBLY (for ACIS) (POWER SOURCE VOLTAGE) |
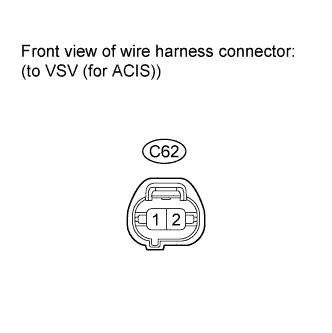 |
Disconnect the VSV connector.
Measure the voltage according to the value(s) in the table below.
- Standard Voltage:
Tester Connection
Condition
Specified Condition
C62-2 - Body ground
Engine switch on (IG)
11 to 14 V
|
|
||||
| OK | |
|
| 4. CHECK HARNESS AND CONNECTOR (VSV (for ACIS) - ECM) |
Disconnect the VSV connector.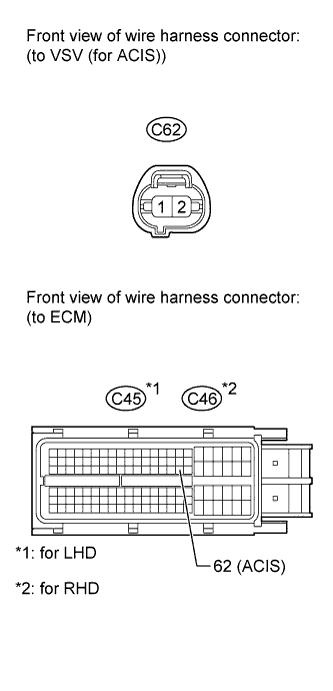
Disconnect the ECM connector.
Measure the resistance according to the value(s) in the table below.
- Standard Resistance (for LHD):
Tester Connection
Condition
Specified Condition
C62-1 - C45-62 (ACIS)
Always
Below 1 Ω
C62-1 or C45-62 (ACIS) - Body ground
Always
10 kΩ or higher
- Standard Resistance (for RHD):
Tester Connection
Condition
Specified Condition
C62-1 - C46-62 (ACIS)
Always
Below 1 Ω
C62-1 or C46-62 (ACIS) - Body ground
Always
10 kΩ or higher
|
|
||||
| OK | ||
|
||
| ||
| 5. CHECK HARNESS AND CONNECTOR (VSV (for ACIS) - EFI NO. 2 FUSE) |
Disconnect the VSV connector.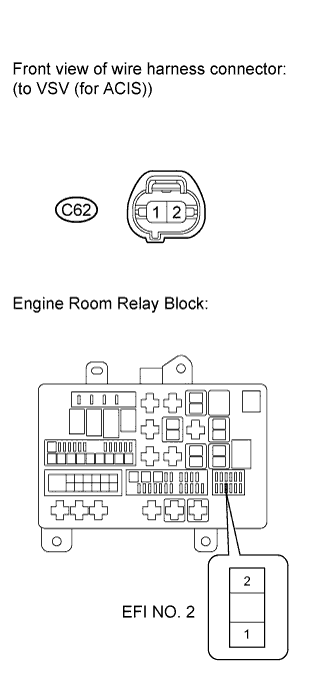
Remove the EFI No. 2 fuse from the engine room relay block.
Measure the resistance according to the value(s) in the table below.
- Standard Resistance:
Tester Connection
Condition
Specified Condition
C62-2 - EFI No. 2 fuse terminal 2
Always
Below 1 Ω
C62-2 or EFI No. 2 fuse terminal 2 - Body ground
Always
10 kΩ or higher
|
|
||||
| OK | ||
|
||
| ||