2011-2013 Land Cruiser · Service Manual Engine / Hybrid / EV System

REMOVAL

Removal / installation · Vehicles built from Jan 2012

Versions by build date: Sep 2011 – Dec 2011 from Jan 2012

NOTICE:
  1. When replacing the injectors (including shuffling the injectors between the cylinders), common rail, cylinder head or intake manifold, it is necessary to replace the injection pipes with new ones.
  2. w/ DPF:
    When fuel lines are disconnected, air may enter the fuel lines, leading to engine starting trouble. Therefore, perform forced regeneration and bleed the air from the fuel lines.


1. PRECAUTION

NOTICE:
After turning the ignition switch off, waiting time may be required before disconnecting the cable from the battery terminal. Therefore, make sure to read the disconnecting the cable from the battery terminal notice before proceeding with work (Click here).


2. DISCONNECT CABLE FROM NEGATIVE BATTERY TERMINAL

NOTICE:
When disconnecting the cable, some systems need to be initialized after the cable is reconnected (Click here).

  1. Disconnect the cables from the negative (-) main battery and sub-battery terminals.


3. REMOVE EGR VALVE ASSEMBLY WITH EGR COOLER (w/ EGR System)
(Click here)

4. REMOVE THERMOSTAT
(Click here)

5. REMOVE FUEL COOLER ASSEMBLY (w/o DPF)
(Click here)

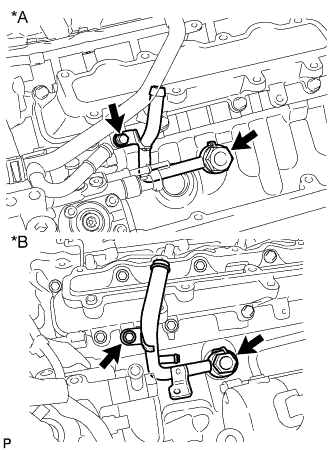
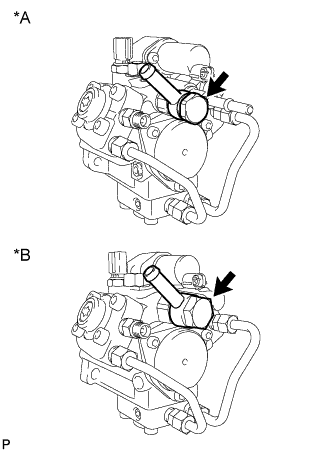
6. REMOVE NO. 1 WATER BY-PASS PIPE

  1. A267239E01
    Remove the union bolt, bolt, No. 1 water by-pass pipe and gasket.
    Text in Illustration 
    *A
    w/ DPF
    *B
    w/o DPF


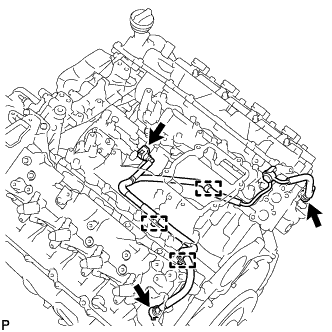
7. REMOVE FUEL TUBE SUB-ASSEMBLY (w/ DPF)

  1. A267238
    Disconnect the 3 fuel tube connectors (Click here).

  1. Detach the 3 clamps and remove the fuel tube.


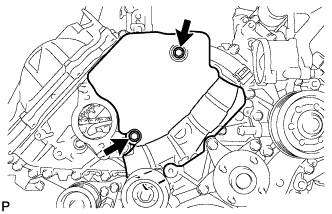
8. REMOVE TIMING GEAR COVER INSULATOR (w/ Intercooler)

  1. A174822
    w/o Viscous Heater:
    Remove the 2 bolts and timing gear cover insulator.

  1. A174823
    w/ Viscous Heater:
    Remove the timing gear cover insulator.


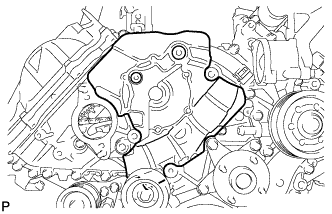
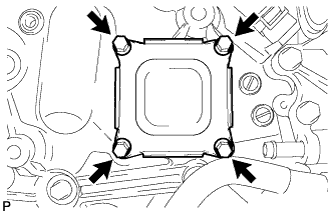
9. REMOVE TIMING CHAIN COVER PLATE

A174824
  1. Remove the 4 bolts, cover plate and gasket.


10. REMOVE NO. 1 FUEL PIPE

  1. A271224E01
    Remove the union bolt, fuel pipe and 2 gaskets.
    Text in Illustration 
    *A
    w/ DPF
    *B
    w/o DPF


11. REMOVE FUEL SUPPLY PUMP

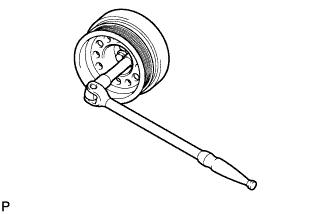
  1. A185177
    Using a wrench, hold the crankshaft.

    NOTICE:
    Do not turn the crankshaft counterclockwise.
    If it is turned counterclockwise, check that the crankshaft pulley set bolt is not loose. If loose, tighten the bolt (Click here).

    Torque:
    108 N*m{ 1101 kgf*cm , 80 ft.*lbf } or more

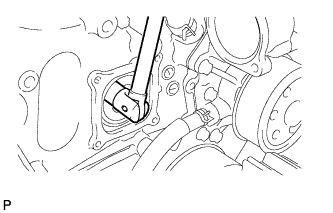
  1. A176402
    Remove the set nut.

  1. A181384
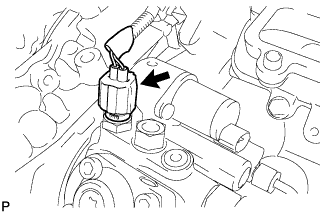
    Disconnect the fuel temperature sensor connector.

  1. A271225E01
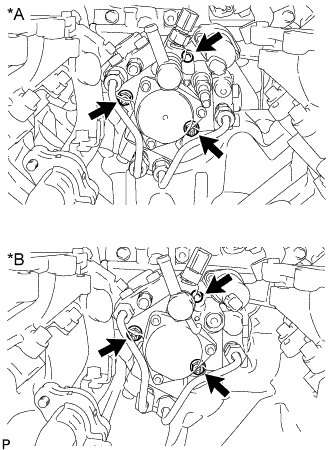
    Using a 6 mm hexagon wrench, remove the bolt.
    Text in Illustration 
    *A
    w/ DPF
    *B
    w/o DPF

  1. Loosen the 2 nuts.

  1. A181383E03
    Disconnect the pump from the supply pump drive gear.

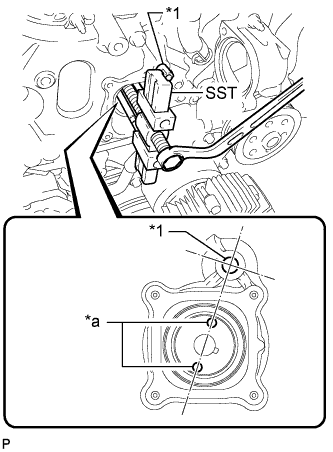
    1. Install SST (No. 1 adapter) to the timing chain cover.

      SST
      09950-50013   (09951-05010, 09952-05010, 09953-05020, 09954-05031, 09955-05010)
      Text in Illustration 
      *1
      SST (No. 1 adapter)
      *a
      Service Hole

      NOTICE:
      Do not use any tools in this procedure.

    2. Rotate the supply pump gear so that the service holes are aligned with SST (No. 1 adapter) as shown in the illustration.

    3. Using SST, disconnect the pump from the supply pump drive gear.

      NOTICE:
      1. When removing or installing SST, do not push the supply pump gear.
      2. Apply lubricant to the threads and tip of SST (center bolt) before using it.

  1. Remove the 2 nuts.

    NOTICE:
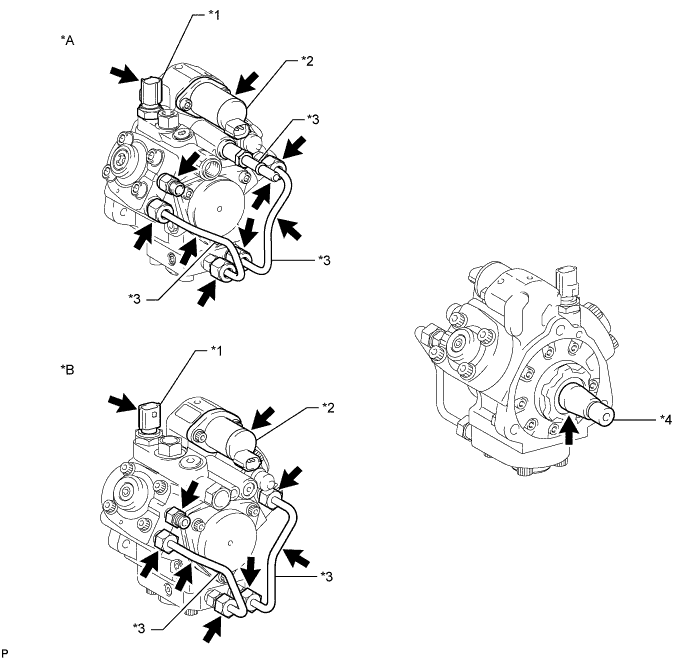
    1. Do not hold the supply pump by the parts indicated by the arrows in the illustration, as this may result in deformation, damage and fuel leakage.

    2. The pump must be kept horizontal.

      A271226E01

    Text in Illustration 
    *A
    w/ DPF
    *B
    w/o DPF
    *1
    Fuel Temperature Sensor
    *2
    Suction Control Valve
    *3
    Fuel Pipe
    *4
    Drive Shaft

  1. Remove the O-ring from the supply pump.

← REMOVAL (Sep 2011 – Dec 2011)INSPECTION (from Sep 2011) →