SUSPENSION CONTROL STABILIZER CONTROL VALVE(w/ KDSS) REMOVAL
PROCEDURE

 48826D
1.REMOVE STABILIZER CONTROL VALVE PROTECTOR
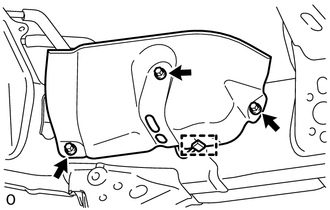
Detach the clamp, and disconnect the connector from the protector.
Remove the 3 bolts and protector.
48860D
2.OPEN STABILIZER CONTROL WITH ACCUMULATOR HOUSING SHUTTER VALVE
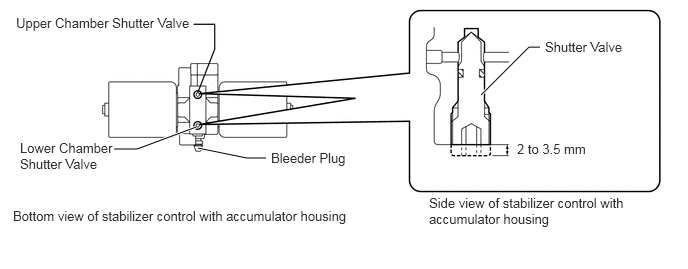
Using a 5 mm hexagon socket wrench, loosen the lower and upper chamber shutter valves of the stabilizer control with accumulator housing 2.0 to 3.5 turns.
- NOTICE:
- ·
When loosening a shutter valve, make sure that the end protrudes 2 to 3.5 mm (0.0787 to 0.137 in.) from the surface of the block, and do not turn the shutter valve any further.
·Do not remove the shutter valves.
17430
3.REMOVE TAILPIPE ASSEMBLY
for 1GR-FE:
Remove the tailpipe (See page Engine / Hybrid System>1GR-FE (INTAKE / EXHAUST)>EXHAUST PIPE>REMOVAL).
for 1UR-FE:
Remove the tailpipe (See page Engine / Hybrid System>1UR-FE (INTAKE / EXHAUST)>EXHAUST PIPE>REMOVAL).
for 3UR-FE:
Remove the tailpipe (See page Engine / Hybrid System>3UR-FE (INTAKE / EXHAUST)>EXHAUST PIPE>REMOVAL).
for 1VD-FTV:
Remove the tailpipe (See page Engine / Hybrid System>1VD-FTV (INTAKE / EXHAUST)>EXHAUST PIPE(w/o DPF)>REMOVAL).
17420
4.REMOVE CENTER EXHAUST PIPE ASSEMBLY
for 1GR-FE:
Remove the center exhaust pipe (See page Engine / Hybrid System>1GR-FE (INTAKE / EXHAUST)>EXHAUST PIPE>REMOVAL).
for 1UR-FE:
Remove the center exhaust pipe (See page Engine / Hybrid System>1UR-FE (INTAKE / EXHAUST)>EXHAUST PIPE>REMOVAL).
for 3UR-FE:
Remove the center exhaust pipe (See page Engine / Hybrid System>3UR-FE (INTAKE / EXHAUST)>EXHAUST PIPE>REMOVAL).
for 1VD-FTV:
Remove the center exhaust pipe (See page Engine / Hybrid System>1VD-FTV (INTAKE / EXHAUST)>EXHAUST PIPE(w/o DPF)>REMOVAL).
5.DISCHARGE SUSPENSION FLUID PRESSURE
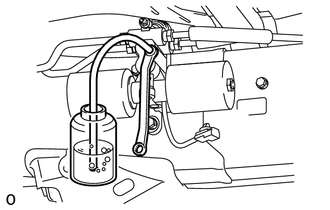
Connect the hose to the bleeder plug for the stabilizer control with accumulator housing and loosen the bleeder plug.
- CAUTION:
-
Be careful as the vehicle height will rapidly decrease when the bleeder plug of the stabilizer control with accumulator housing is loosened.
Discharge the suspension fluid from the stabilizer control with accumulator housing.
After the fluid pressure has dropped and oil has drained out, tighten the bleeder plug and remove the hose.
- Torque:
- 8.3 N*m (85 kgf*cm, 73 in.*lbf)
48890A
6.REMOVE NO. 2 FRONT STABILIZER CONTROL TUBE ASSEMBLY
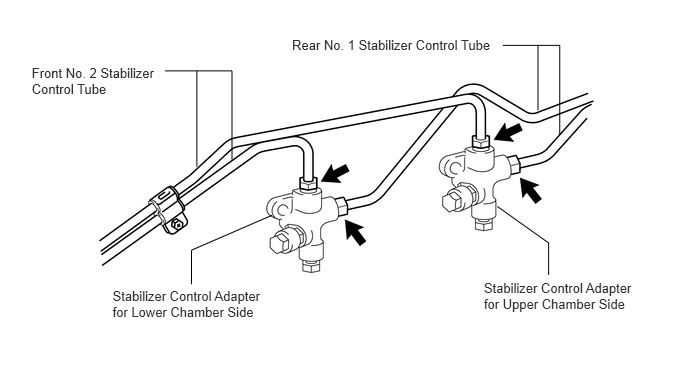
Using a union nut wrench, disconnect the front No. 2 stabilizer control tube from the front No. 1 stabilizer control tube and 2 control adapters.
Remove the bolt and front No. 2 stabilizer control tube from the vehicle.
48880
7.REMOVE NO. 1 REAR STABILIZER CONTROL TUBE ASSEMBLY
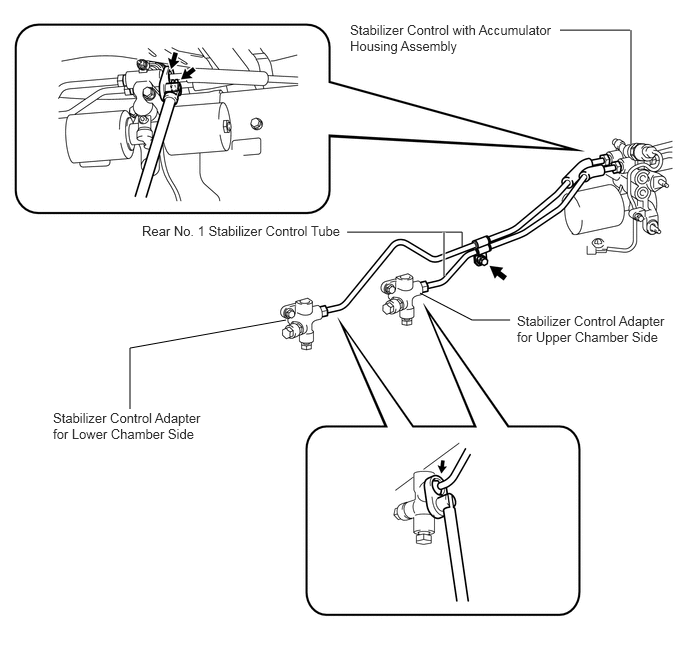
Using a union nut wrench, disconnect the rear No. 1 stabilizer control tube from the 2 control adapters and stabilizer control with accumulator housing.
Remove the bolt and rear No. 1 stabilizer control tube from the vehicle.
48880A
8.DISCONNECT NO. 2 REAR STABILIZER CONTROL TUBE ASSEMBLY
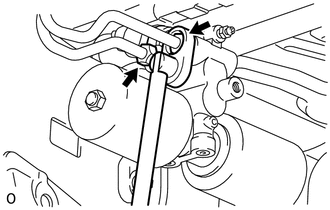
Using a union nut wrench, disconnect the rear No. 2 stabilizer control tube from the stabilizer control with accumulator housing.
48860A
9.REMOVE STABILIZER CONTROL WITH ACCUMULATOR HOUSING ASSEMBLY
Remove the cap and bleeder plug from the accumulator housing.
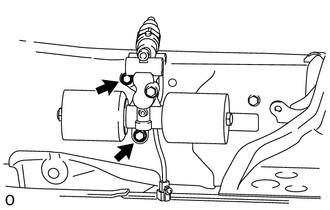
Remove the 2 bolts and stabilizer control with accumulator housing.
48801
10.REMOVE STABILIZER CONTROL ADAPTER SUB-ASSEMBLY
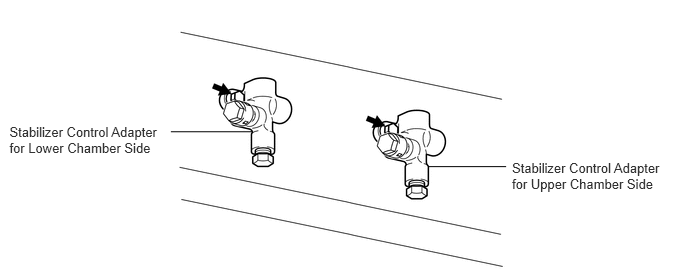
Remove the 2 bolts and 2 stabilizer control adapters from the vehicle.