AUDIO / VIDEO RADIO RECEIVER(w/ Multi-display) REMOVAL
PROCEDURE

 1. PRECAUTION
- NOTICE:
-
After turning the ignition switch off, waiting time may be required before disconnecting the cable from the battery terminal. Therefore, make sure to read the disconnecting the cable from the battery terminal notice before proceeding with work (See page General>INTRODUCTION>REPAIR INSTRUCTION>PRECAUTION).
2.DISCONNECT CABLE FROM NEGATIVE BATTERY TERMINAL
- NOTICE:
-
When disconnecting the cable, some systems need to be initialized after the cable is reconnected (See page General>INTRODUCTION>REPAIR INSTRUCTION>INITIALIZATION).
55449C
3.REMOVE NO. 2 INSTRUMENT PANEL FINISH PANEL CUSHION
55403C
4.REMOVE LOWER INSTRUMENT PANEL PAD SUB-ASSEMBLY LH
55448A
5.REMOVE NO. 1 INSTRUMENT PANEL FINISH PANEL CUSHION
55402C
6.REMOVE LOWER INSTRUMENT PANEL PAD SUB-ASSEMBLY RH
55406B
7.REMOVE LOWER CENTER INSTRUMENT CLUSTER FINISH PANEL SUB-ASSEMBLY
55510F
8.REMOVE NO. 1 SPEAKER OPENING COVER ASSEMBLY
55670
9.REMOVE NO. 3 INSTRUMENT PANEL REGISTER ASSEMBLY
55680A
10.REMOVE NO. 4 INSTRUMENT PANEL REGISTER ASSEMBLY
86110B
11.REMOVE MULTI-DISPLAY ASSEMBLY WITH BRACKET
86130A
12.REMOVE MULTI-MEDIA MODULE RECEIVER ASSEMBLY WITH BRACKET
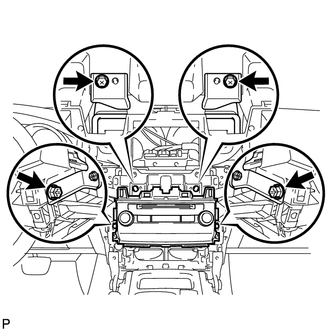
Remove the 2 screws and 2 bolts.
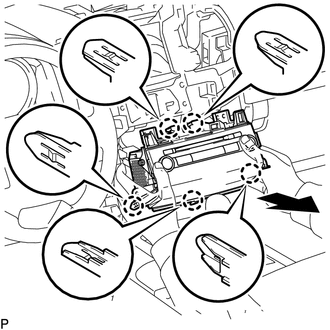
Pull the multi-media module receiver assembly to detach the 5 claws on the backside of the multi-media module receiver assembly.
Disconnect the connectors and remove the multi-media module receiver assembly.
86211
13.REMOVE NO. 1 RADIO BRACKET
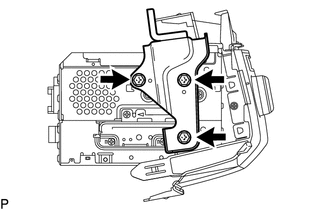
Remove the 3 bolts and No. 1 radio bracket.
86212
14.REMOVE NO. 2 RADIO BRACKET
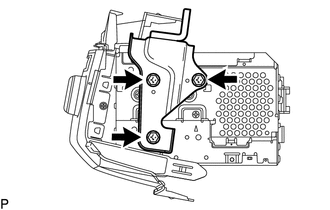
Remove the 3 bolts and No. 2 radio bracket.