K120F MULTIDRIVE / CVT OIL PAN REMOVAL
CAUTION / NOTICE / HINT
The necessary procedures (adjustment, calibration, initialization, or registration) that must be performed after parts are removed, installed, or replaced during the transaxle side cover sub-assembly removal/installation are shown below.
| Replacement Part or Procedure | Necessary Procedure | Effect/Inoperative when not Performed | Link |
|---|---|---|---|
|
*: When performing learning using the GTS. Click here( |
|||
| Battery terminal is disconnected/reconnected | Drive the vehicle until stop and start control is permitted (approximately 5 to 60 minutes) | Stop and start system | ( ) |
| Perform steering sensor zero point calibration | Lane control system | ()
|
|
| Parking support brake system (for Gasoline model)* | |||
| Pre-collision system | |||
| Memorize steering angle neutral point | Parking assist monitor system | ()
|
|
| Panoramic view monitor system (for Gasoline model) | ()
|
||
| Reset back door close position | Power back door system (for Gasoline model) | ()
|
|
| Power back door initialization | Power door lock control system | ()
|
|
| CVT fluid | ATF thermal degradation estimate reset | The value of the Data List item "ATF Thermal Degradation Estimate" is not estimated correctly | ()
|
| Air bleed oil pump with motor assembly (w/ Stop and Start System) | Stop and start system | ()
|
|
- NOTICE:
-
After the ignition switch is turned off, the navigation system requires approximately a minute to record various types of memory and settings. As a result, after turning the ignition switch off, wait a minute or more before disconnecting the cable from the negative (-) battery terminal.
PROCEDURE

 1.REMOVE BATTERY
53895B
2.REMOVE FRONT FENDER FRONT SPLASH SHIELD RH
53896B
3.REMOVE FRONT FENDER FRONT SPLASH SHIELD LH
51441
4.REMOVE NO. 1 ENGINE UNDER COVER
51420
5.REMOVE NO. 2 ENGINE UNDER COVER ASSEMBLY
53737D
6.REMOVE FRONT FENDER APRON SEAL LH
7.DRAIN CONTINUOUSLY VARIABLE TRANSAXLE FLUID
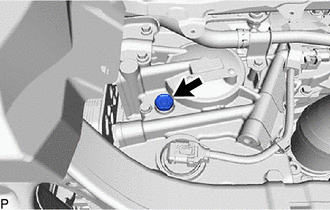
Remove the refill plug and gasket from the rear transaxle case sub-assembly.
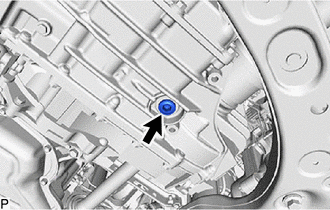
Using a 10 mm hexagon socket wrench, remove the overflow plug and gasket from the transaxle case sub-assembly, and drain the fluid.
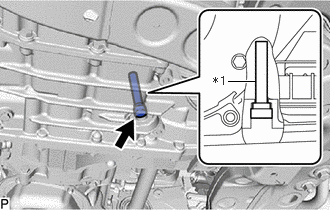
| *1 | Overflow (CVT) Tube |
Using a 6 mm hexagon socket wrench, remove the overflow (CVT) tube from the transaxle case sub-assembly.
- HINT:
-
Removing the overflow (CVT) tube will drain all fluid in the transaxle case sub-assembly.
Using a 6 mm hexagon socket wrench, install the overflow (CVT) tube to the transaxle case sub-assembly.
- Torque:
- 0.8 N*m (8 kgf*cm, 7 in.*lbf)
Using a 10 mm hexagon socket wrench, temporarily install the overflow plug and gasket to the transaxle case sub-assembly.
- HINT:
-
Reuse the old gasket as the overflow plug will be removed again to adjust the fluid level.
Temporarily install the gasket and refill plug to the rear transaxle case sub-assembly.
- HINT:
-
Reuse the old gasket as the refill plug will be removed again to adjust the fluid level.
12601B
8.REMOVE NO. 1 ENGINE COVER SUB-ASSEMBLY
17750A
9.REMOVE INLET AIR CLEANER ASSEMBLY
10.REMOVE AIR CLEANER ASSEMBLY WITH AIR CLEANER HOSE
89661
11.REMOVE ECM
74404B
12.REMOVE BATTERY CLAMP SUB-ASSEMBLY
82121
13.DISCONNECT ENGINE WIRE
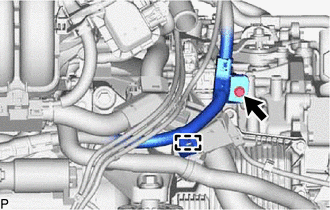
Remove the bolt to disconnect the engine wire from the continuously variable transaxle assembly.
Detach the clamp.
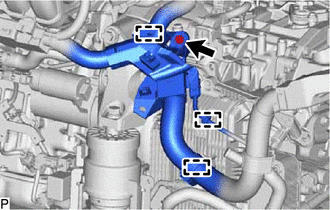
Remove the bolt to disconnect the engine wire from the continuously variable transaxle assembly.
Detach the 3 clamps to disconnect the engine wire from the continuously variable transaxle assembly.
12361
14.REMOVE FRONT ENGINE MOUNTING INSULATOR
16261G
15.DISCONNECT NO. 1 WATER BY-PASS HOSE
32942N
16.REMOVE NO. 1 OIL COOLER OUTLET HOSE
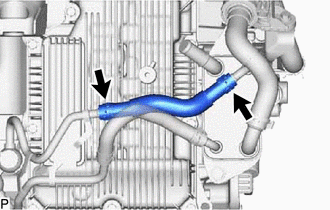
Slide the 2 hose clips and remove the No. 1 oil cooler outlet hose from the transmission oil cooler and oil cooler elbow sub-assembly.
32941R
17.REMOVE OIL COOLER INLET HOSE
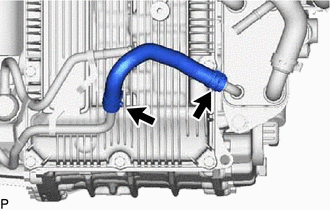
Slide the 2 hose clips and remove the oil cooler inlet hose from the transmission oil cooler and oil cooler elbow sub-assembly.
32901L
18.REMOVE OIL COOLER ELBOW SUB-ASSEMBLY
35015Y
19.REMOVE TRANSAXLE SIDE COVER SUB-ASSEMBLY
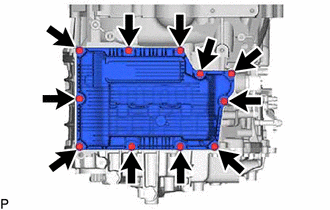
Remove the 11 bolts and transaxle side cover sub-assembly from the transaxle case sub-assembly.
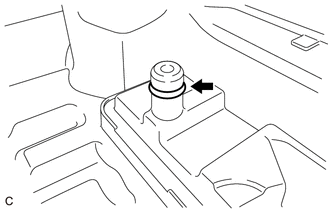
Remove the O-ring from the transaxle side cover sub-assembly.