SUPPLEMENTAL RESTRAINT SYSTEMS REAR AIRBAG SENSOR INSTALLATION
CAUTION / NOTICE / HINT
- HINT:
- ·
Use the same procedure for the RH and LH sides.
·The procedure listed below is for the LH side.
PROCEDURE

 89860C
1.INSTALL NO. 2 SIDE AIRBAG SENSOR ASSEMBLY
Check that the ignition switch is off.
Check that the cable is disconnected from the negative (-) auxiliary battery terminal.
- CAUTION:
- ·
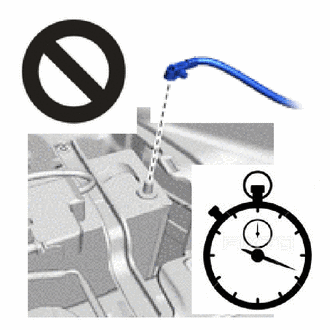
Wait at least 90 seconds after disconnecting the cable from the negative (-) auxiliary battery terminal to disable the SRS system.
·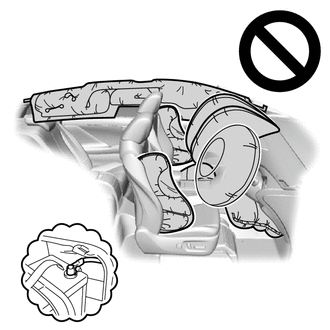
If this procedure is performed without disconnecting the negative (-) auxiliary battery terminal of the battery, the airbag may deploy even if an impact is applied only to the No. 2 side airbag sensor assembly. Therefore, make sure that the negative (-) auxiliary battery terminal of the battery is disconnected before performing this procedure.
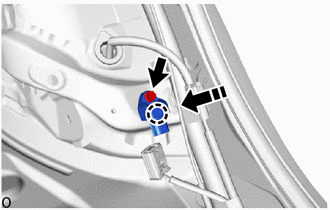

|
Install in this Direction |
Attach the claw and hold the No. 2 side airbag sensor assembly in place.
Install the No. 2 side airbag sensor assembly with the bolt.
- Torque:
- 9.0 N*m (92 kgf*cm, 80 in.*lbf)
- NOTICE:
- ·
If the No. 2 side airbag sensor assembly has been dropped, replace it with a new one.
·When installing the No. 2 side airbag sensor assembly, be careful that the SRS wiring does not interfere with or is not pinched between other parts.
·Tighten the bolt while holding the No. 2 side airbag sensor assembly because the No. 2 side airbag sensor assembly claw is easily damaged.
Check that there is no looseness in the installation parts of the No. 2 side airbag sensor assembly.
Connect the airbag connector.
Before connecting the connector, check that the position of the housing lock is correct as shown in the illustration.
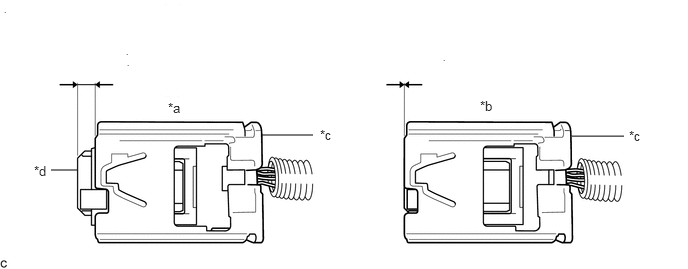
| *a | Correct | *b | Incorrect |
| *c | CPA | *d | Housing |
While holding the CPA, be sure to engage the connectors until they are locked and check that the CPA is in its original position (when locking, make sure that a click sound can be heard).
- NOTICE:
-
Do not push down the upper part of the CPA shown in the illustration when connecting the airbag connector.
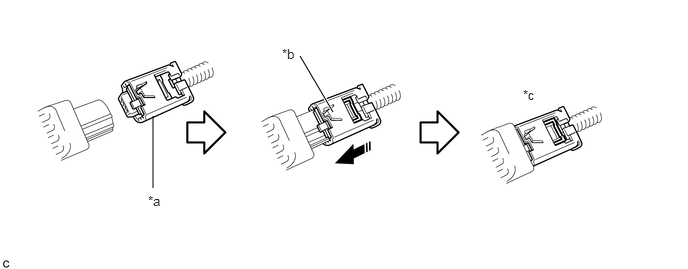
| *a | CPA | *b | CPA Upper Part |
| *c | Connection is Completed | - | - |
|
|
Connect in this Direction | - | - |
62552F
2.INSTALL REAR SEAT SIDE GARNISH LH
Install the rear seat No. 3 side garnish LH.
Click hereVehicle Interior>INTERIOR PANELS / TRIM>ROOF HEADLINING>INSTALLATION
Return the rear door opening trim weatherstrip LH to its original position.
Click hereVehicle Exterior>DOOR / HATCH>REAR DOOR OPENING TRIM WEATHERSTRIP>INSTALLATION
67918E
3.INSTALL REAR DOOR SCUFF PLATE LH (for Gasoline Model)
4.INSTALL REAR SEAT ASSEMBLY
5.CONNECT CABLE TO NEGATIVE AUXILIARY BATTERY TERMINAL
for A25A-FKS:
for M20A-FKS:
for A25A-FXS:
Click hereGeneral>MAINTENANCE>A25A-FXS AUXILIARY BATTERY>INSTALLATION
for A25B-FXS:
Click hereGeneral>MAINTENANCE>A25B-FXS AUXILIARY BATTERY>INSTALLATION
- NOTICE:
-
When disconnecting the cable, some systems need to be initialized after the cable is reconnected.
-
Click hereGeneral>INTRODUCTION>REPAIR INSTRUCTION>INITIALIZATION
65351A
6.INSTALL BATTERY HOLE COVER (for HV Model)
58416K
7.INSTALL REAR NO. 2 FLOOR BOARD (for HV Model)
58410B
8.INSTALL DECK BOARD ASSEMBLY (for HV Model)
9. PERFORM DIAGNOSTIC SYSTEM CHECK
w/o Occupant Classification System:
for Gasoline Model with Occupant Classification System:
for HV Model with Occupant Classification System:
10.CHECK SRS WARNING LIGHT
w/o Occupant Classification System:
for Gasoline Model with Occupant Classification System:
for HV Model with Occupant Classification System:
11.PERFORM SYSTEM INITIALIZATION AND CALIBRATION