AB60F AUTOMATIC TRANSMISSION / TRANSAXLE AUTOMATIC TRANSMISSION ASSEMBLY REMOVAL
PROCEDURE

 1.DRAIN AUTOMATIC TRANSMISSION FLUID
Remove the drain plug and gasket, and drain ATF.
Install a new gasket and the drain plug.
- Torque:
- 20 N*m (204 kgf*cm, 15 ft.*lbf)
2.DRAIN TRANSFER OIL
3.DRAIN ENGINE COOLANT
37140
4.REMOVE FRONT PROPELLER SHAFT ASSEMBLY
Remove the front propeller shaft assembly (See page Drivetrain>DRIVE SHAFT / PROPELLER SHAFT>FRONT PROPELLER SHAFT ASSEMBLY>REMOVAL).
37110
5.REMOVE PROPELLER SHAFT ASSEMBLY
Remove the propeller shaft assembly (See page Drivetrain>DRIVE SHAFT / PROPELLER SHAFT>PROPELLER SHAFT ASSEMBLY(for 4WD)>REMOVAL).
17410
6.REMOVE FRONT EXHAUST PIPE ASSEMBLY
7.REMOVE FRONT NO. 3 EXHAUST PIPE ASSEMBLY
8.DISCONNECT WATER BY-PASS PIPE ASSEMBLY
33820B
9.DISCONNECT TRANSMISSION CONTROL CABLE ASSEMBLY
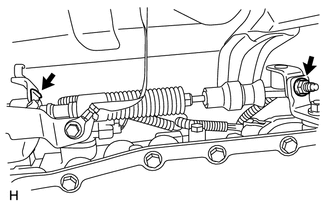
Remove the nut and clip, and disconnect the transmission control cable.
28100
10.REMOVE STARTER ASSEMBLY
Remove the starter assembly (See page Engine / Hybrid System>3UR-FE STARTING>STARTER>REMOVAL).
32101A
11.REMOVE DRIVE PLATE AND TORQUE CONVERTER CLUTCH SETTING BOLT
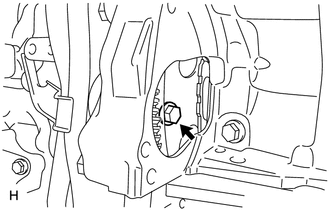
Turn the crankshaft to gain access to the 6 bolts and remove the bolts while holding the crankshaft pulley setting bolt with a wrench.
35000
12.SUPPORT AUTOMATIC TRANSMISSION ASSEMBLY
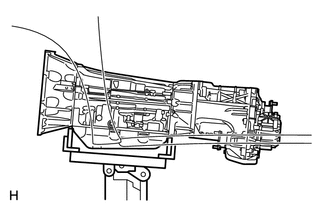
Support the automatic transmission with a transmission jack. Lift the automatic transmission slightly from the crossmember.
- NOTICE:
-
Position the jack so that it supports the oil pan bolt section, to prevent damage to the oil pan gasket.
51204
13.REMOVE NO. 3 FRAME CROSSMEMBER SUB-ASSEMBLY
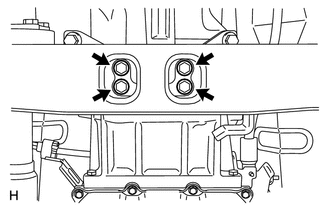
Remove the 4 bolts of the rear No. 1 engine mounting insulator.
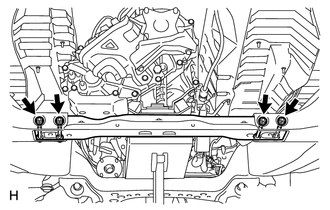
Remove the 4 nuts, 4 washers, 4 bolts and No. 3 frame crossmember.
12371
14.REMOVE REAR NO. 1 ENGINE MOUNTING INSULATOR
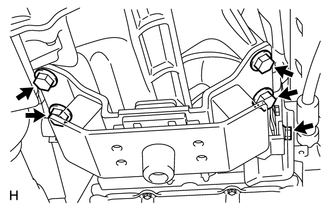
Remove the bolt and rear engine mounting heat insulator.
Remove the 4 bolts and rear No. 1 engine mounting insulator from the automatic transmission.
15.DISCONNECT WIRE HARNESS AND CONNECTOR
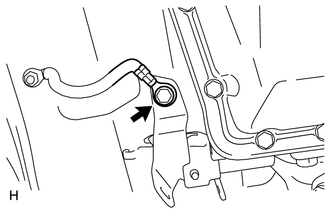
Remove the bolt and disconnect the ground cable.
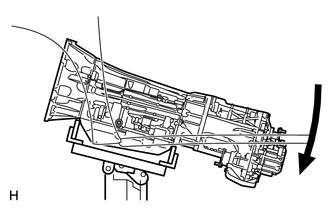
Tilt the transmission downward.
- NOTICE:
-
Make sure the cooling fan does not contact the fan shroud.
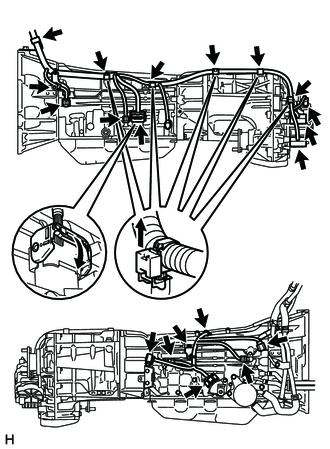
Disconnect the park/neutral position switch connector, 2 transmission wire connectors, 2 speed sensor connectors and 3 transfer control side connectors.
- HINT:
-
Detach the claw, press down the lever, and then disconnect the transmission wire connector.
Disconnect the 3 connector clamps and 7 harness clamps.
Remove the 2 bolts and disconnect the harness clamps and wire harness.
35104V
16.DISCONNECT BREATHER PLUG HOSE
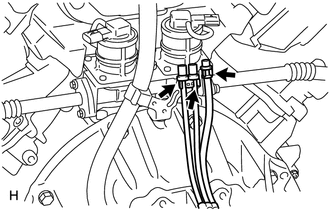
Disconnect the 3 breather plug hoses from the harness clamp bracket.
35000
17.REMOVE AUTOMATIC TRANSMISSION ASSEMBLY
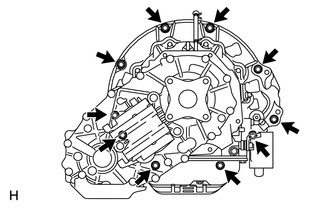
Remove the 10 bolts and automatic transmission.
- NOTICE:
-
Do not use excess force when prying the automatic transmission.
18.REMOVE CONNECTOR CLAMP BRACKET
Remove the 3 bolts and 3 oxygen sensor connector clamp brackets from the automatic transmission.
33823A
19.REMOVE TRANSMISSION CONTROL CABLE BRACKET
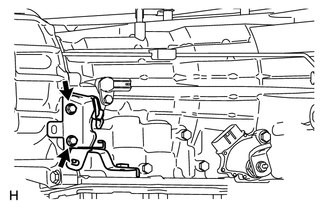
Remove the 2 bolts and transmission control cable bracket.
32000
20.REMOVE TORQUE CONVERTER ASSEMBLY
Remove the torque converter clutch from the automatic transmission.
36100
21.REMOVE TRANSFER ASSEMBLY
22.INSPECT TORQUE CONVERTER CLUTCH AND DRIVE PLATE
Inspect the torque converter clutch and drive plate (See page Drivetrain>AB60F AUTOMATIC TRANSMISSION / TRANSAXLE>TORQUE CONVERTER CLUTCH AND DRIVE PLATE>INSPECTION).