SEAT FRONT SEAT ASSEMBLY(for Manual Seat) REASSEMBLY
CAUTION / NOTICE / HINT
- CAUTION:
-
Wear protective gloves. Sharp areas on the parts may injure your hands.
- HINT:
- ·
Use the same procedure for the LH side and RH side.
·The procedure listed below is for the LH side.
PROCEDURE

 82191
1.INSTALL FRONT SEAT WIRE RH (for Front Passenger Side)
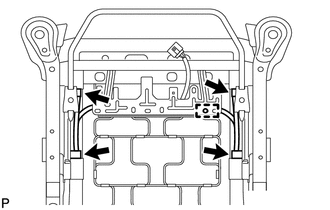
Engage the wire harness clamp.
Connect the 4 connectors and install the front seat wire.
82192
2.INSTALL FRONT SEAT WIRE LH (for Driver Side)
72760D
3.INSTALL LUMBAR SUPPORT ADJUSTER ASSEMBLY LH (for Driver Side)
71873A
4.INSTALL FRONT SEAT CUSHION SHIELD LOWER LH
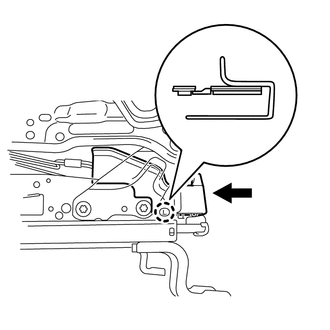
Engage the claw and install the front seat cushion shield lower.
71874C
5.INSTALL FRONT SEAT CUSHION SHIELD LOWER RH
- HINT:
-
Use the same procedure for the LH side and RH side.
71814A
6.INSTALL FRONT SEATBACK SHIELD LH
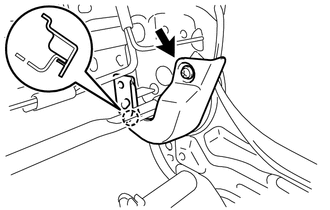
Engage the claw and install the front seatback shield.
Install the screw.
71813A
7.INSTALL FRONT SEATBACK SHIELD RH (for Driver Side)
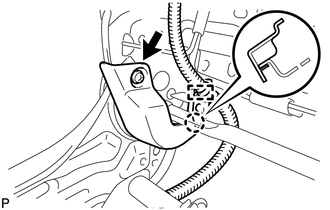
Engage the claw and install the front seatback shield.
Install the screw.
Engage the wire harness clamp.
71875B
8.INSTALL RECLINING ADJUSTER INSIDE COVER LH
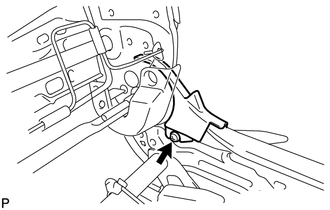
Install the reclining adjuster inside cover with the screw.
71875A
9.INSTALL RECLINING ADJUSTER INSIDE COVER RH
- HINT:
-
Use the same procedure for the LH side and RH side.
71074S
10.INSTALL SEPARATE TYPE FRONT SEATBACK COVER
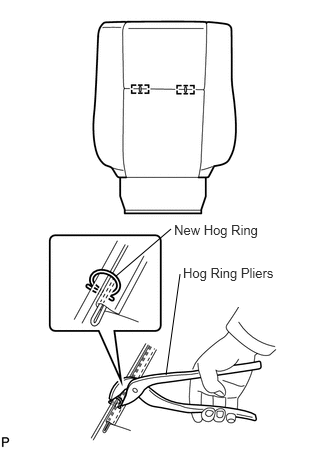
Using hog ring pliers, install the seatback cover to the seatback pad with 2 new hog rings.
- NOTICE:
- ·
Be careful not to damage the cover.
·When installing the hog rings, avoid wrinkling the cover.
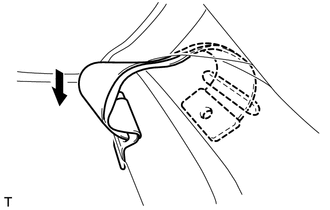
Connect the seatback cover bracket to the seatback pad.
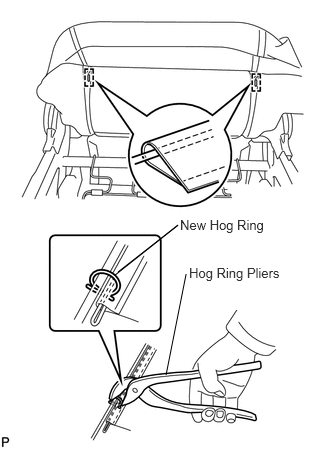
Install the seatback cover wires.
Using hog ring pliers, install 2 new hog rings to the seatback pad.
11.INSTALL SEATBACK COVER WITH PAD
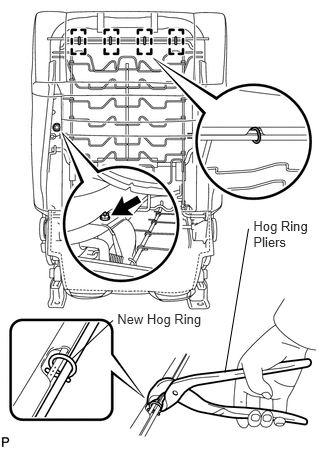
Install the seatback cover with pad to the seatback frame.
Lift the seatback cover and, using hog ring pliers, install 4 new hog rings to the seat frame.
Lift the seatback cover, connect the seatback cover bracket to the seat frame, and install the nut.
- Torque:
- 5.5 N*m (56 kgf*cm, 49 in.*lbf)
- CAUTION:
-
After the seatback trim cover is assembled, make sure that the side airbag strap is not twisted.
71931A
12.INSTALL FRONT SEAT HEADREST SUPPORT
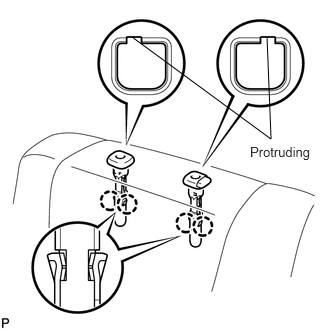
Align the protruding portion of the front seat headrest support with the installation groove of the front seatback frame.
Engage the 4 claws to install the 2 headrest supports.
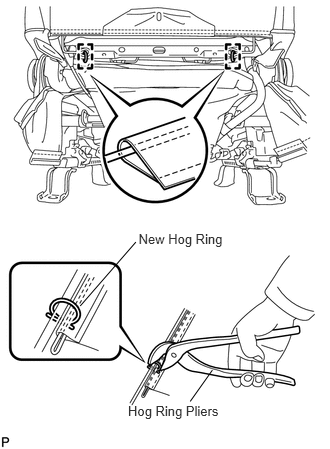
Install the seatback cover wires.
Using hog ring pliers, install 2 new hog rings to the seat frame.
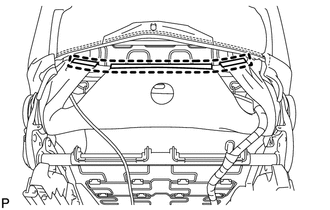
Engage the hook.
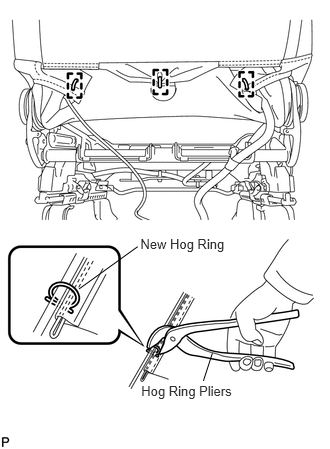
Using hog ring pliers, install 3 new hog rings to the seat frame.
71072S
13.INSTALL SEPARATE TYPE FRONT SEAT CUSHION COVER
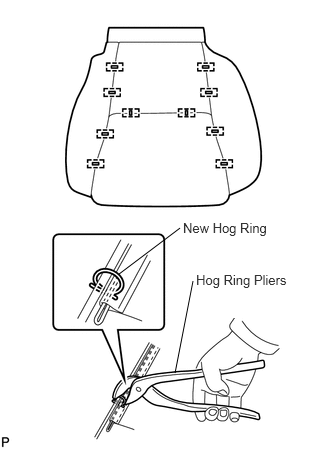
Using hog ring pliers, install the seat cushion cover to the seat cushion pad with 10 new hog rings.
- NOTICE:
- ·
Be careful not to damage the cover.
·When installing the hog rings, avoid wrinkling the cover.
14.INSTALL SEAT CUSHION COVER WITH PAD (for Driver Side)
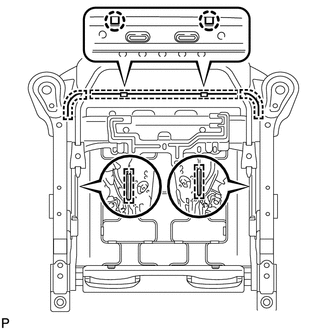
Engage the hooks to install the seat cushion cover with pad.
Bend the 2 seat frame claws downward.
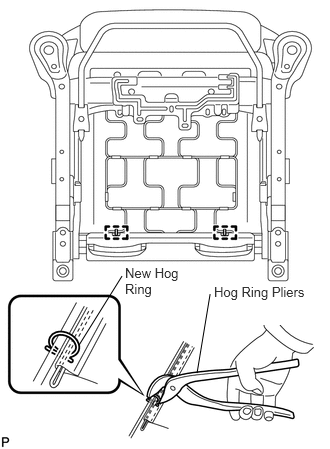
Using hog ring pliers, install the seat cushion cover to the seat cushion spring with 2 new hog rings.
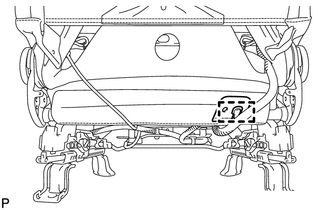
Engage the wire harness clamp.
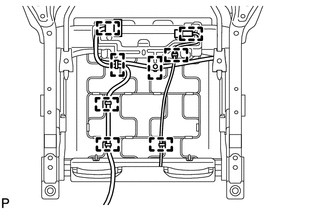
Engage the 8 wire harness clamps.
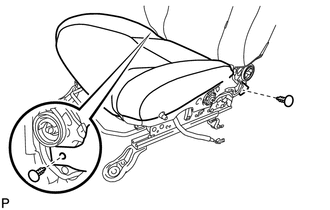
Install the 2 clips.
15.INSTALL SEAT CUSHION COVER WITH PAD (for Front Passenger Side)
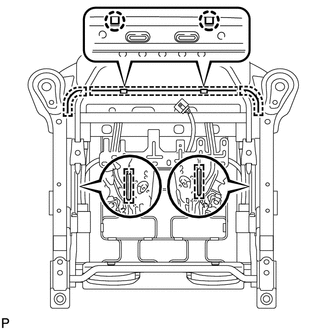
Engage the hooks to install the seat cushion cover with pad.
Bend the 2 seat frame claws downward.
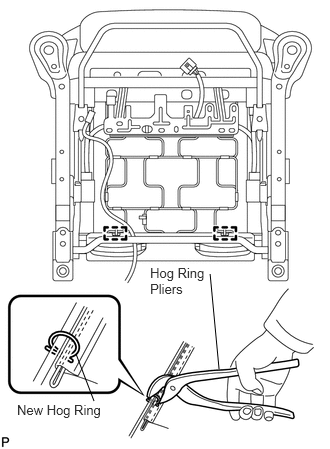
Using hog ring pliers, install the seat cushion cover to the seat cushion spring with 2 new hog rings.
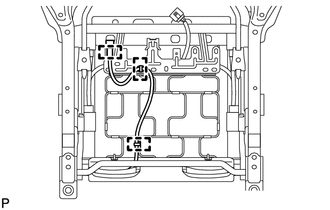
Engage the 3 wire harness clamps.
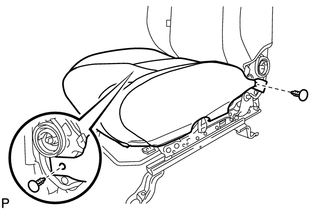
Install the 2 clips.
73240
16.INSTALL FRONT SEAT INNER BELT ASSEMBLY LH
89178A
17.INSTALL SEAT POSITION AIRBAG SENSOR
71862
18.INSTALL FRONT SEAT CUSHION SHIELD INNER LH
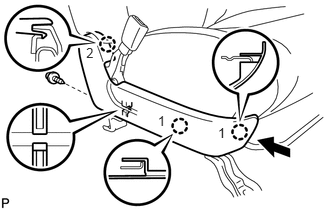
Install the harness to the front seat cushion shield.
Engage the 3 claws in the order shown in the illustration, and install the cushion shield.
Install the screw.
84922A
19.INSTALL FRONT POWER SEAT LUMBAR SWITCH (for Driver Side)
71812D
20.INSTALL FRONT SEAT CUSHION SHIELD LH (for Driver Side)
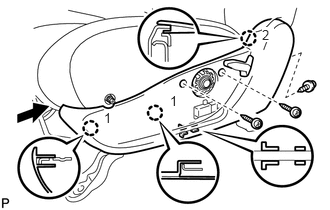
Connect the connector and install the harness to the front seat cushion shield.
Engage the 3 claws in the order shown in the illustration, and install the front seat cushion shield.
Install the 3 screws.
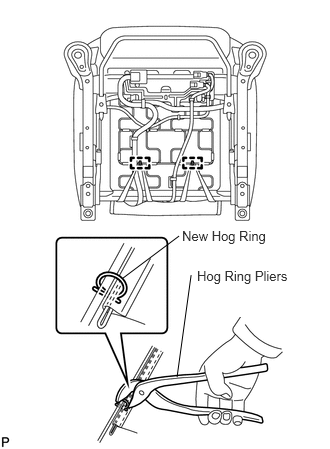
Using hog ring pliers, install the rubber band of the seatback cover to the seat frame with 2 new hog rings.
71811D
21.INSTALL FRONT SEAT CUSHION SHIELD RH (for Front Passenger Side)
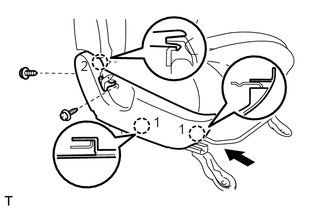
Engage the 3 claws in the order shown in the illustration, and install the cushion shield.
Install the 2 screws.
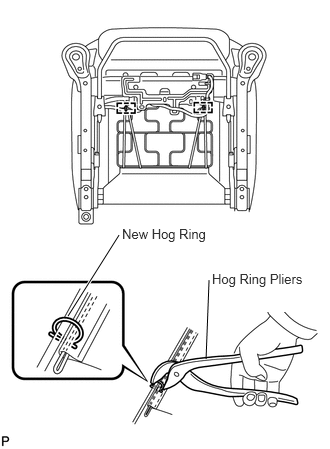
Using hog ring pliers, install the rubber band of the seatback cover to the seat frame with 2 new hog rings.
72526
22.INSTALL RECLINING ADJUSTER RELEASE HANDLE LH
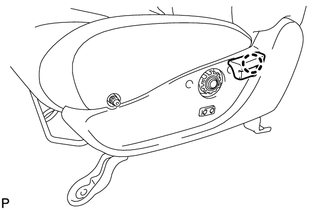
Engage the claw to install the reclining adjuster release handle.
72525A
23.INSTALL RECLINING ADJUSTER RELEASE HANDLE RH (for Front Passenger Side)
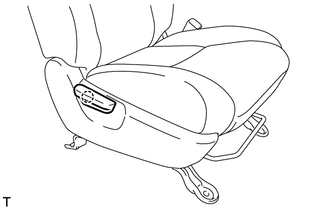
Engage the claw to install the reclining adjuster release handle.
72457
24.INSTALL VERTICAL SEAT ADJUSTER KNOB (for Driver Side)
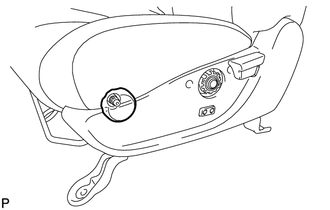
Install the snap ring to the vertical seat adjuster knob.
Install the vertical seat adjuster knob to the front seat.
72495
25.INSTALL VERTICAL ADJUSTING HANDLE LH (for Driver Side)
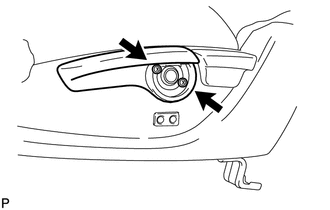
Install the vertical adjusting handle with the 2 screws.
72459A
26.INSTALL VERTICAL SEAT ADJUSTER KNOB CAP (for Driver Side)
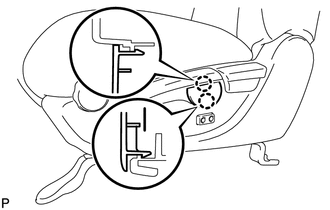
Engage the 2 claws to install the vertical adjuster handle cap.
89952
27.INSTALL OCCUPANT CLASSIFICATION ECU (for Front Passenger Side)